Thread bunching underneath: why top thread nests and how to fix it
Thread bunching underneath happens because the top thread isn't properly held in tension before the needle pulls it through. Rethread with the presser foot up and pull the top thread to check tension, then check needle and bobbin seating to fix it.
On this page (9 sections)
- The short version
- Why a nest forms on the underside when top thread is not in the tension discs
- How to rethread with presser foot up and pull-test that thread is seated
- Bobbin checks: even winding, correct insertion direction and thread in tension spring
- Needle checks: correct size/type, no burr, fully up and facing the right way
- When to reset top tension to normal and why to leave bobbin tension alone first
- Fabric feed and presser foot pressure that lets thread loop and bunch on the bottom
- Thread bunching under fabric when sewing: troubleshooting and fixes
- Still wondering?
Part of our guide on stitches skipping on machine
Key figures
- Top thread tension
- 0-3 lbs pull force
- Needle size
- 80/12 EU/US
- Bobbin winding
- Even, tight
- Presser foot pressure
- Moderate, fabric-dependent
- Thread weight
- 50 wt standard
- Foot position when threading
- Up
- Top tension dial default
- 4-5
The short version
- Thread bunching under fabric nearly always means top thread tension is off before the stitch forms.
- Rethreading with the presser foot up ensures the thread seats in the tension discs correctly.
- Check the needle's size, orientation, and condition to prevent loops forming on the underside.
- Bobbin must be wound evenly, inserted correctly with thread under the tension spring.
- Adjust top tension only after confirming the thread path and parts are correct.
Why a nest forms on the underside when top thread is not in the tension discs
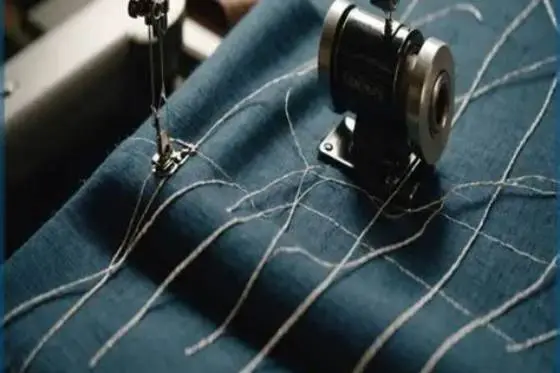
Thread bunching under your fabric happens because the top thread isn’t properly gripped by the tension discs before it reaches the needle. If the presser foot isn’t raised during threading, the discs stay open and the thread floats freely. That loose thread forms loops under the fabric as the needle pulls it down.
The key is the presser foot position. When up, the tension discs clamp the top thread tightly. This regulated tension keeps the thread taut as the needle moves down. Any slack lets the thread form a nest or tangle below. This happens even if the bobbin is perfect.
If you see a nest, check if the top thread passes correctly through the tension discs. Pull the thread gently after threading; it should resist fully with about 1-3 pounds (around 0.5-1.5 kg) of force. No resistance means the tension discs aren’t engaged. This explains why a nest forms below even if your bobbin looks fine.

HOJILA 0-100gw Dial Yarn Tension Gauge
Checks thread tension with a 0-100gw range and 5gw precision, suitable for measuring pull force up to about 0.22 pounds.
How to rethread with presser foot up and pull-test that thread is seated
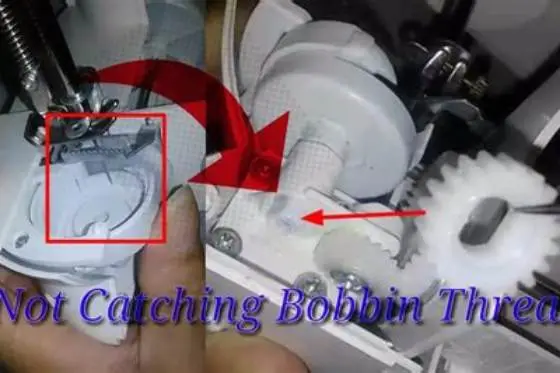
Resetting the top thread path fixes most nests. Stop sewing and lift the presser foot. This opens the tension discs fully. Rethread from the spool through the machine’s thread guides and tension discs while the foot is still up. The other half of this decision is bobbin thread not catching.
After threading, pull the thread gently about 3-4 inches (7-10 cm) above the needle. It should feel taut with slight resistance. This pull-test proves the thread is clamped inside the tension discs. If the thread slips or feels loose, rethread again with care and double-check the spool position and guides.
Lower the presser foot before stitching. This holds thread tension steady during sewing. If you don’t press the foot down, tension varies and loops form below. Testing the pull also helps you catch slip-ups before you sew.
- Stop stitching and raise the presser foot fully.
- Remove thread from needle and tension discs.
- Follow threading path from spool, through upper guides, then between tension discs.
- Thread the needle from front to back.
- Pull 3-4 inches of thread to test tension; it should resist slipping.
- Lower presser foot before sewing.
Bobbin checks: even winding, correct insertion direction and thread in tension spring
Although top thread tension causes most nests, bobbin problems can worsen the issue. The bobbin thread must be wound evenly and not too tight or loose. Uneven bobbin thread creates irregular loops under fabric that tangle with the top thread. The other half of this decision is loops on top of fabric when sewing.
Bobbin insertion direction matters too. The bobbin should spin so the thread unwinds clockwise or counterclockwise according to your machine's manual. Wrong direction makes the bobbin thread pull unevenly, causing loops and bunching.
Ensure the thread is hooked under the bobbin case tension spring snugly. If the thread skips this spring or slips out, tension drops and nests appear. Clean any lint buildup from bobbin and case; lint disturbs tension and can mimic bunching caused by thread errors.
- Winding: smooth, even layers, no loose loops
- Insertion: follow machine manual direction
- Thread path: thread passes under tension spring
- Cleaning: remove lint regularly from bobbin area
Raise the presser foot to engage tension discs before threading; this simple step stops thread nests forming under the fabric.
Needle checks: correct size/type, no burr, fully up and facing the right way
The needle plays a key role in pulling the top thread down without snagging or looping. A wrong or damaged needle can cause loops under your fabric even if tension is perfect. People in this spot often ask about identifying loop source as well.
Use the correct needle size and type for your fabric and thread. For general woven cotton or quilting cotton, a size 80/12 universal needle works well. Heavier fabrics or thicker threads need a larger needle.
Inspect the needle tip and shaft for burrs or bends. A nicked or bent needle catches thread, creating loose loops below. Replace the needle if you see damage or after 8 hours of sewing.
Insert the needle fully up and with the flat side facing the correct direction: usually the back. Incorrect needle orientation disrupts thread movement and causes nests. Confirm the needle is pushed all the way up before tightening the clamp screw.
When to reset top tension to normal and why to leave bobbin tension alone first
Adjusting top thread tension is tempting to fix nests, but it’s best avoided until you confirm thread paths and parts are correct. Most nests clear after proper rethreading and needle checks. The top tension dial’s default is usually 4 or 5 on a scale to 9.
Increase or decrease top tension only if nests persist after you’ve rethreaded with the foot up, checked bobbin insertion, and replaced the needle. Lowering top tension usually makes nests worse by loosening the top thread.
Bobbin tension adjustment is rarely needed for home sewing machines. The bobbin tension spring is factory-set for standard bobbins and thread weights. Adjusting it can cause new problems unless you have specialized equipment or experience.
Resetting tension without these checks wastes time and may confuse what causes the bunching. Follow the ordered troubleshooting steps first.
Fabric feed and presser foot pressure that lets thread loop and bunch on the bottom
If fabric doesn’t feed evenly or the presser foot pressure is too light, loops form under the fabric. The feed dogs push fabric forward under the needle. If they slip or the foot pressure is too low, fabric moves unevenly, creating slack top thread loops below.
Adjust presser foot pressure according to your fabric weight. Lightweight fabrics like silk or chiffon need less pressure. Heavier fabrics like denim require firmer pressure to hold fabric steady.
Check feed dogs for lint or damage. Clean and raise feed dogs fully for proper grip. Walking feet or specialty presser feet can help with slippery or thick fabrics.
Improper fabric feed creates irregular stitch lengths and loose loops under fabric, easily mistaken for tension problems.
- Light fabrics: reduce foot pressure to prevent puckering
- Heavy fabrics: increase foot pressure for steady feed
- Clean feed dogs regularly to maintain grip
- Use specialty feet for slippery or multiple layers
Thread bunching under fabric when sewing: troubleshooting and fixes
Thread bunching under fabric almost always starts with loose top thread tension. Follow these steps to fix it and avoid confusion about what part fails.
1. Raise the presser foot and completely rethread the top thread, pulling it to confirm tension engagement.
2. Remove and check the bobbin for even winding, correct insertion, and thread path under the tension spring.
3. Replace the needle with one matching fabric and thread, check orientation, and inspect for burrs.
4. Lower the presser foot, pull gently on the top thread, and sew a test line.
5. Adjust top tension dial only if nests remain, usually by small increments.
6. Check your fabric feed and adjust presser foot pressure to suit the fabric weight and texture.
Following this routine resets the machine’s stitching balance and usually cures nesting without costly service calls.
- Raise presser foot and rethread top thread fully
- Pull top thread to confirm tension disc grip
- Check bobbin winding and insertion
- Replace needle if needed, check orientation
- Lower presser foot, sew test sample
- Adjust top tension dial carefully if needed
- Adjust presser foot pressure and check feed dogs
Still wondering?
Why does thread bunch under fabric if the top thread looks correctly threaded?
Even if the top thread looks correct, if the presser foot is down while threading, the tension discs stay open and thread slips, forming nests. Always thread with the presser foot up for tension to engage.
How tight should the top thread tension be when pulled by hand?
The top thread should resist with about 1-3 pounds (0.5-1.5 kg) of pull. Too loose means it’s not clamped; too tight can break thread.
Can bobbin tension cause thread bunching under fabric?
Bobbin tension problems are less common. Usually, bobbin thread sloppy winding or wrong insertion direction worsen bunching, but the root cause is top thread tension.
Is it okay to adjust bobbin tension myself to fix nesting?
Adjust bobbin tension only if you’re experienced and have the right tools. Most home sewists should avoid this to prevent making problems worse.
What needle size works best to avoid thread nesting on quilting cotton?
A size 80/12 universal needle is the standard choice. Replace needles often and check for burrs to keep stitching smooth.
How do I know if presser foot pressure is right for my fabric?
If fabric slips or bunches, increase foot pressure; if it puckers or stretches, reduce it. Testing on scrap fabric helps dial it in.