Loops on top or bottom? Which tension dial to turn and how far
If loops appear on top, the top tension is too loose; tighten it in small steps. Loops under the fabric mean the bobbin tension is too loose. Always rethread the machine with the presser foot up before adjusting tension.
On this page (8 sections)
- The short version
- How to read the stitch to tell if top tension or bobbin tension is off
- Why to rethread with presser foot up and check needle size/condition before touching tension
- How to adjust top tension in small steps and test on scrap of the same fabric
- When to leave bobbin tension alone and when a small bobbin adjustment is actually needed
- How thread weight, needle size and fabric thickness mimic tension problems
- What a balanced stitch should look like on both sides with photos to compare
- Still wondering?
Part of our guide on stitches skipping on machine
Key figures
- Top tension dial
- Usually 4-6
- Needle size
- 80/12 typical
- Thread weight
- 50 wt common
- Test swatch size
- 4x4 inches (10x10 cm)
- Bobbin tension
- Usually less adjusted
The short version
- Loops on top mean loosen top tension or tighten it if too loose.
- Loops on bottom often show bobbin tension issues; adjust only if necessary.
- Always rethread with the presser foot raised before tension changes.
- Use a test swatch of the same fabric for every tension adjustment.
- Thread weight, needle size, and fabric thickness affect perceived tension.
How to read the stitch to tell if top tension or bobbin tension is off
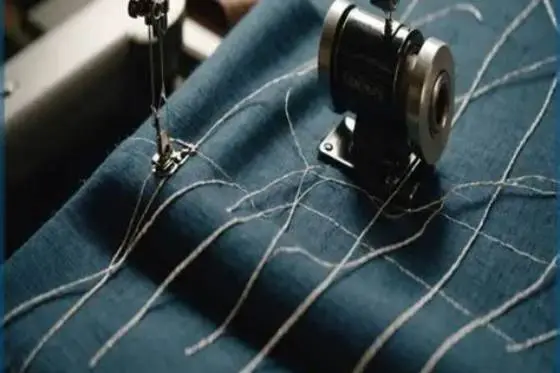
Loops appearing on the top surface of your fabric mean the top tension is too loose. This happens because the upper thread is not tight enough to hold the bobbin thread securely.
If loops show underneath the fabric, or you find thread nests on the bobbin side, the bobbin tension is likely too loose or the bobbin thread is catching.
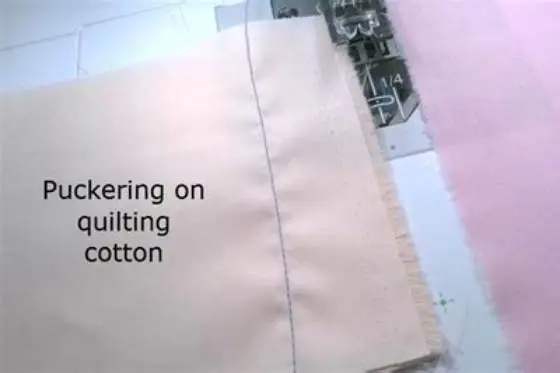
A puckered or gathered fabric edge usually means the top tension is too tight, pulling the fabric excessively.
Look closely at both sides of a test stitch to identify which thread pulls too hard or is too slack. Before you commit to anything, it is worth looking at top fabric loops sewing.
Sometimes loops can appear intermittently, which means the tension issue changes with sewing speed or fabric movement. This shows the thread is not feeding smoothly or the presser foot pressure is uneven.
Check if the thread spool is free to rotate and that the thread guides are clean. Sticky thread can cause sudden slack, leading to loops on either side.
If loops occur only when sewing over seams or thicker areas, the thread tension might be correct but the needle is struggling to form stitches properly. Inspect the needle and consider a heavier one for thick fabric. We cover checking needle and bobbin seating in its own article.
| Symptom | Likely Cause | Thread at Fault | Adjustment Needed |
|---|---|---|---|
| Loops on top | Top tension too loose | Top thread | Tighten top tension |
| Loops on bottom | Bobbin tension too loose | Bobbin thread | Tighten bobbin tension |
| Thread nests under fabric | Bobbin thread catching or loose | Bobbin thread | Check bobbin and tension |
| Puckering or gathers | Top tension too tight | Top thread | Loosen top tension |
Why to rethread with presser foot up and check needle size/condition before touching tension
Always rethread the entire machine, including both the top thread path and bobbin, with the presser foot raised. This opens the tension discs and lets the thread seat properly.
A dull or bent needle or wrong needle size can mimic tension problems by causing skipped stitches or thread breaks.
Use the needle size recommended for your fabric type: usually an EU 80/12 for light to medium weight woven fabrics. For the detail, see our notes on correcting puckered seams.
Inspect the needle for burrs or bluntness and replace it if you see any damage before fiddling with tension.
The presser foot must stay up during rethreading so the tension discs can separate fully. If you thread with it down, the thread might not seat correctly, causing loose tension even if the dial is set right.
Always run a few test stitches after rethreading to check that the machine feeds thread evenly. If stitches skip or thread jams, recheck the threading path including the bobbin case.
Needle condition is often overlooked. A damaged needle bends thread or fails to catch loops inside the fabric, which looks like tension errors. Change needles after 8-10 hours of sewing or sooner if you see stitch problems.
- Presser foot up– opens tension discs
- Full rethreading– clears thread snags
- Needle check– size and condition matter
- Correct needle size– fits fabric thickness

Superior Threads L-Style Towa Bobbin Tension Gauge
Helps measure bobbin tension accurately for L-style bobbins but does not specify precision to 0.1 unit tension measurement.
How to adjust top tension in small steps and test on scrap of the same fabric
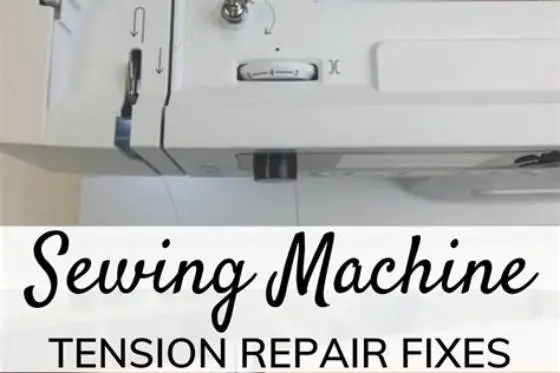
Adjust the top tension dial in increments of 1/4 to 1/2 turns to avoid overcorrecting. Small steps let you find the perfect balance between top and bobbin threads.
Test each adjustment on a scrap piece of your project fabric to see the real effect on stitch appearance and fabric behavior.
Observe the stitch from both sides and check for loops, puckers, or thread nests before deciding to adjust again.
Stop adjusting once you see a balanced stitch where the top and bobbin threads lock evenly in the fabric.
Adjusting top tension too far can cause thread breakage or fabric puckers. If you turn the dial more than 1 full number, back off and test again on scrap.
For example, if you start at tension 4, try 4.5, sew 10 stitches, then 5. If loops disappear at 4.5 but puckers start at 5, 4.5 is your best setting.
Check the stitch length and sewing speed too. A very short stitch or fast sewing can tighten stitches and mimic a high tension problem even if the dial is correct.
- Raise the presser foot and rethread the machine fully.
- Set top tension dial to a mid-range number (often 4-6).
- Sew a test swatch on scrap fabric matching your project.
- Look at both sides for balanced stitches.
- Adjust top tension by 1/4 or 1/2 turns as needed.
- Repeat testing until stitches are even and smooth.
Match visible stitch loops and puckers to top or bobbin tension faults with precise dial adjustments.
When to leave bobbin tension alone and when a small bobbin adjustment is actually needed
Most modern sewing machines have a fixed bobbin tension set at the factory and do not require adjustment.
Only adjust bobbin tension if you have confirmed the top tension is correct and loops or nests still appear under the fabric.
A bobbin tension screw is usually very small and should be turned in tiny increments, often less than 1/8 turn, to avoid ruining the balance.
If unsure, it’s safer to leave bobbin tension alone and recheck threading or needle size before trying to adjust it.
Before adjusting bobbin tension, clean the bobbin case thoroughly. Lint build-up can interfere with smooth thread flow and mimic tension problems.
To test bobbin tension, pull the bobbin thread with a gentle tug. It should unwind with slight resistance but not slip freely.
If the bobbin screw turns easily and tension changes wildly, the screw may be stripped or damaged. In that case, avoid forcing it and see a technician.
How thread weight, needle size and fabric thickness mimic tension problems
Using a thread that's too heavy or too light for the needle and fabric can create tension-like issues: loops, puckers, or skipped stitches.
A thick thread with a small needle causes poor stitch formation and thread breaks, resembling tight top tension symptoms.
Thin thread through a large needle may form loose loops, similar to loose tension problems.
Match your thread weight (for example, 50 wt) to the needle size (like 80/12) and fabric thickness to maintain balanced tension.
| Thread Weight | Needle Size | Fabric Thickness | Effect on Stitch |
|---|---|---|---|
| Heavy (30-40 wt) | 90/14 or larger | Thick woven or denim | Tight tension, potential puckers |
| Medium (50 wt) | 80/12 | Light to medium woven | Balanced stitch, good feed |
| Light (60+ wt) | 70/10 or smaller | Lightweight or sheer fabric | Loose stitches, skipped stitches |
What a balanced stitch should look like on both sides with photos to compare
A balanced stitch shows the top and bottom threads locked evenly inside the fabric layers without any loops or puckering.
On the top side, you should see smooth, straight stitches with no thread pulling to one side or loops.
The underside should mirror the top stitches closely, without thread nests or loose loops.
If you compare photos of problem stitches to balanced ones, you can quickly decide which tension dial needs adjustment.
| Top Side | Bottom Side | Meaning |
|---|---|---|
| Straight, even stitches | Even thread locks | Balanced tension |
| Loops visible | Tight thread pulling | Top or bobbin tension off |
| Puckered fabric | Tight thread | Top tension too tight |
| Thread nests or tangles | Loose thread | Bobbin tension loose |
Still wondering?
Why does my machine keep forming thread nests under the fabric?
Thread nests usually mean the bobbin thread is too loose or the bobbin is misthreaded. Rethread the bobbin carefully, check the bobbin case for lint, and if needed, adjust bobbin tension slightly.
Can a damaged needle cause tension problems?
Yes. A bent or dull needle can skip stitches or break thread, mimicking tension issues. Replace needles regularly, especially if you notice irregular stitches.
How tight should the bobbin tension screw be?
Bobbin tension should allow the bobbin thread to pull out smoothly but with slight resistance. If it pulls out too easily or with much force, it needs adjustment in tiny turns.
Is it normal to adjust tension for different fabrics?
Yes. Heavier or thicker fabrics usually require higher tension, while lightweight fabrics need lower tension. Always test on a scrap piece.
Why does my thread break even after adjusting tension?
Thread breaks can result from tension too tight, a damaged needle, poor-quality thread, or incorrect threading. Inspect all these before adjusting tension further.