Thread loops on top of fabric: which tension to fix first
Thread loops on top of fabric usually mean the top thread isn't seated correctly in the tension discs. Check and rethread the top thread first with the presser foot up. If loops remain, then check bobbin tension and bobbin case.
On this page (8 sections)
- The short version
- Why loops on top usually point to top thread not seated in tension discs vs bobbin issues
- How to rethread the top with presser foot up and check tension discs and take-up lever
- How to remove, clean, and reseat the bobbin and check bobbin case tension
- Needle size, thread weight and fabric mismatch that mimics tension looping and how to rule it out
- Loops on top of fabric when sewing: step-by-step fixes to try before calling the shop
- Loops on top of fabric when sewing: which tension to fix first
- Still wondering?
Part of our guide on sewing machine skipping stitches
Key figures
- Top thread loops
- usually top tension
- Presser foot position
- up for rethreading
- Needle size example
- 80/12 EU/US
- Thread weight example
- 50 wt
- Bobbin tension range
- 0.2-0.3 N
- Common fix order
- top then bobbin
- Machine check tool
- bobbin case gauge
The short version
- Top thread loops almost always signal top tension issues, not bobbin problems.
- Raise the presser foot when rethreading the top thread to seat tension discs.
- Clean lint and check the bobbin case tension after confirming top tension is correct.
- Needle size or thread weight mismatches can mimic loops but are a less common cause.
- A bobbin case tension gauge can help confirm bobbin tension is within specs.
Why loops on top usually point to top thread not seated in tension discs vs bobbin issues
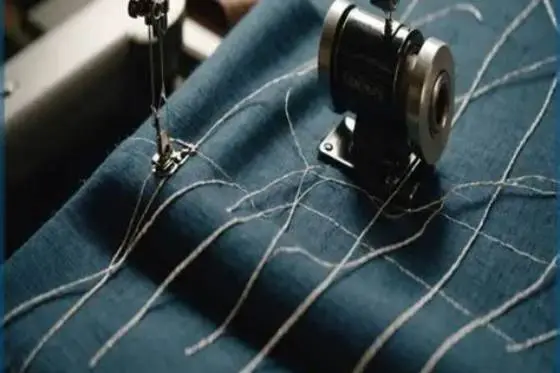
Loops of thread on top of fabric under the needle usually indicate the top thread tension is too loose or the thread isn't properly gripped by the tension discs. The tension discs are part of your sewing machine that pinch the top thread to control its tightness during stitching.
If the top thread doesn't seat properly in these discs, it slips and forms loops on the fabric surface. This is a far more common cause than bobbin tension problems, which usually result in loops or thread nests beneath the fabric.
Checking the bobbin first can waste time. Instead, rethread the top thread with the presser foot raised to allow proper seating in the tension discs. If this doesn't fix the loops, then move on to the bobbin tension and case.
How to rethread the top with presser foot up and check tension discs and take-up lever
Raise the presser foot before rethreading the top thread. This opens the tension discs, letting the thread seat properly between them. Without this, the tension discs stay closed and fail to grip the thread. It helps to understand thread bunching under fabric when sewing before going further.
Follow the machine’s threading path exactly, ensuring the thread passes through all guides and tension discs. Watch the thread enter and leave the discs; it should slip slightly when pulled gently, showing proper seating.
Check the take-up lever: the part that moves the thread up and down as you sew. The thread must loop through it correctly to maintain tension throughout each stitch.
After rethreading, sew a test line on scrap fabric. If loops disappear, the problem was top thread tension or threading. If loops persist, the bobbin or other issues might be the cause. We cover sewing machine tension problems in its own article.
- Lift the presser foot lever to raise the presser foot.
- Remove the top thread entirely from the machine.
- Follow your machine’s threading diagram, passing the thread through tension discs, take-up lever, and guides.
- Pull a few inches of thread through to check it sits between tension discs.
- Lower the presser foot and test sew on scrap fabric.

CKPSMS Brand - TOWA Digital Bobbin Case Tension Gauge Compare to TM-1 L-Style
Measures bobbin case thread tension with a compact unit featuring an easy-to-read LED display.
How to remove, clean, and reseat the bobbin and check bobbin case tension
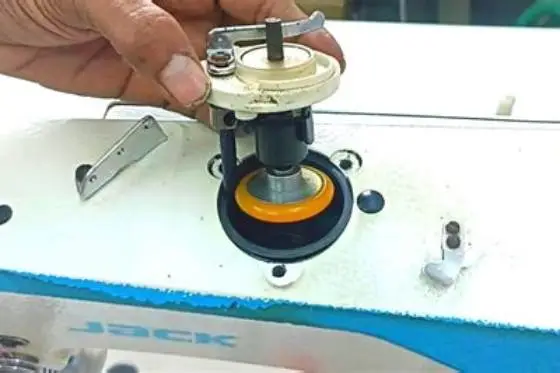
If top thread rethreading doesn’t stop loops, check the bobbin next. Remove the bobbin case from the machine and clean out lint and thread debris, which can loosen tension.
Reseat the bobbin properly, ensuring it spins smoothly and the thread feeds evenly. Poor bobbin insertion causes irregular tension and thread loops.
Use a bobbin tension gauge to measure the bobbin case tension. Typical acceptable tension is around 0.2-0.3 newtons (N), but this varies by machine. The gauge gives a precise reading to know if your bobbin tension is too loose or tight. People in this spot often ask about testing bobbin winder engagement as well.
Adjust bobbin tension screws slightly if you can, following your machine manual. Small turns make a big difference and can stop loops caused by bobbin tension issues.
- Remove bobbin case from the machine.
- Take out the bobbin and clean all lint and dust.
- Check bobbin for damage or uneven winding; replace if needed.
- Reseat the bobbin firmly in the case.
- Use a bobbin tension gauge to check tension.
- Adjust bobbin case tension screw if outside normal range.
Most top thread loops are caused by the top thread not seated correctly in the tension discs, not bobbin tension problems.
Needle size, thread weight and fabric mismatch that mimics tension looping and how to rule it out
Thread loops on fabric might look like tension problems but arise from mismatched needle size, thread weight, or fabric type. For example, a needle too small for heavy fabric can fail to penetrate cleanly, causing loops.
Use a needle suited to your fabric’s weight and type. Common home sewing needle sizes include 80/12 for medium-weight woven cotton and 90/14 for thicker fabrics. Match thread weight similarly; 50 wt cotton thread fits most quilting cotton.
Test with a new needle and thread combination to see if loops persist. If loops vanish after changing needle or thread, the previous mismatch was the cause, not tension adjustments.
Proper tension still matters, but ruling out needle and thread mismatches avoids unnecessary machine tweaks and parts replacements.
- Needle size: 80/12 EU/US for medium cotton, larger for heavier fabrics.
- Thread weight: 50 wt typical for quilting cotton; heavier thread needs larger needle.
- Fabric: heavyweight canvas or denim needs special needles and threads.
- Test by swapping needle and thread before adjusting tensions.
Loops on top of fabric when sewing: step-by-step fixes to try before calling the shop
Start by raising the presser foot and rethreading the top thread carefully with the machine’s threading path. This step alone fixes most top thread loops by seating the thread into the tension discs.
If loops continue, remove and clean the bobbin and case. Reseat the bobbin smoothly and check bobbin tension with a gauge if you have one. Small adjustments here can improve stitch formation.
Next, swap your needle for a new one with the right size for your fabric and thread. Always test on scrap fabric after each fix to identify which solved the issue.
If these steps fail, your machine may need professional servicing. But most loop problems resolve with careful rethreading, cleaning, and tuning tension.
- Retreat the top thread with presser foot up.
- Sew a test stitch on scrap fabric.
- Clean and reseat bobbin; check bobbin tension.
- Replace needle with correct size and type.
- Test sew again; if problem persists, consider service.
Loops on top of fabric when sewing: which tension to fix first
Loops on top almost always mean the top thread tension needs fixing first. This is because the top tension discs control thread tightness before the needle pierces fabric.
The correct order is: rethread top thread with presser foot raised; if loops persist, clean and check bobbin tension next. Bobbin tension is usually less likely to cause top loops but should be verified.
Following this order avoids wasting time adjusting the bobbin when the top tension is the actual cause. It also prevents damaging thread or fabric by incorrect tension adjustments.
If you measure tensions, note typical top tension settings vary widely between machines but the top thread should feel moderately tight when pulled after threading. Bobbin tension is lighter and measured with a gauge.
| Aspect | Top Thread Tension | Bobbin Tension |
|---|---|---|
| Effect of low tension | Loops on top of fabric | Loops under fabric or bobbin thread nests |
| Adjustment method | Rethread with presser foot up, check tension dial | Clean bobbin case, adjust tension screw |
| Typical cause | Thread not seated properly in discs | Lint or improper bobbin seating |
| Measurement | Feel thread slip slightly when pulled | Use bobbin tension gauge, 0.2-0.3 N |
| Fix order | First to check and fix | Second after top thread |
Still wondering?
Why do thread loops on top usually mean the top thread tension is wrong?
The top thread passes through tension discs that control its tightness. If this thread isn’t seated properly, it slips and forms loops. Bobbin tension usually causes loops under the fabric, not on top.
How do I know if the top thread is seated correctly in the tension discs?
Raise the presser foot to open the tension discs, then rethread the top thread following your machine’s path. The thread should slip slightly if pulled, showing it is held properly.
How can I check bobbin tension accurately?
Use a bobbin tension gauge, which measures force in newtons. Typical bobbin tension is about 0.2-0.3 N. Adjust the tension screw on the bobbin case if needed.
Can changing needle or thread fix thread loops?
Yes, mismatched needle size or thread weight can mimic tension problems and cause loops. Always try a fresh needle and appropriate thread for your fabric before adjusting tensions.
When should I call a sewing machine service technician for loops?
If rethreading, cleaning the bobbin area, and changing needles don’t fix loops, a professional service might be needed. The machine may have damaged tension discs or other mechanical issues.