Sewing machine safety: what to check before you press the pedal
Check your sewing machine’s power, needle, presser foot, hand position, and pedal control before sewing. Follow hand-tool and pressing safety too. These checks keep fingers safe, prevent machine jams, and avoid electrical hazards.
On this page (7 sections)
- The short version
- Machine rules: what to check before, during and after sewing
- Hand tools: how to handle scissors, rotary cutters, pins and needles without cuts or eye injuries
- Pressing and electrics: how to set heat and handle cords safely
- Setup: classroom vs home supervision, layout and printable checklist
- When things go wrong: broken needle, jam, thread nest and finger pricks
- Still wondering?
Part of our guide on best online sewing classes for beginners
Key figures
- Needle size
- per machine manual and needle package for fabric and thread
- Presser foot pressure
- adjustable, check manual
- Power off
- always before threading or changing needle
- Pedal control
- foot ready but relaxed, steady pressure
- Iron temperature
- per fabric care label and iron dial, test on scrap
- Workspace lighting
- bright, shadow-free
- Machine lint clean
- weekly or after heavy use, per manual
The short version
- Always unplug your machine before threading or changing needles.
- Choose needle size per your manual and needle package for your fabric and thread.
- Keep fingers well clear of the needle path and presser foot while sewing.
- Handle sharp tools like scissors and rotary cutters with care and lock blades closed.
- Keep your workspace clear, bright, and tidy to reduce strain and trip risks.
Machine rules: what to check before, during and after sewing
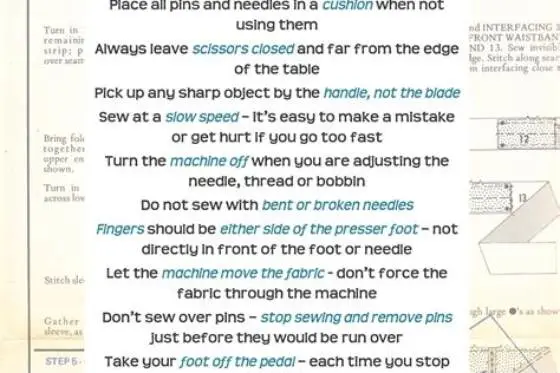
Unplug your machine before you thread, change a needle, or clear lint. This stops a surprise start while your fingers are close to moving parts. Make it a habit every time.
Choose needle size according to your machine manual and the needle package guidance for your fabric and thread weight. Use a larger needle for heavier fabrics. A needle that is too small can bend or snap and strain the machine.
Keep fingers well clear of the needle path and presser foot; keep hands flat and guide fabric from the sides, never directly in front of the needle. You keep control and keep fingertips out of the danger zone.
Raise the presser foot when you thread or position fabric. This opens the tension discs so thread seats correctly. Lower the foot before you sew so the feed dogs grip and move fabric smoothly. If that sounds like your situation, read up on quick sewing crafts for kids next.
Press the pedal with a relaxed foot and steady pressure. Quick jabs can snap a needle or bunch thread under the plate. When you finish, switch off, unplug, and brush lint from the bobbin area per your manual.
- Unplug before threading, swapping needles, or cleaning lint
- Raise foot to thread, lower foot to sew
- Guide fabric from the sides with hands flat and clear of needle
- Use steady pedal pressure and stop if you hear popping or tugging
- Power off, unplug, and clear lint after each session
Hand tools: how to handle scissors, rotary cutters, pins and needles without cuts or eye injuries
Treat every sharp tool as if it can bite. Cut away from your body and keep your free hand behind the blade. Light, even pressure gives a clean cut and more control.
Close scissors after each cut and store them closed and out of reach of children. Use a cutting mat under a rotary cutter to protect the table and keep the edge true. Lock the rotary blade closed after every cut, even for a brief pause. For the detail, see our notes on cleaning a sewing machine.
Replace rotary blades when they tug, skip, or require extra pressure. Check the blade manufacturer's guidance and test on scrap. Dull blades increase slip risk.
Keep pins in a magnetic or cushioned holder, never loose on the table. Pins can bounce and hide in carpet or on hard floors. Sweep the area thoroughly with a magnet. Put bent or burred pins in a sealed container, not an open bin.
Protect your eyes when you snip threads or sew with a stressed needle. Clippings and a broken tip can flick upward, so keep your face back and consider safety glasses for heavy trimming. Never hold pins or needles in your mouth, and use a thimble for hand sewing. It helps to understand how to hem pants with a sewing machine before going further.
- Cut away from you and keep the free hand clear of the blade path
- Lock rotary blade closed when not cutting
- Store scissors closed and high or locked away
- Keep pins in a holder and sweep floors with a magnet after work
- Use a thimble for hand sewing and keep pins out of your mouth
- Keep face back when clipping threads; use glasses if you trim a lot
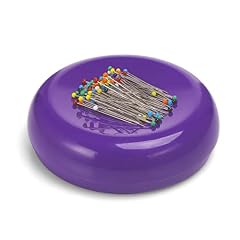
Hilltian Magnetic Pin Cushion with 100 Pins
Keeps stray pins from pricking you by locking them down with a strong magnet that holds even when the cushion is turned and shaken.
Pressing and electrics: how to set heat and handle cords safely
Set iron heat per your iron's dial and the fabric care label; test on an inside corner or scrap first. Use lower heat for synthetics to avoid shine or melting. If the label says low, start low.
Rest the hot iron upright on its stand, never flat on fabric or the board edge. Keep the cord behind the iron so you do not drag it over hot metal. Return the iron to the stand between presses.
If buying an iron, consider one with auto shut-off, and still switch off and unplug at the wall when you step away. Grip the plug to unplug, not the cord.
Check cords for your iron and machine before each use. Look for frays, cracks, soft spots, or exposed wire and stop using a damaged cord. Coil cords loosely after they cool and keep them out from under chair legs and furniture.
Sew with bright, shadow-free light so you see the needle and markings clearly. Sit with feet flat, back supported, and the machine at elbow height to reduce strain. Good light and posture help you avoid slips.
- Match iron dial to fabric label and test on scrap
- Park iron upright on its stand between presses
- Grip plug to unplug and coil loosely after cooling
- Inspect cords for frays or warm spots before use
- Keep cords off walkways and out from under furniture
- Use bright light and a supportive chair at elbow height
A step-by-step safety check before, during, and after sewing protects your fingers, tools, and workspace every time.
Setup: classroom vs home supervision, layout and printable checklist
Classrooms need active supervision, especially for beginners and children. An adult should demo each step and stay within arm's reach during first tries. At home, an experienced adult should set clear rules and check the setup.
Arrange stations with enough clear space to move safely and manage cords and fabric without crowding. Follow your school or workspace safety guidance. Keep walkways clear and tools off the main work surface until needed.
Store sharp tools in a central, closed container in classrooms and lock them or place them high at home. Keep a small magnet, lint brush, and sealed sharps container at each station. Label spots so users return tools after use.
Post a short checklist where everyone can see it and run through it at the start and end of each session. Tick each item before you sew and again when you pack up. That habit catches loose pins and hot irons.
- Power: unplugged for setup, cords checked for damage
- Needle and foot: needle per manual for fabric and thread, foot lowered to sew
- Hands: fingers clear of needle path, guide from sides
- Tools: scissors closed and stored, rotary blade locked, pins in holder
- Pressing: iron on stand, heat per label, test on scrap
- Space: clear surface, bright light, cords off floor
- Pack-up: unplug, store sharps sealed, sweep with magnet, clear lint
| Aspect | Classroom Setup | Home Setup |
|---|---|---|
| Supervision | Constant adult supervision, demo each step | Adult sets rules and checks setup |
| Space | Enough clear space to move safely, follow school guidance | Enough clear space to move safely, adapt to room |
| Tools storage | Central closed storage, supervised use | Locked or high storage, sealed sharps container |
| Safety checklist | Printed, posted, used every session | Printed, posted, use each time you sew |
When things go wrong: broken needle, jam, thread nest and finger pricks
If a needle breaks, stop immediately, unplug the machine, and carefully check the bobbin area and surrounding surface for fragments before continuing. Lift the presser foot and ease fabric free without yanking.
Watch for warning signs like popping, tugging, or skipped stitches before a break. If the needle looks bent, dull, or burred under light, swap it for a new one that matches your fabric and thread per the manual.
For a jam or thread nest, stop, cut the top thread, raise the foot, and wiggle fabric gently side to side while turning the handwheel toward you. Use tweezers to lift tangles and a brush for lint. Never force fabric through, you can bend the needle and score the plate.
If pricked, stop sewing, clean the wound and apply pressure with clean gauze. Seek medical care if bleeding does not stop, the wound is deep, or material remains in skin. This information is general and not medical advice. Call a health professional or urgent care for any concerning injury. That's the safe move.
- Stop sewing and unplug the machine
- Raise presser foot, cut top thread, ease fabric free gently
- Use tweezers and a brush to clear thread nests and lint
- Inspect needle for bends or burrs and replace per manual
- Clean and cover any prick with gauze and seek care if needed
- Ask a technician to service a machine that jams often
Still wondering?
How can I tell if my sewing needle is the right size?
Check your machine manual and the needle package for your fabric and thread weight. Use a larger needle for heavier fabrics. If stitches skip or the needle bends, try the next size up per the guide.
What should I do if my sewing machine pedal feels too sensitive?
Place the pedal on a flat, non-slip surface and practice steady, light pressure. Keep your heel down and press with the ball of your foot. If it still races, ask a technician to check it.
Is it safe to leave my iron plugged in between pressing sessions?
No. Put the iron on its stand and switch off and unplug at the wall when you step away, even if it has auto shut-off.
How often should I clean lint from my sewing machine?
Brush lint from the bobbin area after each heavy session and weekly with regular use. Follow your manual for how to remove the plate and what to oil.
What is the best way to store pins and needles safely?
Keep them in a magnetic or cushioned holder. Sweep the floor with a magnet after sewing and put bent pins in a sealed container so no one gets pricked.