What kids can hand-sew in an hour with felt and no machine
Easy sewing projects for kids start with palm-sized felt shapes like a bookmark or finger puppet. An 8-year-old with scissor control can finish in 20-30 minutes. Younger beginners often need twice that and a helping hand. You need only soft felt, 6-strand floss, a blunt needle, and blunt-tip scissors.
On this page (9 sections)
- The short version
- Materials: why felt works for hand sewing and when you need a machine
- Ages and skills: how scissor control and hand size change the plan
- Time and supplies: easy sewing projects for kids
- Stitches: how to start, space, and tie off so it holds
- Patterns: where to find free ones and how to size them for small hands
- Troubleshooting: tangles, safety, and uneven stitches
- Practice plan: how to build stamina without frustration
- Still wondering?
Part of our guide on threading and winding for beginners
Key figures
- Project time
- Depends on age, skill, and help
- Best age to start
- 5 years+ with adult nearby
- Material
- Soft craft felt, 9x12 inch sheets
- Needle type
- Blunt tapestry, large eye, kids/blunt tip
- Thread
- 6-strand floss or perle 3-5
- First stitch
- Running stitch
- Scissors
- Blunt-tip kids scissors
The short version
- Palm-sized felt shapes fit beginners best and stitch up fastest
- Use 6-strand floss or perle cotton with blunt tapestry needles sold as kids or blunt tip
- Start with running stitch, then add whip or blanket stitch as control improves
- Time and thread use depend on age, scissor skill, stitch spacing, and adult help
- Free printable patterns from named sites let you test size on paper first
Materials: why felt works for hand sewing and when you need a machine
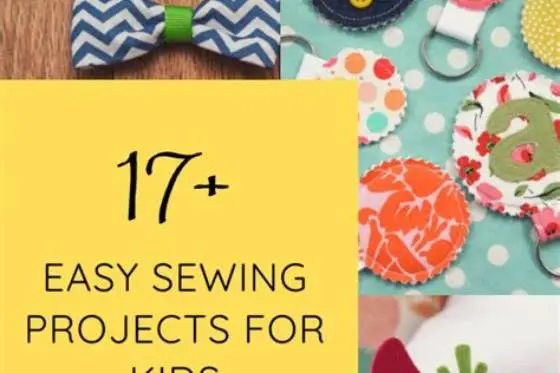
Felt lets kids sew without a machine because it stays stable while you stitch. You can cut a simple shape and sew it right away. That saves time and keeps frustration low.
Use standard soft craft felt sold as 9x12 inch sheets; avoid stiff or dense industrial felt which is harder to pierce. If you have calipers, most craft felt is ~1mm. Test your needle on a scrap first.
Save woven cotton, zippers, and quilting for later. Those fabrics fray and need precise seams. They suit a machine and much closer adult help, so they wait until hand control is solid.
| Aspect | Hand-sewn felt | Machine-sewn fabric |
|---|---|---|
| Fabric behavior | Stable, no hemming needed | Frays, needs finished edges |
| Typical time | Varies; see age notes below | Longer, needs setup and practice |
| Core skills | Cut, thread, knot, even spacing | Machine control, pinning, tension |
| Basic kit | Felt, floss, blunt tapestry needle, blunt-tip scissors | Machine, pins, sharp needles, woven fabric |
Ages and skills: how scissor control and hand size change the plan
Ages 5 to 7 can succeed when pieces are palm-sized and pre-checked. Keep first patterns palm-sized so kids can hold and turn them easily; print a test on paper and check against the child's hand before cutting felt. You will still stay close for threading and knots. We go through pricing simple sewn goods correctly step by step elsewhere on the site.
Ages 8 to 10 cut more accurately and keep stitch spacing steadier. They follow a simple outline and sew longer lines with fewer stops. Short sessions still work best.
Over 10, kids handle layered felt and try simple appliqué. Machine sewing can start with direct supervision. Progress depends on practice, not birthday alone.
Match the job to the child in front of you. Scissor skill, patience, and hand size matter more than age. If cutting is hard, you cut and they sew. If that sounds like your situation, read up on sewing safety rules next.
Time and supplies: easy sewing projects for kids
Easy sewing projects for kids work best when you keep them palm-sized and simple. A bookmark or finger puppet gives a quick win and fits small hands. An 8-year-old who can cut on the line and sew running stitch often finishes in 20-30 minutes. First-timers and younger kids often need 40-60 minutes and help with threading and knots. Plan extra time for cutting, threading, and tying off, not just stitching.
Palm-sized felt shapes fit beginners best and stitch up fastest. 6-strand floss or perle cotton glides through soft felt and resists tangles. One 8-meter skein is enough for one small project when you split it. Cut working lengths to 18 inches (45 cm) and you will tangle less and waste less. Short lengths beat long ones for control. Stitch size and spacing change how much thread you actually use.
A single 9x12 inch (23x30 cm) soft craft felt sheet covers several bookmarks or one small puppet. Soft craft felt needles easily and holds stitches, while stiff industrial felt fights the needle. A magnet or pincushion gives every needle a safe home between stitches. Keep blunt-tip kids scissors close and points covered. You will spend less time searching and more time sewing. The other half of this decision is comparing modern pattern collections.
| Item | What to get | Notes |
|---|---|---|
| Felt | One 9x12 inch soft craft sheet | Avoid stiff industrial felt |
| Thread | One 8m skein 6-strand floss | Cut 18 inch lengths as you go |
| Needle | Blunt needle with large eye and blunt tip | Test that it passes easily through your felt |
| Scissors + storage | Blunt-tip kids scissors, magnet or pincushion | Keeps points covered and needles found |

LoveInUSA 100PCS Yarn Needles for Kids & Beginners
Protects fingers with a smooth, blunt tip and helps small hands thread floss easily with an extra-large eye.
Identify quick, hand-sewn felt projects kids can finish in under an hour, matched to age and skill, to keep sewing fun and frustration-free.
Stitches: how to start, space, and tie off so it holds
Start with running stitch. You go in and out along the edge and make a dashed line. It teaches spacing and gentle tension.
Mark a guide so spacing stays even. Use a ruler and make light pencil dots 1/4 inch apart along the edge. Kids aim for dot to dot. That beats guessing.
Knots keep thread from pulling through. Wrap the tail around your finger, roll it off, and pull to form a small knot. If it slips through felt, make a second wrap for a larger knot.
To tie off, take a tiny backstitch in place and loop the needle through the stitch to form a knot. Hide the tail between layers and trim close. Pull gently so felt stays flat.
- Thread 18 inches of floss through the large eye and tie a finger knot at the tail.
- Bring the needle from back to front near the edge, so the knot rests on the back.
- Sew dot to dot with running stitch, pulling just until flat.
- To finish, make one tiny backstitch and loop through to knot, then trim.
Patterns: where to find free ones and how to size them for small hands
You want free patterns you can trust and print at home. Try Purl Soho Free Felt Bookmark Pattern, Benzie Design Felt Animal Pattern Library, and The Spruce Crafts Beginner Felt Finger Puppet printable. Each site offers a PDF you can download and print on letter paper.
Keep first patterns palm-sized so kids can hold and turn them easily. Print a test on paper and check it against the child's hand before you cut felt. If the shape covers the palm with a little border, it is about right. That's your size check.
Small shapes that sit in a child's palm handle best and finish in one sitting. 6-strand floss or perle cotton gives smooth pulls and easy knots for small hands. You keep the build quick when the pieces stay compact.
You scale patterns with your printer settings, not by redrawing. Print the PDF at 100% and measure the outline with a ruler. For a smaller fit, reprint at 70% or 60% and re-measure the width. An 8 inch wide puppet at 62% prints about 5 inch wide, so you can plan felt cuts.
You can also scale on 1/4 inch grid paper if you prefer hand drawing. Trace the outline onto the grid, then redraw it at 3 squares to 2 squares to shrink it. That keeps curves smooth while you reduce the overall size. Choose patterns with 2 to 3 pieces and no tiny parts at first, so seams stay simple.
Troubleshooting: tangles, safety, and uneven stitches
Long thread and twisting cause tangles. Cut working lengths about 18 inches. Let the needle hang to unwind the thread. Shorter lengths save time and reduce knots.
Safety starts with the right tools. Use blunt needles with large eyes labeled for kids or blunt tips. Test needles on your felt to be sure they slide through easily. Clover Chibi blunt tapestry needles or DMC blunt tapestry size 22 are good examples to check for blunt tips and large eyes on the package.
Choose blunt-tip kids scissors, not sharp fabric shears. Always store needles on a magnet or pincushion after breaks. Count needles going in and out of use. Keep needles away from the floor.
Supervise kids based on their age and skill. Stay close for children under 7 or when learning new skills. Older kids still need checks for knots and proper storage. Uneven stitches improve by marking dots spaced about 1/4 inch apart and sewing slowly from dot to dot.
- Fix tangles: cut thread to
18 inches, let needle dangle to unwind, pull gently - Fix safety issues: use blunt needles, blunt-tip scissors, store needles on magnet, supervise closely
- Fix spacing: mark dots
1/4 inchapart with pencil, sew from dot to dot - Fix puckering: ease thread tension, avoid pulling tight, re-knot if thread slips
Practice plan: how to build stamina without frustration
Build stamina with one short finish. A bookmark in one sitting beats a half-done plush. Success fuels the next try.
Add one new challenge at a time. Add a second felt layer, then a simple appliqué shape, then a button with your help. Keep stitches and shapes familiar while you add.
Time, thread length, and difficulty all shift with the child and the project. Younger hands, wider spacing, and bigger shapes use less thread and less time. Tighter spacing and layers use more. Adjust as you go and note what worked.
Still wondering?
Can kids sew fabric without a machine?
Kids can hand-sew fabric, but woven fabric frays and needs edge finishing. Felt stays stable and needs no hemming, so it is faster for beginners. Save cotton and zippers for later with closer help.
What age can kids start using a sewing machine?
Many kids try a machine around 10 with an adult right beside them. Hand sewing first builds control and patience. Readiness depends on focus, hand control, and ability to follow safety steps.
How do I prevent thread tangles when kids sew?
Cut working lengths ~18 inches at a time and let the needle dangle to unwind. Pull gently and keep tension flat. Shorter lengths tangle less than long ones.
Where can I find free patterns for kids’ sewing projects?
Try verifiable free PDFs like Purl Soho Free Felt Bookmark Pattern, Benzie Design Felt Animal Pattern Library, and The Spruce Crafts Beginner Felt Finger Puppet. Print a paper test and check size against the child's hand before cutting felt.
What needle should kids use for hand sewing?
Use blunt tapestry needles with large eyes sold as kids or blunt tip. Test that the needle passes through your felt without forcing. Check the package for blunt tip and large eye, for example Clover Chibi or DMC tapestry size 22.