How to sew a zipper that lies flat without puckers or wavy seams
Sew a flat, pucker-free zipper by stabilising the opening first, basting teeth exactly on the seam line, then stitching close with a zipper foot so fabric cannot stretch or wave. Choose centered for pillows, lapped for skirts, invisible for dresses.
On this page (8 sections)
- The short version
- Start here: how to sew a zipper so it lies flat the first time
- Choice: centered vs lapped vs invisible zipper and when to use each
- Prep: how to keep fabric from waving with stay tape and pressing
- Basting vs clips and the seam allowance that hides teeth
- Feet: zipper foot vs invisible foot and how to stitch close without hitting teeth
- Finishing: how to end zippers cleanly for pouches, pockets and bag linings
- Still wondering?
Part of our guide on beginner sewing courses
Key figures
- Pucker-free seam
- Stabilise, baste, then stitch
- Invisible width
- Teeth hidden, 1/16 inch (1.5 mm) show
- Stitch length
- 2.5-3 mm (10-12 per inch)
- Needle
- 80/12 universal or 90/14 for denim
- Stay tape width
- 1/2 inch (12 mm) on seam line
- Pressing
- Press, lift, press — never drag
The short version
- Stabilise the seam line with stay tape or light interfacing before you open the fabric, then press, don't stretch.
- Pick insertion by project: centered for cushions, lapped for sturdy skirts and trousers, invisible for dresses.
- Baste teeth to the seam allowance so you can see the final line before you commit to stitching.
- Stitch with the foot that lets you ride the teeth, and stop 1/8 inch (3 mm) above the stop to avoid a bump.
Start here: how to sew a zipper so it lies flat the first time
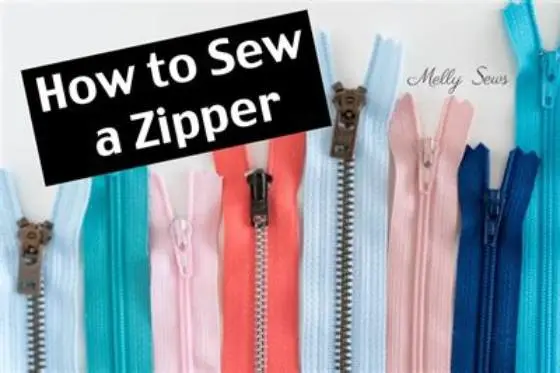
A wavy zipper usually means the fabric stretched about 1/8 inch (3 mm) while you sewed, and how to sew a zipper without that wave starts before the machine is threaded. You prevent most puckers by keeping the seam line stable and keeping the zipper from pulling. That takes pressing and a little support, not tighter tension. Once the fabric can feed without stretching, the teeth stay hidden.
You will fix this fastest by treating the opening as a seam first, not a zipper task. Finish the seam below the zipper, press it open, and keep the opening flat with clips or a light baste. The zipper then sits on a seam allowance that already lies flat. If the base seam waves, the zipper will wave too.
Think of teeth as the centre line. Every stitch should sit a consistent 1/16 to 1/8 inch from the teeth, which is about 1.5 to 3 mm, depending on zipper type. You get that closeness from position, not pressure. Light presser foot pressure and a steady feed keep knits and bias cuts from growing.
If you take one habit from this page, make it press and check. I would pick a pressed, stay-taped seam over any fancy foot every time. Rule of thumb: if the fabric moves when you pull it gently along the seam, it will wave under the foot unless you stabilise it first. The other half of this decision is how to avoid sewing errors.
Choice: centered vs lapped vs invisible zipper and when to use each
A centered zipper shows stitching equally on both sides of the teeth and suits pillows, cushions and simple skirts where you want a balanced look. The teeth sit exactly under the seam line, with topstitching about 1/4 inch (6 mm) from the seam on each side. It is the most forgiving insertion for beginners because small wobbles show less.
A lapped zipper hides one side under a fold and shows stitching on one side only, which is why you see it on trousers, sturdy skirts and bags that take strain. The overlap is usually 1/8 to 1/4 inch (3 to 6 mm) past the teeth. That lap protects the teeth and gives you a clean line to topstitch. It also handles thicker fabrics better than a centered finish.
An invisible zipper hides teeth completely and reads as a plain seam, so it is the choice for dresses, blouses and linings where you want no topstitching. You press the coils back and stitch in the groove right beside the teeth, about 1 to 2 mm away. It looks magic when it works, and it puckers fast if the fabric was not stabilised because any stretch shows as a bubble beside the seam. Before you commit to anything, it is worth looking at sewing French seams.
- Centered: use when you want symmetry and easy access, as on a pillow back where both sides show.
- Lapped: use when strength or a clean front matters, as on a skirt or bag where one side takes pull.
- Invisible: use when you want the zipper to disappear, as on a dress side seam or a lined pouch.
| Insertion | Where it shines | Visibility | Skill trade-off |
|---|---|---|---|
| Centered | Pillow, cushion, simple skirt | Two lines of topstitching, teeth centred | Easiest to keep even |
| Lapped | Trousers, sturdy skirt, tote | One topstitched lap covers teeth | Strong, hides small errors |
| Invisible | Dress, blouse, lined bag | No topstitching, teeth hidden | Needs pressing and close stitching |
- Centered: balanced look, simple basting
- Lapped: strong overlap, hides teeth well
- Invisible: clean seam with no topstitching
- Centered: topstitching always shows
- Lapped: one side harder to keep straight
- Invisible: shows every wave if not stabilised

Zipper Presser Foot Kit 4pcs
Lets you ride right next to the zipper teeth so the coil stays hidden without hitting or puckering the fabric.
Prep: how to keep fabric from waving with stay tape and pressing
Waves start when a seam cut on the bias or a soft knit grows as you handle it. Stay tape stops that. Use 1/2 inch (12 mm) woven stay tape or a strip of light fusible interfacing centred on the seam line, applied before you cut the opening. It adds almost no bulk, but it keeps the length true while you press and stitch. For stable wovens you can stay tape only the zipper section, for knits tape the full seam.
Pressing sets the shape. Press the seam allowances open first, then press the opening flat so the folds sit exactly on the seam line. Lift and place the iron, do not push it along the seam like a squeegee. A push stretches the edge and you will see the wave after stitching. A light shot of steam helps cotton and linen, but let the fabric cool flat before you move it.
Interfacing choice matters. A light woven fusible about 0.8 to 1.0 oz works for dress fabrics, a slightly firmer one for bag panels. Cut it 3/4 to 1 inch (19 to 25 mm) wide and fuse it to the wrong side of each seam allowance, not the fashion fabric. That way the front keeps its drape and the seam still resists stretch. Test a scrap first and check that the adhesive holds after cooling. We go through stitch guide for fabrics step by step elsewhere on the site.
Check your prep before you baste. Lay the opening over a ruler and see if the seam line still measures the length you cut. If it grew, re-press with stay tape. You want the two sides to meet without easing or pulling. That flat, even edge is what lets the final stitching sit close without puckers.
- Stay tape: apply to seam line on wrong side, 1/2 inch (12 mm) wide, no stretch.
- Interfacing: fuse to seam allowance only, test on scrap for show-through.
- Pressing: lift and place, let cool flat, check length with a ruler.

Field's Fabrics White - 1/2" Woven Stay Tape - 0.5" X 25 Yards SewkeysE
Keeps your seam from stretching and waving while you press and stitch the zipper with true non-stretch support.
Most puckers are not tension at all. They are fabric stretching a fraction under the foot before the needle drops.
Basting vs clips and the seam allowance that hides teeth
Basting gives you a true preview, clips and pins just hold. For a centered or lapped zipper, hand baste or use double-sided tape to place teeth exactly on the seam line, then machine baste the opening closed and press. You can see the final position and fix it without unpicking topstitching. Clips are fine for bags and pouches, but they let the zipper creep a hair as you sew.
Seam allowance sets how hidden the teeth look. A standard 5/8 inch (16 mm) allowance gives enough fabric to fold over teeth and still cover them after pressing. If your pattern uses 1/2 inch (12 mm), keep teeth just shy of the fold so about 1 to 2 mm of fabric rolls over the teeth. Too narrow and teeth peek, too deep and the seam bubbles. Mark the seam line with chalk and align teeth to that line, not to the raw edge.
For an invisible zipper, baste differently. Press coils flat first, then baste each side to its seam allowance with coils rolled outward. Keep basting about 3 mm from the coils so the foot can run in the groove later. Remove basting after final stitching, not before. That keeps the fabric from shifting when you get close to the teeth.
Sequence that keeps you out of trouble. Close the seam below the zipper, press open, stay tape the opening, baste zipper to seam allowances, then topstitch or stitch in the groove. Try the slider before you finish. It should run without catching fabric. If it catches, teeth are too deep under the fold or stitching rode over them.
- Close and press the seam below the zipper stop. Keep the opening basted shut and pressed flat.
- Apply stay tape or light interfacing to the seam allowances along the opening.
- Place zipper face down on seam line, align teeth to chalked seam, baste or tape in place.
- Stitch one side, then the other, keeping distance from teeth even. Test slider, then remove basting.
Feet: zipper foot vs invisible foot and how to stitch close without hitting teeth
A standard zipper foot is a narrow foot that lets the needle sit to one side of the teeth, so you can stitch about 1/16 inch (1.5 mm) from the coils without the foot riding over them. You move the needle position, not the fabric, to get closer. It works for centered and lapped zippers and for many invisible zippers if you press coils flat. You will hear a light tick if you hit teeth, stop and shift the needle one notch away.
An invisible foot has a groove that rides the coil itself and guides the needle into the gap beside the teeth. That groove keeps stitching consistently 1 to 2 mm from the coil, which hides the teeth fully. Use it when you want that disappearing seam on a dress or lining. It needs coils pressed fully back, otherwise the groove slips off and stitching wanders.
How to stay close without damage. Set stitch length to 2.5 to 3 mm, which is about 10 to 12 stitches per inch, so the seam has enough hold without perforating the fabric. Reduce presser foot pressure a touch on knits or napped fabrics, and guide with your hands flat, not pulling. Sew slowly over the slider area and stop with the needle down to pivot. If the foot hits the slider, lift the foot, slide the zipper past, then reset.
Needle and thread finish the job. Use 80/12 (universal) for most wovens, 90/14 for denim or canvas, and 70/10 or 75/11 for fine lawn or satin, with 50 wt polyester thread. A fresh needle prevents skipped stitches that look like puckers. Re-thread with the presser foot up so thread seats in the tension discs, then test on a scrap sandwich of your fabric plus stay tape.
- Zipper foot: adjustable needle position, good for centered and lapped, also works for invisible if coils are pressed flat.
- Invisible foot: grooved sole rides the coil, best for a truly hidden seam.
- If you hear clicking on teeth, move needle away one step and sew again. Do not force the foot over teeth.
Finishing: how to end zippers cleanly for pouches, pockets and bag linings
A clean end needs fabric to cover the raw zipper tape, otherwise the tape frays and the slider bumps. For pouches and flat pockets, make tabs. Cut two rectangles 1-1/2 by 2 inches (38 by 50 mm), fold each in half to 1-1/2 by 1 inch, press, then sandwich each end of the zipper between a tab and stitch across at 1/4 inch (6 mm). Press tabs away and topstitch close to the fold. Tabs give you a flat, bulk-free end that turns neatly.
For a bag lining, you want the zipper hidden between outer and lining. Place outer right side up, zipper face down along the top edge with teeth just inside the seam line, then lining right side down on top. Stitch at your seam allowance, usually 3/8 to 1/2 inch (10 to 12 mm), flip and press so both layers roll slightly to the inside. Repeat for the other side. When you turn the bag, the zipper sits cleanly between layers with no tape showing.
Check the corners. At each end, fold the seam allowances away from the teeth so stitching does not stack over the stop. Backstitch only 1/4 inch (6 mm) at the ends to secure, then trim tape at an angle if it extends beyond the seam. For a pocket inside a bag, stitch the pocket bag first, then set the zipper into the opening the same way, so the pocket lining hides the tape inside.
If you take one finishing habit, make it test the turn. Turn the pouch or lining right side out and zip fully before you close the lining gap. The zipper should sit flat with tabs even and no fabric caught. If the slider sticks at the tab, your tab stitching is too close to the stop, move it 2 to 3 mm away and try again.
- Cut two tabs 1-1/2 by 2 inches (38 by 50 mm), fold to 1-1/2 by 1 inch and press.
- Sandwich zipper ends inside tabs, stitch at 1/4 inch (6 mm), flip and topstitch near fold.
- For linings, layer outer, zipper face down, lining face down and stitch at 3/8 to 1/2 inch (10 to 12 mm).
- Flip, press with layers rolled inside, repeat other side, test zip before closing lining.
Still wondering?
Why does my zipper pucker even with correct tension?
Fabric stretched under the foot, not tension, is the usual cause. Stay tape the seam line, press without dragging, lighten foot pressure a touch, and baste teeth in place so you are not pulling as you sew. Test on a scrap with the same layers.
How far from the teeth should I stitch?
For centered and lapped zippers aim 1/16 to 1/8 inch (1.5 to 3 mm) from teeth, and about 1/4 inch (6 mm) for lapped topstitching. For invisible zippers stitch 1 to 2 mm beside the coil in the groove. Keep that distance even from top to stop.
Do I need an invisible zipper foot?
It helps for a truly hidden seam because the groove rides the coil and keeps you close. You can use a standard zipper foot if you press coils flat and move the needle close, but the invisible foot is more consistent, especially on slippery fabrics.
How do I stop the slider catching fabric?
Teeth are sitting too deep or stitching rode over them. Move basting 1/16 inch (1.5 mm) shallower, stitch a hair farther from teeth, and press seam allowances away from the coil. Test the slider after basting before you do final stitching.
What seam allowance hides zipper teeth best?
5/8 inch (16 mm) is ideal because the fold covers teeth with a little to spare. With 1/2 inch (12 mm) you must place teeth just shy of the fold so fabric rolls over them. Mark the seam line and align teeth to it, not to the raw edge.