Why your stitches skip, pucker or nest and what to fix first
Common sewing mistakes like skipped stitches, puckered seams, or thread nests often come from needle condition, thread size, tension settings, or incorrect threading. Start by replacing the needle, re-thread your machine with the presser foot raised, check bobbin rotation per your machine's manual, and inspect tension adjustments.
On this page (8 sections)
- The short version
- What a thread nest means and the first 3 checks
- Why stitches skip and how needle size and thread weight cause it
- What makes seams pucker and how tension, presser foot and handling fix it
- How wrong needle insertion, bobbin direction and threading order create most 'machine not sewing' complaints
- A quick test sequence to confirm the fix before sewing the project
- Common sewing mistakes and how to avoid them
- Still wondering?
Part of our guide on beginner sewing courses
Key figures
- Needle size
- 80/12 EU/US typical
- Thread weight
- 50 wt common
- Bobbin rotation
- varies by machine, check manual
- Presser foot position
- up for threading
- Tension range
- medium setting, often 3-5
The short version
- Skipped stitches often mean a wrong needle size, damaged needle, or mismatched thread weight.
- Thread nests usually indicate incorrect bobbin installation or threading errors.
- Seam puckering is often caused by uneven tension or improper fabric handling.
- Always re-thread with presser foot raised to keep tension discs open.
- Test needle and thread compatibility on scrap fabric before starting your project.
What a thread nest means and the first 3 checks

A thread nest, or bird nest, is a tangled clump of thread beneath your fabric. It usually means the bobbin thread isn’t feeding properly or the machine is threaded incorrectly.
Check one: the bobbin is inserted with the correct rotation for your machine; many machines require clockwise, but some drop-in bobbins spin counter-clockwise. Refer to your manual.
Check two: your upper thread is threaded in the right order, with the presser foot raised so tension discs open fully. Threading with the foot down traps thread and causes nests.
Check three: the bobbin case and hook area are free of lint and debris. Lint buildup can block thread movement and cause nesting. Before you commit to anything, it is worth looking at setting tension and needle correctly.
- Bobbin rotation - check your machine's manual
- Threading order - always presser foot up to thread
- Clean hook area - remove lint and debris
Why stitches skip and how needle size and thread weight cause it
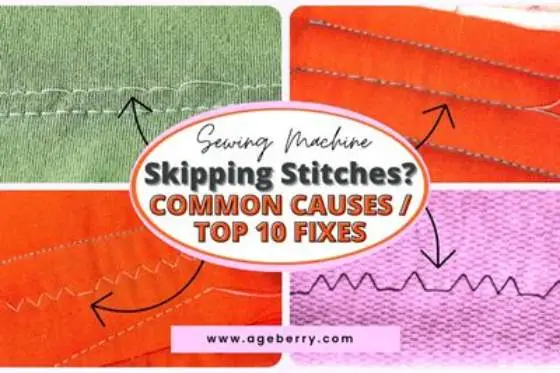
Skipped stitches happen when your sewing machine needle misses some stitches, leaving gaps. Common causes include damaged needles, wrong needle type, or mismatched thread weight.
A bent or dull needle can’t pierce fabric cleanly, causing skipped stitches. Manufacturers often suggest changing needles after about 6-8 hours of sewing or at the start of a new project, sooner if sewing heavy or abrasive fabrics.
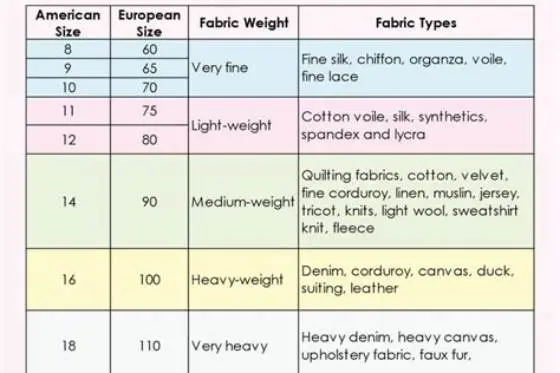
Choose needle size to suit your fabric: lightweight fabrics need smaller needles (for example, 65/9), medium-weight like quilting cotton work well with 80/12 needles, and heavier fabrics like denim benefit from 90/14. People in this spot often ask about sewing machine skipping stitches as well.
Match thread weight to fabric and needle. Thick threads require larger needle eyes. Using heavy thread with too-small a needle can cause skipped stitches or thread drag. Test on scrap fabric to find the right combination.
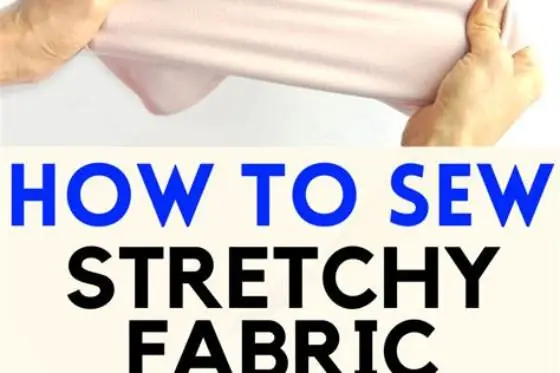
Use specialized needles for specific fabrics: a stretch needle for knits and a Microtex needle for tightly woven synthetics. A universal 80/12 needle may skip on knits like Lycra. You might see occasional skipped stitches, often where knit fabric stretches under the presser foot.
Heavy thread with too-small a needle can cause skipped stitches or drag; try a larger needle (for example, 90/14 for denim with 40-weight thread) and test on scrap to confirm. For the detail, see our notes on preventing skipped stitches on knits.
- Needle condition - replace if bent or dull
- Needle size - match to fabric weight
- Thread weight - pair with needle size

60 PCS Universal Sewing Machine Needles
Fixes skipped stitches and needle damage by providing 60 size 80/12 needles suitable for medium-weight fabrics like heavy cotton and corduroy.
What makes seams pucker and how tension, presser foot and handling fix it
Seams pucker when fabric looks wrinkled or gathered. This happens if fabric is pulled unevenly or thread tension is off.
Too-tight top thread tension pulls fabric too hard, causing puckers. Start with your machine’s medium tension setting (often marked around 4) and adjust slightly while testing on scrap fabric.
Presser foot pressure affects fabric feed. Too much pressure crushes fabric, causing puckers; too little lets fabric shift. Adjust pressure to match fabric thickness and type. It helps to understand matching needle to fabric weight before going further.
Handle fabric gently: don’t pull or push fabric under the presser foot. Let the feed dogs guide fabric evenly for smooth seams.
Lightweight fabrics like voile or lawn often need lower top tension and lighter presser foot pressure. Begin near your machine’s normal tension and reduce slightly while testing on similar scrap fabric, including bias if your project uses it. Look for small waves or puckers indicating tension is still too high.
Sew a test seam on scrap fabric to check tension and pressure. Hold the seam flat after sewing; puckers that relax without pulling usually mean tension is set right.
- Tension setting - start medium and adjust on scrap
- Presser foot pressure - match to fabric weight
- Fabric handling - avoid pulling or pushing fabric
Diagnose stitching problems by what your stitches look like, then test needle, thread, bobbin, and tension step-by-step.
How wrong needle insertion, bobbin direction and threading order create most 'machine not sewing' complaints
If your machine doesn’t sew, the cause is often needle insertion, bobbin direction, or threading mistakes.
Needle insertion: The needle must be pushed fully up into the clamp with the flat side facing the correct direction, usually the back, as your manual states. If not fully seated, the hook may miss the loop and no stitch forms.
Bobbin direction: Insert the bobbin so thread feeds correctly. Many machines require clockwise rotation, but some drop-in bobbins spin counter-clockwise. Check your manual.
Threading order: Always raise the presser foot to open tension discs during threading. Threading with the foot down traps thread and blocks stitching.
Pull a short length of bobbin thread; it should unwind smoothly with slight resistance. If it spools freely or jams, recheck insertion per your manual.
- Needle fully inserted with flat side per manual
- Bobbin rotation varies; verify with machine manual
- Thread upper path with presser foot up
A quick test sequence to confirm the fix before sewing the project
Before starting your project, run a simple test on scrap fabric similar to your project material.
Step 1: Replace the needle with the correct size and type for your fabric.
Step 2: Re-thread the machine fully with the presser foot raised, check bobbin rotation as per your machine’s manual, and clean the hook area.
Step 3: Adjust tension settings starting at your machine's default (often marked 4). Sew a 10-inch (25 cm) straight seam.
Step 4: Inspect the seam for skipped stitches, puckers, or thread nests.
If issues persist after these checks, repeat or consider professional service. Persistent problems mean something else may need adjustment or repair.
- Replace needle for fabric weight and type
- Re-thread machine with presser foot raised
- Check bobbin rotation per manual
- Clean lint from bobbin and hook area
- Sew test seam on scrap fabric
- Inspect seam and adjust tension or pressure
Common sewing mistakes and how to avoid them
Skipped stitches, thread nests, and puckered seams are common sewing problems. They usually trace back to needle, thread, tension, or threading methods.
Use needles sized by fabric weight: 70/10 for fine fabrics like silk, 80/12 for quilting cotton, and 90/14 for heavier fabrics like denim or canvas. Needle flat-side orientation varies; check your machine’s manual.
Match thread weight to needle and fabric. Use polyester thread for most projects and cotton thread for quilting or natural fibers.
Keep your machine clean and lubricated as your manual directs. Remove lint from bobbin case and feed dogs regularly. Dirty machines cause tension faults and thread jams.
Always start with a new needle to prevent skipped stitches and fabric damage.
Thread with the presser foot raised to keep tension discs open and avoid thread nests.
Adjust presser foot pressure and tension to suit the fabric you sew, preventing puckering.
Avoid pulling fabric; guide it gently and let feed dogs move fabric evenly for smooth seams.
- Needle choice - size and type based on fabric weight
- Thread match - weight and fiber type
- Machine maintenance - follow cleaning and oiling instructions
- Threading method - presser foot raised
- Fabric handling - no pulling or pushing
Still wondering?
Why does my sewing machine make thread nests under the fabric?
Thread nests usually form when the bobbin is inserted incorrectly or the upper thread is not threaded with the presser foot raised. Lint buildup in the bobbin area can also cause nesting.
How do I stop skipped stitches when sewing?
Skipped stitches stop when you replace a bent or dull needle, match needle size to fabric weight, and use the right thread weight. Also, check your machine is threaded properly.
What causes seams to pucker and how can I fix it?
Seams pucker due to uneven tension or too much presser foot pressure. Adjust tension starting at medium and lower foot pressure if needed. Avoid pulling fabric as you sew.
How can I tell if my needle is inserted correctly?
The needle should be pushed fully up into the clamp with the flat side facing the machine’s back or as your manual directs. Sewing with a loosely inserted needle causes stitch problems.
Can I fix sewing problems myself or do I need a repair shop?
Most common problems fix with a new needle, re-threading with the foot up, cleaning lint, checking bobbin direction per manual, and adjusting tension. If issues persist, professional service may be needed.