How to Sew a Zipper: Centred, Invisible and Lapped
Sew a zipper by basting the seam shut where it goes, pressing the allowances open, pinning the zipper face down under the seam, then stitching close to the teeth with a zipper foot. A centred zip is the easiest first try, and an invisible zip hides in the seam.
On this page (8 sections)
- The short version
- How to Sew a Zipper: the Centred Method First
- Before You Sew: Pick the Right Zipper and Foot
- Prep Work: Baste, Press and Pin the Opening
- Invisible Zipper: the Hidden Finish Step by Step
- Lapped Zipper: One Fold Hides the Teeth
- Fixes: Wavy Seams, Puckers and a Zipper That Sticks
- Still wondering?
Part of our guide on creating a professional french seam
Key figures
- Straight stitch length
- 2.5 mm
- Invisible zipper length
- 2 to 3 in (5 to 8 cm) longer
- Basting stitch
- Longest stitch length
- Lapped fold
- Narrow fold covering teeth
- Needle, light cotton
- 80/12 universal
- Thread weight
- 50 wt polyester
The short version
- Baste the opening shut and press it flat before the zipper goes near the machine.
- Buy an invisible zipper 2 to 3 in (5 to 8 cm) longer than the opening.
- Stitch with a zipper foot at 2.5 mm and move the slider past the foot with the needle down.
- Press the coils of an invisible zipper flat with a cool iron before you sew.
- Never sew over metal teeth: stop, move the slider, then carry on.
How to Sew a Zipper: the Centred Method First
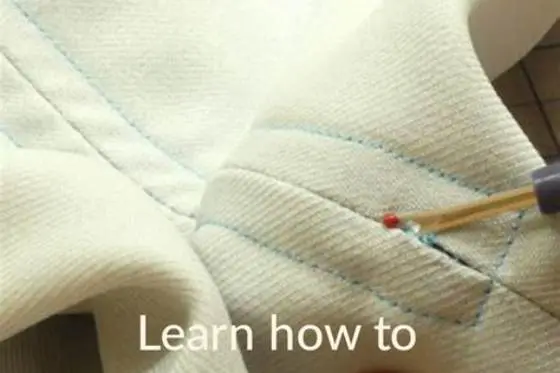
A centred zipper sits in the middle of a seam, teeth hidden under the join, with topstitching on each side. It suits skirts, dresses, cushions and bags, and forgives small wobbles better than a hidden zip. Work from an opening that is basted shut and pressed flat, as the prep section below sets out.
Lay the closed zipper face down on the wrong side of the seam, with the teeth lined up on the basted line. Pin or hand baste it in place, then check from the front that the teeth sit dead centre. Plan the top edge now: a facing or waistband should cover the tape ends. Swap in the zipper foot, choosing the side that puts the needle close to the teeth. Turn the handwheel by hand for the first few stitches and watch the needle clear the teeth.
Stitch down one side from the top, across the bottom just below the zipper stop, then up the other side. Stop with the needle down whenever the slider nears the foot, lift the foot, and slide the pull past it. Remove the basting and test the zipper three or four times. Smooth running with no caught fabric means it worked. A zipper that is too long can be shortened after sewing: stitch across the teeth and cut below the stitching.
- Sew the seam below the opening at 2.5 mm.
- Lay the closed zipper face down on the basted line.
- Pin or hand baste the zipper, then fit the zipper foot beside the teeth.
- Topstitch down one side, across the bottom below the stop, and up the other side.
- Remove the basting and test the zipper.
Before You Sew: Pick the Right Zipper and Foot
Zippers come in three shapes for home sewing, and the shape decides the method. Regular zips show their teeth from the front and work for centred and lapped seams. Invisible zips use fine coils that roll inward, so the seam looks like plain stitching once it closes. Separating zips open right apart at the bottom and belong on jackets and bags, not dress seams. Match the zipper length to the opening your pattern calls for. If the shop lacks your length, buy the next longer one and trim the tape after sewing. Before you commit to anything, it is worth looking at seam finishing without a serger.
Your zipper foot is the one tool this job truly needs. Its narrow toe lets the needle stitch close beside the teeth, where a standard foot cannot reach. Most machines ship with one, so check your accessory box before you buy anything. If yours went missing, a snap-on low-shank kit with both feet covers every method in this guide. Check the listing states low-shank snap-on fit for your machine's make.
For most dress and skirt fabrics, a 50 wt polyester thread suits the job, and a fresh 80/12 universal needle keeps the stitching even. Swap to a 70/10 needle for fine lawn or voile, and a 90/14 for denim or canvas. Set a straight stitch at 2.5 mm for the final topstitching, and the longest stitch your machine offers for basting. A sharp needle keeps the stitching even and stops the tape snagging.
| Zipper | Finish | Best for | Foot |
|---|---|---|---|
| Regular, centred | Teeth hidden, topstitching shows | Skirts, dresses, cushions | Zipper foot |
| Regular, lapped | One fold hides the teeth | Skirts, trousers, side seams | Zipper foot |
| Invisible | No stitching shows at all | Dresses, fine fabrics | Invisible zipper foot |
| Separating | Opens fully at the bottom | Jackets, bags, coats | Zipper foot |

11Pcs Sewing Machine Presser Feet
If your machine didn't come with a zipper foot, this 11-piece kit gives you both a standard zipper foot and an invisible zipper foot, plus nine other feet for everyday sewing.
Prep Work: Baste, Press and Pin the Opening
Good zippers are made before the machine starts. Sew the seam below the opening first, backstitching where the zipper ends, then baste the opening itself. Press the seam allowances open, and press the zipper tape flat too if it curls. Creased, flat openings hold the zipper straight while you pin it. Skipped prep shows up later as a wavy seam no careful stitching can rescue. If that sounds like your situation, read up on hiding zipper teeth smoothly next.
Lightweight fabrics stretch and ripple under a zipper, so give the opening some body first. Press light fusible interfacing along each side of the opening, or stay tape on a knit. Cut the strip the full length of the opening and a little wider than the seam allowance, then press it to the wrong side. This step takes two minutes and stops the fabric creeping sideways as the foot feeds it.
Pinning decides whether the two sides match at the bottom. Place the closed zipper face down on the wrong side, teeth on the basted line, with the top stop just below the top edge. Pin across the tape at top, middle and bottom, then hand baste if the fabric slips. Turn the work over and check the teeth sit in the middle of the seam. Shift the zipper now, while shifting it costs nothing.
- Zipper check: open and close the zip a few times before you sew it in.
- Longest stitch: set the machine to its longest straight stitch for basting.
- Iron ready: press each fold as you go, rather than only at the end.
Most zippers fail at the pressing board, not the machine: a flat, basted seam is what makes the stitching look store-bought.
Invisible Zipper: the Hidden Finish Step by Step
An invisible zipper hides in the seam, with no topstitching showing at all. The coils roll inward, so the seam reads as a plain join until you pull the tab. Buy one 2 to 3 in (5 to 8 cm) longer than the opening, and trim the extra tape after sewing. Open the zip and press the coils flat with a cool iron, so the groove the foot follows opens up. For the detail, see our notes on sewing machine threading guide.
Sew an invisible zipper before you stitch any of the seam. Place the open zipper face down on the right side, coil on the seam line. Keep the top of the teeth about 1 in (2.5 cm) below the cut edge, or where your pattern marks it. Fit the invisible zipper foot with the coil in the groove on the right of the needle. Stitch from the top to the mark, then backstitch.
Close the zip and check the seam from the front before you sew the rest. The two sides should meet with no pucker and no gap showing the tape. If one side sits higher, unpick that side only and re-sew it. Swap back to the standard foot and stitch the seam below the zipper, sewing up to meet the zipper stitching. Press the seam open and the zip should vanish into the join.
- Press the coils flat and mark the zipper end on both allowances.
- Place the open zipper face down, coil on the seam line.
- Fit the invisible foot and stitch the first side.
- Repeat on the other side, coil in the left groove.
- Close the zip, check the join, then stitch the seam below it.
Lapped Zipper: One Fold Hides the Teeth
One folded edge hides the teeth in a lapped zipper, so only a single line of stitching shows. It suits side seams on skirts and trousers. The opening needs the same prep as a centred zip. Fold the left allowance back and turn the right allowance under in a narrow fold that just covers the teeth.
Begin on the left side, stitching from the bottom up. Work with the zipper foot on the side that puts the needle close to the teeth, stitching tape and allowance only. Turn the work right side up, stitch across the lower end, then up the lapped side along the fold. Move the slider past the foot the same way as for a centred zip. Remove the basting and press from the right side.
Check that the lap covers the teeth with no gap and no bunching at the bottom. If the fold drifts, the teeth peek out and the zip looks unfinished. Unpick the topstitching on that side only, re-fold the edge, and sew it again. Lapped zips take more patience than centred ones, and repay it where a centred zip would show two stitching lines.
Fixes: Wavy Seams, Puckers and a Zipper That Sticks
Waves beside a zipper usually mean the fabric moved while you stitched. Unpick the topstitching, press the seam flat, and re-pin with the zipper basted in place. Stitch slowly and let the feed dogs move the fabric. Check the needle is fresh: a blunt 80/12 drags light fabric and leaves a ripple. Test on a folded scrap first, and the wave should stay on the scrap.
Puckers at the bottom of the zip come from stitching across the stop or sewing over the slider. Stop just below the bottom stop, pivot with the needle down, and never stitch through metal teeth. Needles that hit metal teeth can snap, so keep the slider clear of the foot. A sticking zipper usually has thread in the teeth or a bent tooth near the bottom. Bent teeth will not straighten, so replace the zipper instead of forcing the pull past it.
Gapping at the top calls for a hook and eye or a small snap above the pull. Sew the fastening to the seam allowances, not through the zipper tape. If the sides sit at different heights, one stretched while you sewed. Unpick the lower side, ease it back to match, and re-stitch it with the fabric relaxed. Most zipper trouble traces back to prep: unpick, press and baste, then sew it once more.
A centred zipper is the best first zipper to learn: simple, forgiving, and neat enough for most garments.
Still wondering?
What length zipper do I need for a dress?
Measure the opening your pattern marks. Buy that length for a regular zip, and 2 to 3 in (5 to 8 cm) longer for an invisible one. A zipper too short leaves the opening gaping. Trim extra tape after sewing, and stitch across the teeth above the cut so the pull cannot run off.
Can I sew a zipper without a zipper foot?
You can, but the stitching sits further from the teeth and the seam gapes. A standard foot cannot reach beside the coil, so the zipper pulls and the join shows. A low-shank snap-on zipper foot fits most home machines and costs little. Check your manual for the shank type before you order one.
Why does my zipper pucker the fabric?
Puckers come from fabric stretching as it feeds or tension set too tight. Baste the zipper before machine stitching, and press interfacing along the opening on light fabrics. Test on a folded scrap of the same fabric before you sew the garment.
How do I shorten a zipper?
Mark the new length on the tape, stitch across the teeth a few times just above the mark, then cut the tape below your stitching. The bar of stitching acts as the new bottom stop. Never cut first and stitch after, since the pull can slide off the open end.