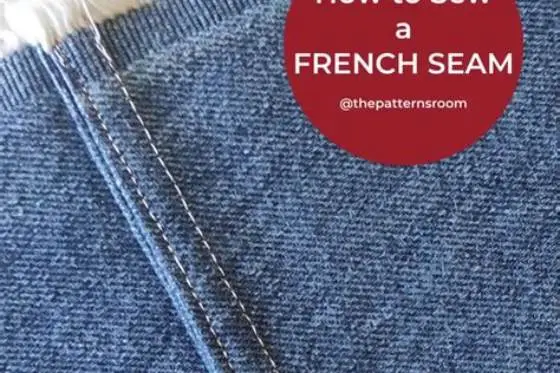
How to Sew a French Seam for a Clean, Fray-Free Finish
Stitch wrong sides together at 1/4 inch (6 mm), trim to 1/8 inch (3 mm), then fold right sides together and stitch again at 3/8 inch (10 mm). The edges end up sealed inside, so nothing frays or shows through sheer fabric.
On this page (8 sections)
- The short version
- What a French seam is: two rows, no raw edges
- How to sew a French seam: the full method
- Fabrics: where this seam shines and where it fails
- Pressing and trimming: the details that decide the finish
- Fixes: whiskers, puckers and a seam that will not lie flat
- French seam vs the other clean finishes
- Still wondering?
Part of our guide on beginner sewing courses
Key figures
- First pass
- 1/4 inch (6 mm)
- Trim to
- 1/8 inch (3 mm)
- Second pass
- 3/8 inch (10 mm)
- Total allowance
- 5/8 inch (16 mm)
- Best fabrics
- chiffon, voile, silk
- Avoid
- denim, knits, curves
The short version
- Pick the French seam when the inside of the garment will show, as on sheer blouses and unlined jackets.
- Check the pattern allowance first: you need 5/8 inch (16 mm), or 1/2 inch (13 mm) at a pinch.
- Press after every step and trim to a scant 1/8 inch (3 mm), or fibres will poke through.
- Change the needle, re-thread with the foot up and test on a scrap before the real seam.
What a French seam is: two rows, no raw edges
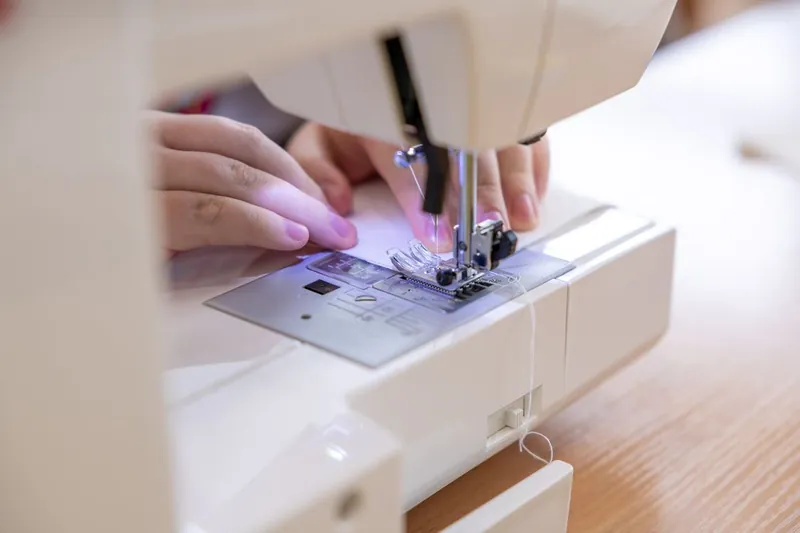
A French seam hides every raw edge inside itself. You sew it twice. The first pass joins the pieces wrong sides together. The second pass folds that whole seam inside and closes it, so the cut edges sit sealed in a small tube. From the outside it reads as one plain seam. From the inside it looks finished, with no fraying threads and no zigzag to catch the light.
The seam suits fabric you can see through. Chiffon, organza, voile and fine silk lawn all show a raw edge from the right side. A finish that buries the edge is the only one that looks right. Linen and light cotton suit it too, since both fray fast in the wash. The trade is time. Two passes, two pressings and a trim take longer than one straight seam.
Think of it as a seam with a pocket built in. The first pass is narrow and sits on the outside while you sew it. That feels wrong the first time you try it. The second pass folds the first seam inside and closes the pocket. If the second line lands too close to the fold, whiskers of raw edge poke out. If it lands too far in, the seam grows fat and stiff.

Dritz 620 Sewing Gauge
Marks your 1/4 inch first pass and your 1/8 inch trim at the same setting every time, because the sliding marker stays locked where you put it for repeat marking.
How to sew a French seam: the full method
Start with a fresh needle and the right thread. A fine 60/8 or 70/10 needle suits sheer fabric. An 80/12 needle suits light cotton and linen. Use a 50 wt cotton or polyester thread, which keeps the seam supple instead of stiff. Set a straight stitch a touch shorter than usual, around 2 mm, so the first pass holds fine fibres without pulling them. People in this spot often ask about how to sew a French seam as well.
Pin the pieces wrong sides together, matching the raw edges exactly. Pins go inside the seam allowance, so any tiny hole they leave stays hidden in the finished seam. Sew the first line 1/4 inch (6 mm) from the raw edge. Backstitch a few stitches at each end. This line will sit on the outside of the garment for now, which is correct.
Press the seam flat as sewn, then press the allowance to one side. Trim it to a scant 1/8 inch (3 mm). Fold the fabric along the first seam line so the right sides meet and the trimmed edge sits inside. Press the fold sharp, pin it, and sew the second line 3/8 inch (10 mm) from the fold. Keep the same stitch length as the first pass. The two passes add up to the pattern allowance: 1/4 inch plus 3/8 inch is 5/8 inch. The second line lands where the pattern seam line sits, so the garment keeps its size.
- Pin the pieces wrong sides together, raw edges matched.
- Sew the first pass at 1/4 inch (6 mm), backstitching both ends.
- Press the seam flat, then press the allowance to one side.
- Trim the allowance to a scant 1/8 inch (3 mm) and clear loose threads.
- Fold right sides together along the first seam line and press sharp.
- Sew the second pass at 3/8 inch (10 mm) from the fold.
- Press the finished seam to one side and check for whiskers.

1/4 inch Snap on Foot w/Guide
The built-in guide rides the fabric edge so your first pass sews a steady 1/4 inch seam, the seam the second pass has to enclose.
Fabrics: where this seam shines and where it fails
Sheer and light woven fabrics are the natural home of the French seam. Chiffon, organza, voile, silk charmeuse and fine cotton lawn all fray. They all show a raw edge through the cloth, and they all press into a crisp narrow fold. A French seam on these fabrics looks like the inside of a bought blouse, which is the point. Linen earns a place too. It frays more than most fibres, and the enclosed edge survives wash after wash.
Medium-weight cotton and light linen take the seam well if you test a scrap first. The fold adds four layers of cloth at the seam line. A fabric that presses flat and holds a crease will behave, while a springy one will fight the fold. Rayon challis and other fluid wovens work when the weave is tight enough to hold the first stitching without slipping.
Skip the seam on thick fabric, stretch knits and sharp curves. Denim, canvas and heavy wool turn into a stiff ridge four layers thick, and the seam will not press flat. Knits need stretch in the stitching. A straight-stitched French seam can pop when the garment is pulled on, and knits barely fray anyway, so a serged edge suits them better. Tight curves such as armholes and necklines pucker, since the folded layers cannot ease around the bend.
The inside of a sheer blouse should look as tidy as the outside, and this seam is how you get there.
Pressing and trimming: the details that decide the finish
Heat is the variable most sewists get wrong on this seam. Silk chiffon scorches and shines at a high setting, so keep the iron low and test on a scrap first. Cotton voile takes medium heat and a little steam. Linen likes the hottest setting the fibre allows. A press cloth sits between the iron and the cloth on anything that water-spots or goes shiny, and it costs nothing to use.
Cut the trim in one smooth run with sharp scissors or a rotary cutter. A ragged cut leaves fibres of different lengths, and the longest ones are the ones that poke through. Hold the cut edge up to the light before you fold and snip off any thread that sticks out past the rest. Pinking shears help on fabrics that fray hard, since the zigzag edge sheds less. A straight cut is fine on a tight weave.
A good fold shows as one clean crease with the stitching sitting right at its edge. Hold the folded seam up to the light and look along it from both sides. The crease should run straight with no ripples and no trimmed edge peeking out. If the fold wanders, press it again rather than sewing over a crooked crease. Sew the second pass slowly and watch the fold, not the needle. Press the finished seam toward the back of the garment on side seams, or down on horizontal seams.
Fixes: whiskers, puckers and a seam that will not lie flat
Whiskers are the most common fault, and they mean the trim was wider than the second seam allowed. Short fibres poking through on the right side tell you the second line sat too close to the fold or the trim ran too wide. Unpick the second pass only and trim the allowance closer. Then sew the second line a hair wider, at a full 3/8 inch (10 mm) from the fold. The garment is not ruined. The fix takes ten minutes.
Puckering along the seam usually comes from tension or a dull needle, not from the method. Change to a fresh sharp needle first. A blunt point pushes fine fibres instead of piercing them. Re-thread with the presser foot up so the thread seats in the tension discs, and check the bobbin is the right one for the machine. Shorten the stitch a little and sew more slowly. Let the feed dogs move the cloth instead of pulling it through.
A seam that stands up like a cord instead of lying flat has too much cloth inside it. The cause is almost always a second pass sewn wider than 3/8 inch (10 mm) or a trim left too generous. Press it hard from the wrong side with a clapper or a heavy book on top while it cools. That often tames it. If it still stands proud, unpick the second pass, trim to a true 1/8 inch (3 mm) and sew again at the right width.
French seam vs the other clean finishes
A French seam is one of four ways to finish a raw edge neatly, and each one suits a different job. A serged edge is fastest and handles knits and curves, but the overlocked thread shows through sheer fabric. A flat-felled seam is the strongest of the four and lies flat on shirts and jeans. It needs a topstitched line on the right side, though, and it adds bulk on fine cloth. A mock French seam sews a plain seam, trims, folds the edges in and topstitches.
Choose by what the garment shows and what it must survive. A sheer blouse or an unlined jacket calls for the French seam. The inside is on display and the fabric is too light for anything else. A shirt that gets washed weekly and pulled hard at the seams wants the flat-felled finish. A knit top or a curved armhole wants the serger. The mock version is the fallback when the pattern gives you only 1/4 inch (6 mm) of allowance.
Time matters too. A French seam takes about twice as long as a serged edge on the same length. You sew, press, trim, press and sew again. That cost is worth paying on a blouse you will wear for years. The seam you pick should match the fabric in front of you, not the one you wish you had.
| Finish | Best for | Weak point |
|---|---|---|
| French seam | sheer, light wovens, unlined garments | slow, needs 5/8 inch allowance |
| Flat-felled seam | shirts, jeans, hard wear | visible topstitch, bulky on fine cloth |
| Serged edge | knits, curves, quick work | shows through sheer fabric |
| Mock French seam | narrow allowances | weaker, topstitch shows |
Still wondering?
Can I sew a French seam on a pattern with a 1/4 inch seam allowance?
No, a true French seam needs more room than that. The two passes plus the trim use a full 5/8 inch (16 mm) on most patterns. With only 1/4 inch to work with, sew a mock French seam instead. Stitch a plain seam, trim, fold each edge in and topstitch.
What do I do when a French seam meets a cross seam or a zipper?
Press the crossed seam flat first and trim its allowance close so the bulk stays low. Sew slowly over the crossing and guide the cloth gently, since pushing it will shift the fold. Do not run a French seam across a zipper. End the French seam just short of the zipper. Finish that stretch with a plain seam, then press the join flat so the change of finish does not show.
Do I need a serger to sew a French seam?
No. The whole point of the French seam is that it finishes the edge with an ordinary machine and a straight stitch. A serger is faster on knits and curves, but it is a second machine you do not need for this. All you need is a standard presser foot, sharp scissors and an iron.
Can I use a French seam on a curved seam?
Only on a gentle curve, such as a slightly shaped side seam, and only with careful trimming and clipping. Sharp curves like armholes and necklines pucker because the folded layers cannot ease around the bend. For those, use a bias-bound finish or a serged edge instead. Keep the French seam for straight runs.