How to Finish Seams Without a Serger: Five Clean Finishes
You can finish seams without a serger. A zigzag or overcast stitch wraps the raw edge, a French seam hides it, and a flat-felled seam turns it into strength. Pick the finish by your fabric.
On this page (8 sections)
- The short version
- The Zigzag Stitch: How to Finish Seams Without a Serger
- Pinked Edges: The Fastest Finish for Light Wovens
- French Seams: A Clean Finish for Sheer Fabric
- Flat-Felled Seams: Strength for Jeans and Shirts
- Bound Edges: Bias Tape for Curves and Linings
- Matching the Finish: Which Method Suits Your Fabric
- Still wondering?
Part of our guide on sewing a clean french seam
Key figures
- Zigzag start
- 3-4 mm wide, 2-3 mm long
- French seam, first pass
- 3/8 in (10 mm)
- French seam, second pass
- 1/4 in (6 mm)
- Flat-felled allowance
- 5/8 in (16 mm)
- Finishes in this guide
- 5, no serger needed
The short version
- Zigzag or overcast stitch is the fastest finish for most fabrics. Test the width on a scrap first.
- French seams suit sheer and lightweight fabric. Flat-felled seams suit denim and shirts.
- Pinking shears only slow fraying on woven fabric. They do nothing for knits.
- Press between every pass. A finish that is not pressed will not hold its shape.
The Zigzag Stitch: How to Finish Seams Without a Serger
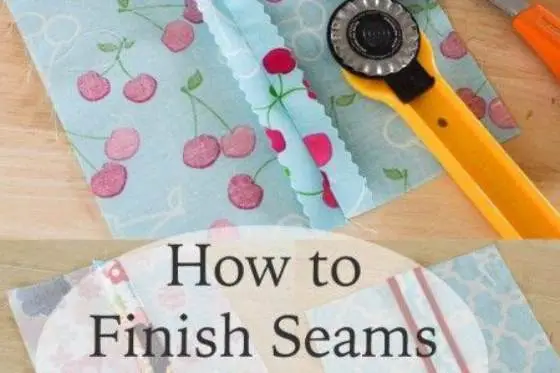
A zigzag stitch is the fastest way to finish seams without a serger, and it works on almost any fabric you sew at home. The needle swings side to side as it moves forward, so the thread loops over the raw edge instead of running along it. Start with a width of 3 to 4 mm and a length of 2 to 3 mm. Sew a test line on a scrap of the same fabric first.
Sew so the right-hand swing of the needle lands just off the fabric edge, and the thread wraps the last few fibres as it turns. Press the seam open first, or press both allowances to one side and finish them together. Medium-weight cotton takes this finish well, and most knits do too, since the stitch stretches with the fabric.
Many machines also carry a dedicated overcast stitch, which mixes a straight stitch with a slanted one and sits closer to a serger edge. Check your machine's manual for its overcast stitch width range and the presser foot recommended for overcasting. Next up is a finish that needs no machine at all, and it takes less than a minute a seam.
Pinked Edges: The Fastest Finish for Light Wovens
Pinking shears cut a zigzag edge into the seam allowance, and that zigzag is what slows fraying on woven fabric. Each little point breaks the grid of threads that lets a raw edge unravel. Loose threads stop short instead of running the length of the seam. You cut after you sew, right along the edge of the allowance, and the job is done in one pass. We go through how to thread a sewing machine step by step elsewhere on the site.
This finish suits light, tightly woven fabrics best: cotton lawn, crisp shirting and silk. Skip it on knits. Knit edges curl and stretch rather than fraying in straight lines, so the zigzag cut does nothing to stop that. Loosely woven linen or raw silk defeat it too, since the points shed threads after a few washes.
Buy shears made for fabric and keep them off paper. Sharp, branded shears are the difference between a clean zigzag and a chewed edge. Look for an 8 in (20 cm) pair with stainless steel blades that close cleanly along the whole tooth. Hold the shears square to the fabric and cut in smooth, full strokes, moving the cloth rather than snipping in short bites. When the fabric is too fine for even a pinked edge to stay put, the next finish hides the edge altogether.

Fiskars 8" Orange-Handled Pinking Shears for Fabric Cutting & Sewing
Cuts a clean zigzag along your fabric edge so light wovens stop fraying without a serger, and the 8 in blades run tip to tip across the whole tooth.
French Seams: A Clean Finish for Sheer Fabric
The French seam sews the seam twice and hides the raw edges inside a narrow tube of fabric, so nothing frays and nothing shows. It suits sheer and lightweight wovens best: voile, chiffon, silk and lawn, where a zigzag edge would show through or add bulk. This seam uses more allowance than a plain seam, so check your pattern leaves at least 5/8 in (16 mm) before you start. We go through choosing finishes by fabric type step by step elsewhere on the site.
It feels backwards the first time, because the first pass is sewn with the wrong sides together. Iron the seam after each pass, and the second pass folds the raw edges out of sight. A narrow French seam looks neat from both sides. That is why it suits blouses and lingerie, where the inside of the garment is on show.
Trimming between the two passes is the step beginners skip, and skipping it is what makes the finished seam lumpy. A 3/8 in (10 mm) first pass, trimmed to half its width, leaves a slim tube after the second pass. That 1/4 in (6 mm) second stitch traps the raw edges fully inside it. Sew slowly on the second pass and keep the folded edge lined up with the needle, since a wobble lets raw threads peek out.
- Place the fabric wrong sides together and sew 3/8 in (10 mm) from the edge.
- Trim the allowance to half its width and press the seam to one side.
- Fold the fabric right sides together, press the fold, and sew 1/4 in (6 mm) from the folded edge.
- Press the finished seam to one side and check no raw threads show.
Your home machine can wrap a raw edge almost as neatly as a serger. The trick is matching the finish to the fabric.
Flat-Felled Seams: Strength for Jeans and Shirts
Flat-felled seams fold one allowance over the other and topstitch it flat, so the seam is strong, smooth and finished in one go. Jeans legs and tailored shirt shoulders carry this seam, built for places that take wear and washing. Topstitching shows on the right side, so match your thread and keep the line straight, since a wobble is the first thing anyone sees. We go through hiding an invisible zipper step by step elsewhere on the site.
Start right sides together at 5/8 in (16 mm), then trim one allowance to half its width. Push both allowances to one side, fold the wider one under itself so its raw edge hides, and topstitch close to the folded edge. Topstitch a second row 1/4 in (6 mm) from the first for extra strength and the classic jeans look. Use a 90/14 needle and a heavier topstitch thread for denim, and lengthen the stitch to 3 mm so the topstitching sits neatly.
Straight seams on medium to heavy fabric suit it best, and curves do not, since the folded layers will not lie flat. On a curve, a mock flat fell works. Zigzag one edge and trim the other to 1/4 in (6 mm). Press both to one side and topstitch 1/4 in (6 mm) from the seam. Close to the real thing, it sews in half the time. Save the true flat fell for straight runs, and let the mock version handle the rest.
Bound Edges: Bias Tape for Curves and Linings
Binding wraps a strip of fabric around the raw edge and stitches it down, so the edge is covered rather than stitched over. A Hong Kong finish binds each allowance on its own, and it is the prettiest inside finish on an unlined jacket. Ready-made bias tape works, and cutting your own on the bias gives a binding that bends around curves without puckering.
Cut the binding 1 1/4 to 1 1/2 in (3 to 4 cm) wide for a Hong Kong finish. Fold it around the allowance and stitch in the ditch from the right side. Or sew the tape to the edge, wrap it to the back and stitch it down by hand. No stitching shows at all. Binding adds a little bulk, so it suits jackets, bags and quilts better than fine blouses, where a French seam stays slimmer.
Save binding for the places where the inside of a garment is meant to be seen. Edges that curve too much for a folded finish suit it too. Contrast binding turns a plain lining into a detail, and a matching one disappears into the garment. Slow work suits the pieces you care about, so use a zigzag on the everyday seams.
Matching the Finish: Which Method Suits Your Fabric
Match the finish to the fabric first and to your patience second. Fighting the cloth makes a finish look worse than a plain one. A slow finish you never use is no finish at all. Light wovens take pinking or a French seam, fraying wovens need a zigzag or overcast stitch, and heavy cloth earns a flat-felled seam. Knits want a stretch stitch, never a folded seam that cannot give. Denim wants a seam that takes a beating.
When two finishes both fit, pick the one you will actually sew. The zigzag takes a minute a seam, a French seam takes five, and a bound edge can take the evening. The garment that gets finished beats the one waiting for a perfect seam. Start with the quick finish and save the slow ones for the pieces you love. A finish you dread is a finish you skip, so let your patience set the pace.
With a good overcast stitch and a foot to match, your machine covers most of this page on its own. The rest is practice, and a scrap bin full of test seams.
| Finish | Best fabric | Watch out for |
|---|---|---|
| Zigzag or overcast stitch | Almost any woven or knit | Can pucker light fabric |
| Pinked edge | Light, tightly woven fabric | Frays on loose weaves |
| French seam | Sheer, lightweight wovens | Needs 5/8 in (16 mm) allowance |
| Flat-felled seam | Denim, canvas, shirting | Straight seams only |
| Bound edge | Jackets, bags, curved edges | Adds bulk, slow to sew |
For most home sewing, the zigzag and overcast stitch does the job. Save French and flat-felled seams for the fabrics that earn them.
Still wondering?
Can I finish seams without a serger on any sewing machine?
Yes, if your machine sews a zigzag stitch, and most home machines do. A zigzag or overcast stitch finishes the edge, and an overcasting foot keeps it flat. French and flat-felled seams need only a straight stitch, so even a basic machine handles them.
Which finish is best for stretchy knit fabric?
A zigzag or overcast stitch, since both stretch with the fabric instead of snapping. Sew the seam with a stretch stitch or a narrow zigzag, then finish the edge with a wider zigzag. Skip French and flat-felled seams on knits, since the folded layers cannot stretch.
Do pinking shears stop fraying completely?
No, they only slow it down on tightly woven fabric. The zigzag cut breaks the threads that unravel, but a hard-fraying cloth will still shed after several washes. Use a zigzag stitch as well on anything that frays badly.
Why does my zigzag finish pucker the edge?
The stitch is usually too narrow or too tight for the fabric, so the thread pulls the edge in as it wraps. Widen the stitch and loosen the top tension a touch. An overcasting foot also helps, since its bar holds the edge flat while you sew.