Sewing machine not feeding fabric: six checks that fix it
Your sewing machine is not feeding fabric because the presser foot is up, the feed dogs are lowered, or the stitch length sits at zero. Lower the foot, raise the feed dogs, and set a normal stitch length. Test on scrap first.
On this page (8 sections)
- The short version
- Sewing machine not feeding fabric: the five-minute check
- Feed dogs: the teeth that move your fabric
- Presser foot: pressure, position and the wrong foot
- Stitch length and needle: small settings that stall the feed
- Lint and thread: cleaning the feed area
- Thick and slippery fabric: when the machine needs extra help
- Still wondering?
Part of our guide on sewing machine skipping stitches
Key figures
- First check
- Presser foot down
- Stitch length test
- Near 2.5 mm
- Feed dog re-engage
- One handwheel turn
- Walking foot stitch
- Near 3.0 mm
- Clean the feed area
- Every few bobbins
The short version
- Lower the presser foot, raise the feed dogs, and set a stitch length above zero before you blame the machine.
- A new needle, a re-thread with the foot up, and a brushed feed area clear most feed faults for free.
- Test on two layers of cotton scrap to tell a machine fault from a fabric problem.
- A walking foot feeds slippery and layered cloth evenly when the standard foot cannot.
- Feed dogs that stay down or a binding handwheel mean a service shop, not more force.
Sewing machine not feeding fabric: the five-minute check
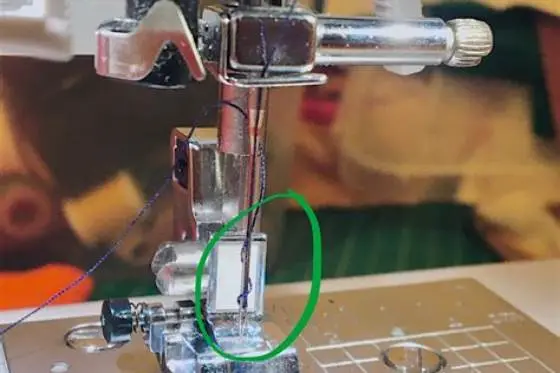
A sewing machine not feeding fabric looks alarming, and the fix is often small. The needle goes up and down, the thread tangles in one spot, and the cloth stays put. Three parts do the moving: the feed dogs below, the presser foot above, and the stitch-length setting that tells them how far to step. When one of the three is off, the fabric stays still. Work through the checks in order, cheapest first, and change one thing at a time.
Start with a fresh needle. A bent or blunt needle drags in the cloth and fights the feed dogs. Fit a new 80/12 universal needle for medium cotton, or the size your fabric calls for. Re-thread with the presser foot up, so the thread seats between the tension discs. Check the bobbin too: the right bobbin for your machine, wound evenly, clicked into place. These three cost nothing and clear a surprising share of feed trouble.
Now test on scrap. Cut two layers of stable woven cotton, about 6 inches (15 cm) square. Lower the presser foot, pick a straight stitch, and set the stitch length near 2.5 mm. Sew a slow seam and watch the cloth. If the scrap moves and your project fabric does not, the machine is fine and the fabric needs a different approach. If the scrap stays still too, keep going through the checks below.
- Fit a new needle and re-thread with the presser foot up.
- Lower the presser foot and pick a straight stitch.
- Raise the feed dogs and lift off any darning plate.
- Brush lint from the feed dogs and the bobbin area.
- Sew a test seam on two layers of cotton scrap.
Feed dogs: the teeth that move your fabric
Feed dogs are the rows of small metal teeth under the needle plate. They rise, grip the cloth, step it forward, then drop and slide back for the next stitch. That cycle repeats with every stitch, and the stitch-length setting decides how big each step is. When the teeth sit below the plate, nothing grips the cloth. That is one of the most common reasons a machine stops feeding. People in this spot often ask about checking feed dogs as well.
Most machines let you lower the feed dogs for free-motion quilting or darning. Look for a lever or switch, often at the back of the machine or behind the free arm. If you quilted or darned recently, check it first. Move the control back to normal sewing, then turn the handwheel one full turn toward you. Some machines need that turn, or a few stitches, before the dogs pop up again. Your manual names the control and the re-engagement step for your model.
Watch the dogs move before you sew. Raise the presser foot, take the fabric out, and turn the handwheel toward you by hand. Never turn the handwheel backwards: some machines jam if the wheel turns the wrong way. You should see the teeth rise above the plate, travel forward, drop, and return. If they stay hidden, they are still lowered or something blocks them. A darning plate can cover the teeth too, so lift it off for normal sewing. If the dogs move but look smooth and shiny, the teeth may be worn, and that is a service-shop job.

Distinctive Even Feed Walking Sewing Machine Presser Foot
Grabs your top fabric and feeds it in sync with the feed dogs, so slippery or layered cloth stops sliding out of line on a low-shank drop-in-bobbin machine.
Presser foot: pressure, position and the wrong foot
The presser foot holds the cloth against the feed dogs. With the foot up, the teeth move under a loose cloth and grip nothing. Lower the lever before every seam, and check it again after threading or changing a foot. A raised presser foot is one of the first things manufacturer manuals tell you to check. It is the easiest fix on this page, and the easiest to miss. Before you commit to anything, it is worth looking at no bobbin thread catching.
Pressure matters too, on machines that let you adjust it. Too little pressure and the cloth slips under the foot. Add too much and the feed dogs stall against a clamped stack. Find the dial on top of the machine, near the needle bar, and move it one click at a time. Test on scrap after each click. Your manual gives the normal range for your model, so use its numbers rather than guessing. Not every machine has this control, so skip this step if yours does not.
The wrong foot can stall a feed as surely as a wrong setting. A darning foot or free-motion foot is built to let cloth move by hand, so it will not feed normally. A zipper foot sits to one side and grips only part of the cloth. Fit the standard all-purpose foot for straight stitching, and seat it fully on the shank. If the foot wobbles or sits crooked, remove it and clip it back on until it sits square. A foot that is not seated right presses unevenly.
The feed fault is usually a lever you bumped, not a part that broke.
Stitch length and needle: small settings that stall the feed
A stitch length of zero means the feed dogs step nowhere. The needle punches the same spot, the thread knots into a nest, and the cloth never moves. Check the dial or the screen and pick a positive length. A straight stitch of medium length suits medium cotton. Lengthen it for thick cloth, shorten it for fine cloth. If the fabric barely creeps forward, lengthen the stitch one step and test again. The right length shows in the seam: even stitches, evenly spaced.
A damaged needle fights the feed in a different way. A bent needle drags, a blunt needle pushes cloth into the needle plate, and a wrong-size needle can snag the weave. Change the needle before you blame the machine. Use a fresh 80/12 universal for medium cotton, a 70/10 or finer needle for lightweight cloth, or a ballpoint for knits. Slide the needle up as far as it goes, flat side to the back, and tighten the screw. Sew a short seam and look for smooth, even stitches.
Threading and the bobbin round out the cheap fixes. Re-thread from the spool with the presser foot up, following every guide, and seat the thread between the tension discs. A thread that missed a guide can tug the cloth sideways and stall the feed. Fit the bobbin your manual names, wound evenly with 50 wt thread, and click the case home. If the bobbin case sits crooked, the hook cannot catch the thread cleanly. These checks take two minutes and rule out several causes on this page.
| What you see | Likely cause | Fix first |
|---|---|---|
| Fabric stays put, needle punches one spot | Stitch length at zero | Set a positive stitch length |
| Fabric creeps, stitches uneven | Presser-foot pressure too light | Raise pressure one click, test on scrap |
| Top layer shifts ahead | Slippery or layered fabric | Fit a walking foot |
| Fabric stalls on thick seams | Stack too thick for the foot | Slow down, lengthen the stitch, use a walking foot |
Lint and thread: cleaning the feed area
Lint packs around the feed dogs and the bobbin area with every seam. The teeth lose their bite, the bobbin case drags, and the cloth stops moving. Unplug the machine first, then take out the needle, the presser foot, and the needle plate. Brush the teeth with the stiff brush that came with the machine, working along the rows rather than across them. Use a soft paintbrush for the corners a stiff brush cannot reach.
Look for thread as well as lint. A loop of thread wound round the feed dogs or the bobbin hook can jam the whole feed. Pick it out with tweezers and turn the handwheel by hand to check the motion is free. Wipe the bobbin area with a dry cloth. Add one drop of oil only where your manual says to oil. Too much oil attracts more lint, so keep it light. Put the plate back and re-thread.
Clean on a schedule, instead of waiting for trouble. Machines that sew most days need the feed area brushed out every few bobbins. A machine that sews once a month needs it before each project. Lint builds fastest with cotton and fleece, which shed the most fibre. Keep the brush beside the machine so the job takes a minute. Clean teeth feed evenly, and the job is the cheapest maintenance your machine gets.
Thick and slippery fabric: when the machine needs extra help
Some cloth defeats a standard feed even when the machine is fine. Thick stacks of denim or canvas can stall under the foot, and slippery satin slides ahead of the feed dogs. Stretchy knits grow longer as they feed, and napped velvet creeps the other way. The machine is not broken: the cloth needs a different grip. Test with two layers of plain cotton first. If cotton feeds and your project cloth does not, the fabric is the problem.
A walking foot feeds the top layer at the same pace as the feed dogs move the bottom layer. It carries its own small feed teeth on top, so layers stop shifting against each other. Fit it for quilts, matching plaids, satin, knits, and thick stacks, and set the stitch length near 3.0 mm for the extra grip. Clip it on with the fork over the needle clamp screw, and try it on spare cloth first. Skip it for free-motion quilting and sharp curves, where a standard foot gives better control.
If none of this helps, the fault may sit deeper. Feed dogs that stay down after the lever moves, a handwheel that binds, or a grinding noise all point past home fixes. Stop sewing and take the machine to a service shop rather than forcing it. Tell the technician what you checked, in order, so the repair starts from facts.
Still wondering?
Why does my sewing machine stitch in one place?
The stitch length is at zero, or the feed dogs are lowered. Set a positive stitch length and raise the feed dogs, then turn the handwheel one full turn toward you. Test on scrap before you sew your project.
How do I know if my feed dogs are up?
Raise the presser foot and turn the handwheel toward you by hand. The teeth should rise above the needle plate, step forward, drop, and return. If they stay below the plate, the feed-dog control is still set for free-motion work.
Can lint really stop fabric from feeding?
Yes. Lint packs between the feed dog teeth and around the bobbin case, so the teeth lose their grip. Unplug the machine, lift the needle plate, and brush the teeth along the rows. Clean the feed area every few bobbins.
Why does my fabric feed on cotton but not on satin?
Satin slides under a standard foot while the feed dogs pull the bottom layer, so the layers move at different speeds. A walking foot grips the top layer and feeds it at the same pace. A longer stitch near 3.0 mm helps too.