Bobbin Thread Not Catching? Six Checks Before You Call the Shop
Your bobbin thread is not catching because the hook never meets the loop of top thread it must grab. Bent needles, missed take-up levers, wrong bobbins, or lint in the hook race can stop that loop forming. Start with the needle.
On this page (8 sections)
Part of our guide on sewing machine fabric feed issue
Key figures
- First fix
- New universal 80/12 needle
- Needle life
- About 8 hours of sewing
- Thread tails
- 4 to 6 inches (10 to 15 cm)
- Top tension
- Middle of the dial, often 4
- Bobbin classes
- Class 15, 66, or 15J
The short version
- Fit a new universal 80/12 needle first, flat side to the back and pushed fully up.
- Re-thread with the presser foot up so the thread seats between the tension discs.
- Match the bobbin class to your model and pass the thread under the tension spring.
- Brush lint from the hook race monthly; leave timing to a repair shop.
Bobbin thread not catching: what the hook is missing
A lockstitch forms when two threads meet inside the fabric. The needle carries the top thread down, and as it rises a small loop opens behind the eye, in the scooped hollow called the scarf. The hook, a pointed steel beak, sweeps through that loop and drags it around the bobbin. The take-up lever then pulls the join up into the cloth. Break any link in that chain and the needle comes back up empty.
That picture explains why the bobbin looks guilty when it is not. The bobbin thread only appears because the hook caught a loop of upper thread and carried it around the case. Without that loop, the hook has nothing to catch. Most of the time the fault sits on top of the machine, in the needle or the thread path. The bobbin itself causes the trouble less often than sewists expect.
Start with one test before you change anything. Hold the top thread tail in your left hand and turn the handwheel toward you, by hand, through one full turn. Watch the needle eye, not the wheel. The loop of bobbin thread should rise through the needle plate as the needle comes up. Pull the top thread gently and the loop follows. That result tells you the hook and the needle are lined up, and the fault lies in the thread path or the tension. No loop at all points to the needle, the bobbin, or the timing.
| What you see | Where the fault sits | Check first |
|---|---|---|
| Needle moves, no thread comes up | Needle, bobbin or thread path | New needle, then re-thread |
| Thread comes up by hand but not while sewing | Thread path or tension | Presser foot up while threading |
| Loop forms then drops at once | Hook timing or clearance | Book a service shop |
Needle first: the cheapest fix
Fit a new needle before you touch anything else. No bent or blunt needle can form the loop the hook needs. One used for hours can look fine while its point is dull. Swap in a fresh universal 80/12 for ordinary cotton and medium-weight wovens. Change to a 90/14 for denim and a 75/11 for fine knits. It costs little and rules out the most common cause in one move. The other half of this decision is bobbin thread missed.
Turn the needle the right way round. Most home machines take a 130/705H needle, also sold as 15x1, with the flat side of the shank facing the back of the machine. Loosen the clamp screw, push the needle up into the bar as far as it will go, then tighten the screw firmly. One sitting a fraction low puts the scarf below the hook path, so the hook sweeps past the loop. Your manual shows the flat-side direction for your model, so check it rather than guessing. A round-shank needle has no flat side, so check your manual for which way the groove faces.
Test the old needle before you throw it away. Lay it flat-side down on a smooth surface and look along its length. The straight one lies flat with an even gap under the shank. The bent one rocks, or shows more gap at one end than the other. Replace any needle that rocks, and replace the needle after about eight hours of sewing even if it still looks straight.

SCHMETZ Universal (130/705 H) Household Sewing Machine Needles
If your bobbin thread won't catch, a bent or burred needle is the usual culprit, and this fresh 130/705 H size 80/12 card gives you 10 needles to swap straight in.
Thread path: re-thread with the foot up
Re-thread the top path from scratch, with the presser foot up. Raising the foot opens the tension discs. Thread routed while the foot is down rides on top of the discs instead of seating between them. That leaves the top thread loose from the first stitch, and the loop it forms is too slack for the hook to catch. Thread the spool pin, the guides, and the tension discs in the order your manual numbers them. Miss one guide and the path fails the same way.
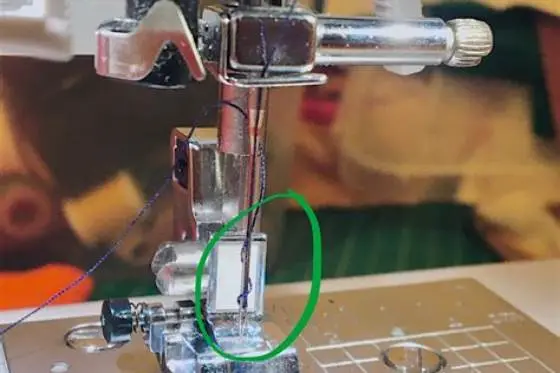
Do not skip the take-up lever. Pull the thread up into the slot. Slip it into the eye of the lever from right to left, until it sits inside the hook. The lever lifts the thread after each stitch and pulls the join up into the cloth. Thread that missed the lever leaves slack at the needle, and the loop opens in the wrong place. Raise the needle first, so the lever sits clear of its slot.
Finish with the draw-up test from the first section. Hold the top thread tail, turn the handwheel toward you through one full turn, and pull the loop of bobbin thread up through the plate. Leave tails of four to six inches (10 to 15 cm) under the foot and toward the back. If the loop comes up by hand but not while you sew, the path is right and the tension needs a look. Set the top tension dial to the middle and test on scrap.
- Hold the top thread tail in your left hand, with a few inches of slack.
- Turn the handwheel toward you through one full turn, by hand.
- Pull the top thread gently until a loop of bobbin thread rises through the plate.
- Draw the loop clear and pull both tails under the foot toward the back.
The bobbin is almost never the villain here. The hook needs a loop of top thread to grab, and five cheap faults stop that loop forming.
Bobbin: the right class, the right way round
Use the bobbin class your machine asks for. Class 15 and Class 66 bobbins look almost the same, and one will drop into a machine built for the other. The wrong one sits at the wrong height, so the hook passes above or below the thread it should catch. Most Brother home machines take a Class 15 bobbin, but confirm the class in your model's manual or parts list. Bobbin classes differ between models, and the manual settles which one yours takes. Read the parts list rather than trusting the look of the bobbin.
Drop the bobbin in the right way round. On most top-loading machines the thread should unwind counterclockwise, forming the shape of a letter P when you look down at it. The backward q shape means the bobbin is flipped. Your manual has the final say, since a few models wind the other way. Guide the thread through the slot in the case wall and under the flat tension spring, until you feel a slight tug when you pull. Thread above the spring gets no tension, so the bobbin unwinds freely.
Wind the bobbin well, or rewind it if you doubt it. Thread must pass through the pre-tension disc near the winder spindle, or the bobbin winds loose and lumpy. The loose one feeds thread in jerks, and a bobbin wound past full rubs against the case. Wind steadily and stop when the bobbin is full. If the bobbin is cracked, chipped, or bent, replace it. The damaged one wobbles in the case and the hook cannot meet its thread twice in the same place.
Lint: clean the hook race
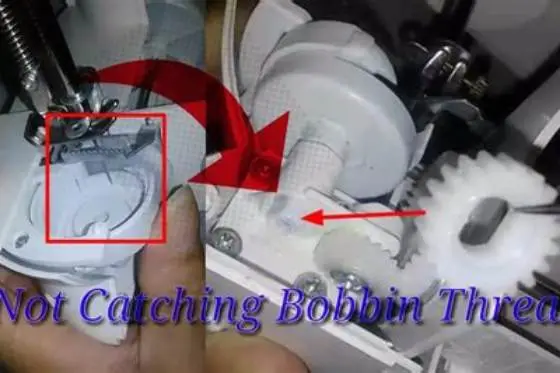
Lint is the quietest cause on this list. Every stitch sheds fibre, and the fluff packs into the hook race, under the needle plate, and inside the bobbin case. That wad lifts the bobbin case a fraction out of place, or holds the thread off the tension spring. The hook then misses the loop, or reaches it late.
Switch the machine off and take the needle plate off. Lift the bobbin case out and brush the race with the small brush that came with the machine, or a soft paintbrush. Pick out thread chips with tweezers. Clear lint around the feed dogs too, since it stops the fabric moving and the stitch forming cleanly. Do not blow into the race with your mouth, since damp breath adds moisture to the lint. Brush and tweezers do the job without pushing fluff deeper.
Put the case back until it clicks, with its positioning finger in the notch at the top of the race. Reseat the needle plate and run the draw-up test again. If the loop now rises, lint was the fault, and a monthly brush-out will keep it away. Machines used for quilting or fleece need cleaning more often, since those fibres shed fast.
Timing: when to stop and call the shop
Timing is the last suspect, not the first. The hook must pass the scarf just after the needle starts to rise. Hard jams, needle strikes on pins, or a yank on stuck fabric can knock that meeting out of place. Signs that often point to timing include a loop that forms and drops at once, or stitches that skip in a regular pattern. The pattern varies by machine, so only a service visit can confirm it. One skipped stitch now and then is not a timing fault.
Check the bobbin winder spindle before you blame timing. On Singer machines the spindle must sit pushed to the left, or the needle drive stays disengaged and the needle does not move at all. Push it left until it clicks. The same check applies on any machine with a winder that engages the needle drive: if nothing moves, the winder is still engaged. One that sews air with the needle moving has a different fault, and the earlier checks are where it sits.
Leave timing to a repair shop. Setting the hook needs the needle bar height and the hook clearance set together. One wrong move can bend the hook or score the race. If the needle, thread path, bobbin, and race all check out, no home fix is left. Book a service visit and tell the shop your checks, in order, so the technician starts at timing. If you are unsure which symptom you have, try the Sewing Machine Doctor tool on this site. Click where the trouble is and get the fix. Test a timed machine on scrap: one clean lockstitch from the first stitch.
Still wondering?
Why does my bobbin thread come up by hand but not while I sew?
The hook and needle are lined up, so the fault sits in the thread path or the tension. Re-thread with the presser foot up and check the take-up lever.
Can the wrong bobbin stop the thread catching?
Yes. Class 15 and Class 66 bobbins look alike but sit at different heights, and the hook then passes above or below the thread. Dropping into the hole is not proof it is the right one.
How often should I change the needle?
Change it after about eight hours of sewing, and any time it bends, breaks, or sews skipped stitches. The fresh needle is the cheapest fix on this page. Keep a pack of universal 80/12 needles in your sewing box.
Is it always a timing problem?
No. Timing is the rarest cause, and most cases end at the needle, the thread path, the bobbin, or lint. Suspect timing only when the loop forms and drops at once, or stitches skip in a regular pattern. That job belongs to a repair shop.