How to Thread a Serger: Loopers First, Needles Last
To thread a serger, raise the presser foot, thread both loopers first, then thread the needles in your manual's order. Follow the colour dots on the machine for each path. Pull every tail to the back, then sew a short test chain before fabric.
On this page (8 sections)
- The short version
- Threading order: why loopers go before needles
- Before you start: foot up, spools set, needles checked
- How to thread a serger, step by step
- Test chain: prove the threading before fabric
- Tie-on shortcut: fast colour change, clear limits
- Fixes: loops, skips and breaks, cheapest first
- Still wondering?
Part of our guide on stitches skipping on machine
Key figures
- Threading order
- Loopers, then needles
- Presser foot
- Up while threading
- Tail length
- About 4 to 6 in
- Test chain
- About 4 in off fabric
- Needle, medium fabric
- 80/12, system per manual
- Serger thread
- Cones, often 50 wt
The short version
- Thread both loopers before either needle, every time.
- Raise the presser foot so thread seats between tension discs.
- Pull each tail to the back before you test the chain.
- Sew the chain off fabric first, then test on scrap.
- Change one tension dial at a time on the scrap.
Threading order: why loopers go before needles
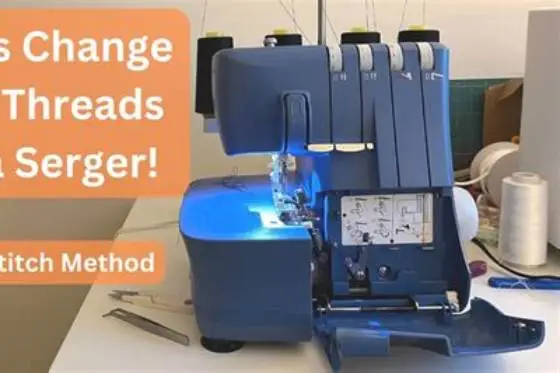
A four-thread serger has four separate paths. Two paths end at the loopers, which wrap thread around the fabric edge, and two paths end at the needles, which pierce the fabric. Each cone feeds one path through its own tension dial and guides. Order decides everything. Slow down here.
Maker manuals agree on the core sequence. Maker guides put both loopers before either needle, and needle order and colour codes change by model. So your manual wins on those details. Sergers must be threaded in the order printed on the machine, and crossed threads cause skipped stitches. That saves unpicking. Guides matter. Dials wait.
Loopers cross the needle path as they move, and thread a needle first and its thread lies across the looper route. The next looper pass can catch, shear or skip that thread, and that is why a broken looper thread means unthreading the needles too. Check twice. Sew once.
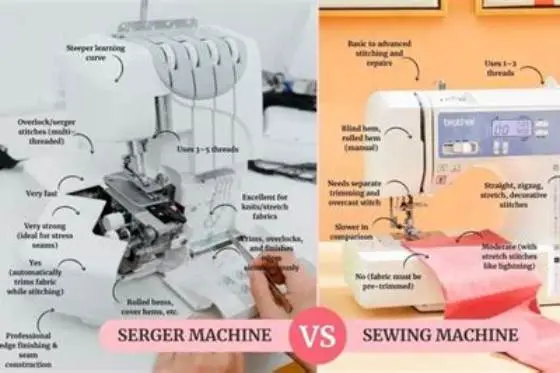
Colour dots help, but colours do not travel between brands, and green means one path on one machine and a different path on another. Follow the dots and numbers printed inside your own machine, and keep the manual open beside you for the first few changes. A quick photo of a correct path helps on the next change. Tails back. Covers closed. When every path sits in its own channel, the loopers and needles meet in the right place and the chain forms without a fight. People in this spot often ask about sewing machine vs serger as well.
Before you start: foot up, spools set, needles checked
Switch the machine off before you thread or change needles, and raise the thread stand to full height and seat each cone on its pin. Each holder should sit above its spool pin so thread feeds straight up. Open the front cover so you can see the looper paths clearly. Foot up. Always. Scrap first. Every time.
Raise the presser foot and leave it up while you thread, and lifting the lever opens the tension discs beside each dial. Thread then drops between the discs instead of riding outside them, and thread outside the discs sews loose and loopy, however you set the dials. Knots lie. Chains tell. Watch the chain form.
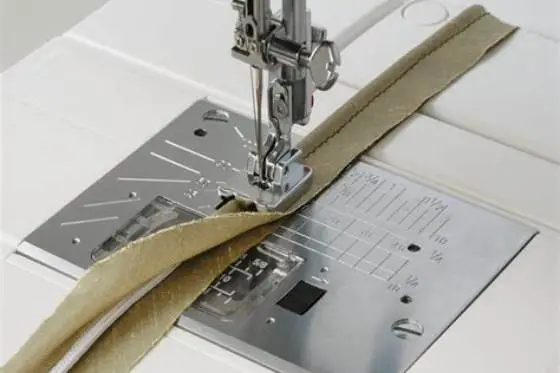
Turn the handwheel toward you until needles sit at the top, and check both needles for bends, burrs or a dull point. A bent needle can hit a looper and throw timing out, and fit fresh needles in the system and size your manual names. Such as 80/12 for medium fabric. The Needle & Thread Finder matches needle and thread to your fabric when you are unsure which size suits it. Fresh needle. Fresh start. For the detail, see our notes on presser foot for piping sewing machine.
Serger thread on cones suits the loopers best, and cones hold far more thread than small spools and feed smoothly at speed. Ordinary 50 wt all-purpose thread can run in the needles for a short job. Keep tweezers close, since looper eyes sit deep inside the machine. A few slow handwheel turns with tails held lightly show whether all four threads wrap together around the stitch finger.
- Have ready: four cones, tweezers and small scissors.
- Have ready: fresh needles in your manual's system.
- Have ready: scrap fabric in two layers for testing.
- Have ready: manual open at the threading diagram.

Schmetz ELX705 Needles - Size 80/12
Puts five fresh ELx705 needles in size 80/12 in your hand before you re-thread, so a skipped stitch stops looking like a threading fault and you rule needles out first.
How to thread a serger, step by step
Work one path at a time, from cone to eye. Pull thread up through the stand guide. Then down through the tension dial channel. Hold the thread with both hands and pull it firmly into the discs, and some models use a release button beside the dial. So hold that while you pass thread through. One path at a time. Stop. Look. Then sew.
Thread the upper looper first on most home models, then the lower looper. Follow each colour dot in turn and use tweezers at the looper eye, and turn the handwheel toward you to bring each eye into reach. Keep looper threads from crossing each other inside the machine. Order first. Dials later. Needles last. No shortcuts.
Needles come last, in the order your manual gives. Needle order varies by model, so the diagram inside your machine is the authority. Pass each needle thread through its guides. Then through the eye front to back, or as your diagram shows. Pull gently. Never force. Knot snags? Stop pulling.
Pull every tail out to the back. About 4 to 6 in (10 to 15 cm) long, and lay tails under the presser foot toward the back of the machine. Close the covers and lower any knife you raised, and short tails can pull back inside and jam the first stitches. A short seam on two layers of project scrap tells you more about balance than any dial number on the machine front.
- Switch off, raise the thread stand and open the front cover.
- Raise the presser foot and turn needles to the top.
- Thread the upper looper path, cone to looper eye.
- Thread the lower looper path, cone to looper eye.
- Thread the needles in your manual's order, guides then eyes.
- Pull all tails to the back, 4 to 6 in long.
- Close covers, lower the foot and turn the handwheel slowly.
Most serger jams start before the first stitch, in the threading order.
Test chain: prove the threading before fabric
Hold the tails lightly and turn the handwheel toward you a few turns, and threads should entwine around the stitch finger and form a chain. No chain means one path missed a guide or an eye, and recheck that path before you touch any tension dial. No chain, no sewing.
Sew about 4 in (10 cm) of chain with no fabric under the foot. A sound chain holds together and pulls out in one piece. Gaps, loose loops or a chain that falls apart point to threading, not tension. Stop, lift the foot and trace each thread from cone to eye again. Cones up. Stand high.
Place two layers of scrap under the foot and sew a short seam, and use the same fabric you plan to sew. Folded as the seam will sit. Look at both sides of the stitch line when you finish, and balanced stitches meet at the fabric edge, with no loops hanging past it. Fresh chain. Clean start.
Change one dial at a time, then sew again on scrap, and loose loops on the underside point to the lower looper dial. Loose loops on top point to the upper looper dial. Small moves matter, so turn a dial a little and test again.
| What you see | Likely cause | Try this |
|---|---|---|
| No chain forms | Missed guide or eye | Retrace each path |
| Loops underneath | Lower looper too loose | Tighten that dial slightly |
| Loops on top | Upper looper too loose | Tighten that dial slightly |
| Flat, even edge | Threading and tension right | Sew the project |
Tie-on shortcut: fast colour change, clear limits
Tie-on changes colour without threading every guide again. Cut each old thread near its cone, behind the stand guides. Tie the new thread to the old with a small firm knot. Trim knot tails short so the knot slides through guides cleanly. Speed tempts. Proof wins.
Raise the presser foot and note your tension settings. Pull each thread through gently, one path at a time. Stop needle threads just before the needle eye, then cut the knot off. Thread the needle eye by hand, since knots rarely pass through it. Eyes deep. Tweezers help.
Knots that snag tell you to stop and rethread properly. Thick or fluffy thread can jam at a guide or tension disc. A knot pulled hard through a looper eye can bend fine parts. Tie-on is a widely used shortcut among home serger owners. It fails when knots snag or thread runs thick.
Use tie-on when the machine sews well and only colour changes. Skip it after a break, a jam or a missed guide. A full re-thread costs a few minutes and proves every path. That proof matters more than speed when stitches already look wrong. Keep the old cones handy until the new chain sews clean.
- no guides to rethread
- keeps working tension settings
- fast colour swaps
- knots can snag guides
- needle eyes need hand threading
- hides a missed guide
Fixes: loops, skips and breaks, cheapest first
Loopy seams usually trace back to threading, not dials. Lift the foot and reseat each thread between its tension discs. Pull thread with both hands until you feel it settle in. Sew a fresh test chain and look for a linked, even chain. Cheapest check first.
Skipped stitches often mean a tired or wrong needle. Fit a fresh needle in the system your manual names. Many home sergers take standard 130/705 H needles. Coverstitch models and some sergers need ELx705 needles instead. Check your manual for the needle system and size before you buy. Test seam tells truth. Pull each thread firmly into its discs, foot raised. That small move separates a balanced seam from a loopy mess.
Thread breaks at the same spot suggest a snag on the path. Run a fingertip along guides and the needle plate for burrs. Clean lint from around loopers and feed dogs with a small brush. Lint packs tight in a serger and can deflect thread and needles.
A looper break needs the full order again. Cut needle threads out, rethread the looper, then rethread both needles. Sew over the last 1 to 2 in (2.5 to 5 cm) of stitching to rejoin. Repeated breaks, needle hits or grinding noises mean a service shop, since timing may be out.
- Loopy seam: reseat thread in tension discs, foot up.
- Skipped stitches: fit a fresh needle, right system.
- Repeated breaks: clean lint, check guides for burrs.
- Needle hits looper: stop and book a service.
Still wondering?
Why must loopers be threaded before needles?
Loopers cross the needle path as they move around the stitch. Needle thread threaded first lies across that route and gets caught. Maker guides put loopers first. Follow your own manual for needle order after that.
Can I use regular sewing machine needles in a serger?
Some home sergers take standard 130/705 H needles, the same system as many sewing machines. Others, and most coverstitch machines, need ELx705 needles. Check your manual for the needle system and size. Wrong needles skip stitches and can hit loopers.
What if my serger will not form a chain?
One thread has missed a guide, a tension disc or an eye. Lift the presser foot and trace each path from cone to eye. Pull tails to the back and turn the handwheel slowly. A linked chain means threading is right.
How long should thread tails be after threading?
About 4 to 6 in (10 to 15 cm) behind the presser foot works well. Anything shorter can pull back inside the machine and jam the first stitches. Lay tails toward the back before you sew.
Does tie-on work for every thread change?
Tie-on suits colour swaps on a machine that already sews well. Knots can snag on thick or fluffy thread and at needle eyes. Cut needle knots off and thread eyes by hand. Rethread fully after breaks or jams.