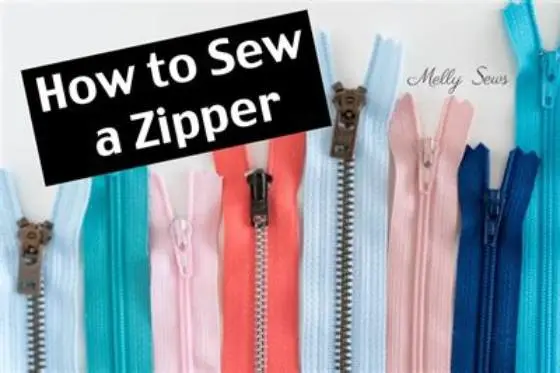
How to Sew an Invisible Zipper So the Seam Disappears
Iron the coil flat, pin the zipper face down on the seam line with the teeth on the line, fit an invisible zipper foot, and stitch close to the coil from the top down on each side. Then close the zipper, sew the rest of the seam below it, and press from the wrong side.
On this page (8 sections)
- The short version
- The invisible zipper, explained: what makes it disappear
- The foot that does the work: invisible zipper foot
- How to sew an invisible zipper, step by step
- The top and the bottom: where invisible zips go wrong
- Fabric by fabric: settings that keep the seam flat
- Fixes when the zipper shows: puckers, waves and gaps
- Still wondering?
Part of our guide on beginner sewing courses
Key figures
- Stitch length
- 2.5 mm
- Lost length
- 1 in (2.5 cm)
- Needle position
- Centre, between grooves
- Seam allowance
- 5/8 in (1.5 cm)
- Needle, medium
- 80/12 universal
- Press first
- Coil open, then pin
The short version
- Iron the coil flat first, or it will not sit in the foot's groove.
- Keep the needle close to the coil, or a ridge will show on the seam.
- Sew one side, close the zipper, and only then pin the second side.
- Buy the zipper longer than the opening, not the same length.
The invisible zipper, explained: what makes it disappear
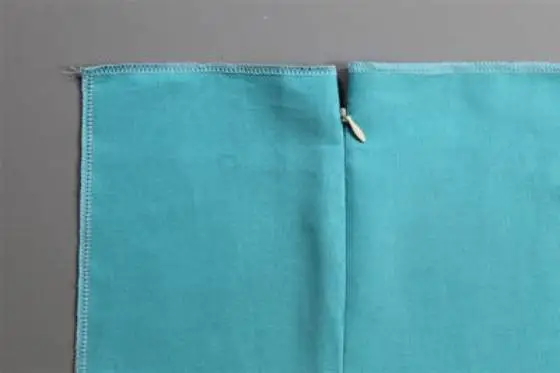
An invisible zipper hides because its coil rolls under the tape, so the closed seam shows only a fine line and the small pull. Regular zippers put their teeth on show, and lapped zippers show a fold of fabric over the teeth. Use it for dresses, skirts and cushions, anywhere a zipper would spoil a clean line. It is not the strongest zipper, and it does not suit heavy coats or bags.
Two parts matter here, so learn their names. The coil is the row of fine teeth that mesh together. Beside it sits the tape, the fabric strip you stitch to the garment. The pull slides the coil open and shut, and the top stop keeps it on the tape. Zippers are sold by tape length. You lose about 1 in (2.5 cm) of it, because the pull sits in the way at the bottom.
Buy the zipper by length and colour, not by brand alone. Measure the opening in the seam. Buy a zipper longer than the opening, so the pull clears the bottom. Match the colour to the fabric in daylight; a shade darker shows less than a shade lighter. Too short a zipper leaves a gap at the bottom of the seam, and no stitching fixes that.
The foot that does the work: invisible zipper foot
The invisible zipper foot is what makes the job easy. Its underside has two grooves, one for each side of the zipper, and each groove holds the coil upright and out of the needle's way. That lets the needle stitch close to the coil, so the fabric rolls over the teeth and hides them. Stitch further from the coil and the seam shows a ridge, because the coil cannot roll back flat. We go through hiding an invisible zipper step by step elsewhere on the site.
Check the foot fits your machine before you buy one. Most home machines are low shank, which means 1/2 in (13 mm) from the centre of the presser foot screw to the needle plate. Measure yours with a ruler if you are not sure. Low shank feet do not fit high shank or slant shank machines, and a snap-on foot needs a snap-on ankle. Your machine manual names the shank type.
Fit the foot and set the needle to the centre position. The needle must drop through the hole in the middle of the foot, between the two grooves, or it will strike the foot. Set a straight stitch at 2.5 mm for medium fabric, and test on a scrap first. In a pinch a regular zipper foot can sew an invisible zipper, but the result shows more, because nothing holds the coil upright.

Concealed Invisible Zipper Foot Fits All Low Shank Snap-On Singer Brother
Holds an invisible zipper in the parallel grooves while fitting low-shank snap-on domestic machines, as shown by the listed compatibility and grooves.
How to sew an invisible zipper, step by step
Prepare the seam before the zipper goes near it. Stay-stitch the seam line if the fabric frays or stretches, and finish the raw edges. Leave the seam unsewn along the zipper opening, and mark the seam line on both pieces. The seam line sits 5/8 in (1.5 cm) from the raw edge on most patterns, so the tape edge lines up with it. Those marks guide the tape, so take a minute to get them right. We go through create clean seam finishes at home step by step elsewhere on the site.
Iron the coil flat first. Lay the zipper face up and run the tip of the iron along the coil, pressing it flat and away from the tape. Work from the top stop down to the pull, and keep the iron off the tape itself. Use a press cloth and a medium iron setting on synthetic tape, since high heat can mark it. Curled coils will not sit in the foot's groove, and the stitching will land too far from the teeth.
Stitch one side, then check it before you stitch the other. Pin the right tape to the right fabric piece, right sides together. Baste the tape by hand first when the fabric is slippery, since pins alone may not hold it. Set the tape edge on the seam line, with the top of the coil just below the finished seam line. Fit the coil into the right groove of the foot and stitch from the top down, stopping at the pull. Close the zipper to check the seam lines up, then stitch the left side the same way. Switch to a regular zipper foot and fold the tapes out of the way. Stitch the rest of the seam below the zipper, overlapping the last stitches by a few.
- Stay-stitch the seam line and finish the raw edges.
- Mark the seam line on both fabric pieces.
- Press the coil open with the tip of the iron.
- Pin the right tape to the right piece, right sides together.
- Fit the invisible zipper foot and the coil in the right groove.
- Stitch from the top down, stopping at the pull.
- Close the zipper and check the two sides meet.
- Pin and stitch the left side the same way.
- Switch to a regular zipper foot and stitch the seam below the zipper.
- Press the seam from the wrong side and check the zipper.
The zipper that vanishes is not magic; it is a foot with two grooves and a coil pressed flat.
The top and the bottom: where invisible zips go wrong
Neat work shows at the top of the zipper. Start the coil just below the finished seam line, so the pull sits under the waistband or facing when the garment is done. Pin the tape with the top of the coil a fraction below the line, and backstitch at the top. Start too high and the pull pokes above the seam; start too low and a gap is left.
Most invisible zippers fail at the bottom. You cannot stitch past the pull, so sew the last inch with a regular foot after the zipper is closed. Overlap the new stitching over the end of the zipper stitching by a few stitches, and the join will not show. Gaps at the base usually mean the overlap was missed, or the seam below the zipper drifted off the line.
Check the fit before you press. Close the zipper and look at the seam from the right side. Both sides should meet in a straight line, with no pucker and no step. Match prints or stripes across the seam by pinning the pattern lines together before you pin the tape. Open and close the zipper a few times; it should run smoothly, and the fabric should not catch in the coil. When the zipper catches, move the stitching a fraction further from the coil, never force it.
Fabric by fabric: settings that keep the seam flat
Light fabric needs a light touch. Use a fine needle and a short stitch to stop the seam from puckering. Add a strip of fusible interfacing on the seam allowance to stop a stretchy fabric from growing as you sew. Press the seam allowance before you pin the tape. Wavy fabric stays wavy once the zipper is in.
Heavy fabric needs room. Use a larger needle and a longer stitch to pass through the layers without dragging. Pin the tape at closer intervals so it cannot shift. Thick seams may need the bulk trimmed from the seam allowance, so the zipper can lie flat. Test the full sandwich on a scrap first, tape and all.
Use the table below as a starting point for the three weights you will meet most. Your fabric may want a shorter or longer stitch. Change one thing at a time on a scrap, and keep the setting that sews flat. Knits and slippery synthetics want a ballpoint or stretch needle, sized to the fabric weight. Puckers on a scrap tell you the truth before the garment does.
| Fabric | Needle | Thread | Stitch length |
|---|---|---|---|
| Lightweight lawn or voile | 70/10 universal | 50 wt polyester | 2 mm |
| Medium cotton or linen | 80/12 universal | 50 wt polyester | 2.5 mm |
| Heavy twill or denim | 90/14 universal | 50 wt polyester | 3 mm |
Fixes when the zipper shows: puckers, waves and gaps
Puckers along the zipper mean the fabric moved while you stitched. Usually the stitch was too long for the fabric, or a seam allowance was not pressed flat. Unpick the side that puckers, press the seam allowance flat, and stitch it again a fraction shorter. Pin closer this time, so the tape and the fabric feed together.
Waves in the seam mean the zipper is longer than the opening, or the fabric stretched as you sewed. Measure the opening again and check the zipper against it. If the zipper is too long, shorten it from the top: cut the tape above the pull and stitch a new stop across the coil. If the fabric stretched, a strip of fusible interfacing on the seam allowance stops it next time.
Gaps that will not close mean the stitching landed too far from the coil, or a stitch caught the coil and stopped the pull. Look at the stitching line first. Stitches that land too far from the coil leave a ridge the fabric cannot roll over, so unpick and stitch closer. Stitches through the coil jam the pull, so unpick a few stitches around the jam and try the pull again. When the pull runs free and the seam lies flat, press from the wrong side.
Still wondering?
Can I sew an invisible zipper without the special foot?
Yes, with a regular zipper foot, but the result shows more. The regular foot has no groove to hold the coil upright, so the needle lands further from the teeth and the seam shows a ridge. Borrow or buy the right foot when the zipper has to disappear.
Why does my invisible zipper pucker?
The fabric moved as you stitched, or the stitch was too long for the fabric. Unpick the puckered side, press the seam allowance flat, and stitch it again a fraction shorter, pinning at closer intervals. A strip of fusible interfacing on the seam allowance stops a stretchy fabric growing.
What length invisible zipper do I need?
Measure the opening first. The pull takes about 1 in (2.5 cm) at the bottom, so that much of the tape cannot be stitched. A zipper that is too short leaves a gap at the bottom of the seam.
Why will my invisible zipper not close?
A stitch has caught the coil, or the stitching sits too close to the teeth. Open the zipper and look for a stitch through the coil, then unpick a few stitches around it. When the pull runs free, press the seam from the wrong side and try again. Never force a stuck pull, since a bent coil never runs smooth again.
Do I press an invisible zipper?
Yes, but from the wrong side and never straight onto the coil. Iron the coil flat before you sew, and press the finished seam from the wrong side with a press cloth. Heat straight on the coil can flatten it so it will not mesh.