No hand sewing: how to bind a quilt by machine
Bind your quilt entirely by machine using double-fold binding strips cut 2.25 to 2.5 inches wide depending on batting loft, join strips on the bias pressed flat, and machine-stitch corners with miter folds and joining tails to avoid bulk while keeping stitching hidden.
On this page (8 sections)
- The short version
- Choosing binding width for different batting loft
- Joining strips on the bias and pressing seams flat
- How to attach binding, miter corners, and join tails with no bulk
- Machine-only finish vs hand finish on the back and how to keep stitching hidden
- When self-binding with backing, flange, or bias tape works and what it limits
- How to bind a quilt by machine: step-by-step procedure
- Still wondering?
Part of our guide on sewing machine with quilting features
Key figures
- Binding strip width
- 2.25-2.5 inches
- Bias join seam
- 45 degrees
- Binding fold
- Double-fold
- Machine stitch type
- Straight stitch
- Batting loft effect
- Wider strip needed
The short version
- Cut double-fold binding strips 2.25 to 2.5 inches wide depending on batting thickness.
- Join strips on the bias, pressing seams open to reduce bulk.
- Attach binding by machine with precise mitered corners for neat edges.
- Machine-only finishes exist but hand finishing hides stitches better on the back.
- Self-binding methods work with thin quilts but limit design options.
Choosing binding width for different batting loft
A wider binding strip is necessary for loftier batting. For quilts with low-loft batting under 0.25 inches thick, cut double-fold binding strips about 2.25 inches (5.7 cm) wide. For lofts over 0.25 inches, increase to 2.5 inches (6.4 cm) wide. This ensures your binding covers the edge fully without straining.
The double-fold binding means each strip folds in half lengthwise before attaching. This fold covers both quilt edges and allows room for stitching and a clean finish. If your batting pushes the quilt layers apart more, cutting wider strips compensates so the binding won't pull tight or reveal the batting inside.
Before cutting, measure your quilt's batting loft with a ruler or fabric thickness gauge, especially if you use specialty or handmade batting. The strip width depends directly on this thickness to allow an even fold and straight edges after attachment.
- Low-loft batting: 2.25 inches wide binding strips.
- Medium to high-loft batting: 2.5 inches wide binding strips.
- Always test fold one strip to check coverage before full cutting.

3 Pack Sewing Ruler Sliding Gauge Sewing Measuring Tool Black Metal
Lets you choose the right binding width by checking your quilt's loft with its 0 to 6 inch scale so the binding folds over evenly.
Joining strips on the bias and pressing seams flat
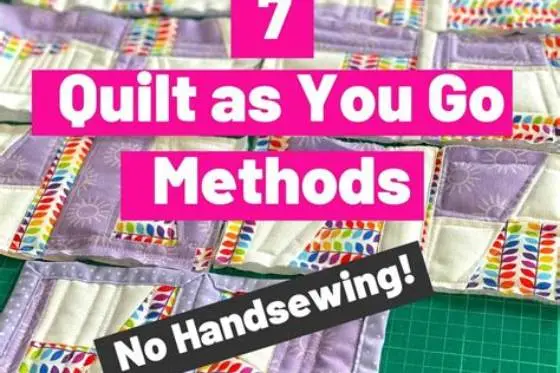
Joining binding strips on the bias (at a 45-degree angle to the fabric grain) creates a longer, more flexible seam. This flexibility lets your binding curve neatly around quilt edges and corners without puckering or bulk. It helps to understand quilt as you go method before going further.
Cut ends of strips diagonally and overlap about 1/4 inch (6 mm), then sew with a narrow 1/4-inch seam allowance. Press the seam open using a warm iron and steam so the seam lies flat. This reduces bulk and prevents lumpiness when binding the quilt.
The bias join also helps your seam stretch gently around curves, important for any curved edge or when wrapping binding around corners. Pressing open is critical; folded seams cause thick lumps and stitching problems later.
- Cut strip ends at 45-degree angle.
- Overlap ends 1/4 inch and pin.
- Sew with 1/4 inch seam allowance.
- Press seam open with iron and steam.
How to attach binding, miter corners, and join tails with no bulk
Attach binding to the quilt front first by machine stitching with a straight stitch 1/4 inch (6 mm) from the edge. Leave a 10-inch (25 cm) tail unsewn at the start to join tails smoothly later. If that sounds like your situation, read up on figuring borders and binding amounts next.
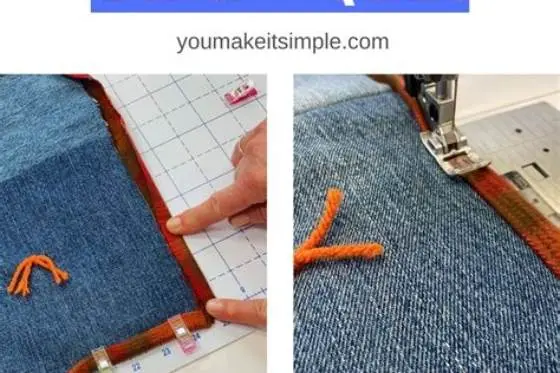
When arriving at corners, stop sewing 1/4 inch before the edge and backstitch. Lift the presser foot and fold the binding up vertically, forming a 45-degree angle. Then fold it down horizontally to align with the next edge, creating a mitered corner. Lower the foot and continue stitching.
To join tails, overlap the loose end with the starting tail on the quilt back, matching seams. Open the binding ends, place right sides together, and sew a diagonal seam at the 45-degree join. Trim excess fabric, press the seam open, then fold the binding back and finish stitching around the quilt edge. This method avoids bulky overlapping layers.
- Start sewing binding with 10-inch tail free.
- Sew to corner, stop 1/4 inch before edge, backstitch.
- Lift foot, fold binding up then down for miter.
- Continue stitching next edge.
- Overlap tails on quilt back, sew diagonal seam right sides together.
- Trim, press seam open, refold binding and finish stitching.
Exact strip widths, bias joining, and mitered corners guide you to bind quilts by machine without hand sewing or bulky seams.
Machine-only finish vs hand finish on the back and how to keep stitching hidden
Binding can be finished entirely by machine with a second straight stitch on the quilt back, sewing the folded edge down. This saves time but leaves visible stitching on the back. We go through choosing the right drape for beds step by step elsewhere on the site.
Alternatively, hand finishing the back with a slipstitch hides all stitching, offering a cleaner look and flexibility if the quilt needs washing or stretching. However, it takes more time and skill.
To keep machine stitching less noticeable on the back, use matching thread colors and stitch close to the fold edge. A narrow stitch length helps prevent puckering. Consider a decorative stitch on the front as a style choice if back stitching is visible.
Decide based on your priorities: quick finish with visible back stitches or neat finish with hand sewn slipstitch. Both hold the binding firmly when done properly.
| Aspect | Machine-only finish | Hand finish on back |
|---|---|---|
| Speed | Fast | Slower |
| Skill level | Basic machine skills | Requires hand sewing skill |
| Appearance back | Visible stitching | No visible stitching |
| Durability | Very durable | Durable but can be adjusted |
- Saves time
- No hand sewing needed
- Visible stitches on back
- Less professional look
When self-binding with backing, flange, or bias tape works and what it limits
Self-binding means using the quilt backing fabric folded over the edges as binding. This works best for thin quilts with low loft batting since folding thick batting causes bulk and uneven edges.
A flange binding uses a narrow strip folded in a way to create a decorative raised edge under the binding. It adds visual interest but requires more fabric and careful sewing.
Bias tape binding uses pre-cut commercial bias tape, convenient for straight edges but less flexible for curves or thick quilts. It limits fabric choice to what's commercially available.
Self-binding and flange methods reduce the need for extra fabric but limit design freedom and may complicate machine-only finishing if layers are uneven. They suit quilts with minimal batting and simple shapes.
- Self-binding suits thin quilts, limits bulky batting use.
- Flange adds decorative edge but needs extra fabric handling.
- Bias tape is quick but less flexible and limits fabric choice.
How to bind a quilt by machine: step-by-step procedure
Follow this sequence for neat, machine-only quilt binding with mitered corners and bias strip joins:
First, measure your quilt perimeter and add 10 inches (25 cm) for joining tails. Use the Quilt Calculator tool on this site to find exact yardage and strip count.
Cut your double-fold binding strips 2.25 or 2.5 inches wide based on batting loft. Join strips on the bias with 1/4 inch seams pressed open. Press all binding strips in half lengthwise with wrong sides together.
Attach binding to quilt front by sewing with 1/4 inch seam allowance. Use miter folds at corners as described. When you reach the start point leaving a 10-inch tail, stop sewing.
Join tails flat on the quilt back with diagonal seam, trim and press open, then continue stitching around edges to complete the attachment.
Fold binding over quilt edges to back and stitch in the ditch from the front or machine stitch close to folded edge on the back for a machine-only finish.
- Measure quilt perimeter, add 10 inches.
- Cut binding strips 2.25–2.5 inches wide by batting loft.
- Join strips on bias, press seams open.
- Fold strips in half lengthwise, wrong sides together.
- Sew binding to quilt front with 1/4 inch seam allowance, miter corners.
- Leave 10-inch tail at start, stop sewing at corner.
- Join tails flat on quilt back with diagonal seam, trim, press open.
- Finish stitching binding edge around quilt.
- Fold binding over edges to back and machine stitch to finish.
Still wondering?
What width should I cut for French double-fold vs single-fold bindings based on batting thickness?
For double-fold, cut 2.25 inches wide strips for batting under 0.25 inch loft, increasing to 2.5 inches for thicker loft. Single-fold bindings generally require narrower strips, about 1.75 inches, but are less common for quilts with thicker batting.
How do I join binding strips on the bias to keep seams flat?
Cut the strip ends at a 45-degree angle, overlap 1/4 inch, sew with a 1/4 inch seam allowance, then press this seam open with a hot iron and steam. This keeps the join flexible and smooth.
What is the best way to join tails without bulk at the binding ends?
Overlap tails on the quilt back, right sides together, sew a diagonal seam, trim excess fabric, press open, then fold binding back around the quilt edge to continue stitching. Avoid overlapping tails directly on top of each other.
Can I finish quilt binding entirely by machine and keep stitches hidden?
Machine-only finishing is possible but leaves visible stitches on the back. Use matching thread and narrow stitches to minimize this. Hand finishing hides stitches completely but requires more skill and time.
When is self-binding with backing or flange binding a good choice?
Self-binding works well on thin quilts with low loft batting due to less bulk. Flange binding adds decorative detail but needs more fabric and careful sewing. Both methods limit fabric choices and are less flexible for thick quilts.