How to quilt as you go without bulky seams where blocks join
Use sashing to join quilt-as-you-go blocks for the flattest result on a home machine. It covers raw edges on both sides and spreads bulk across two narrow seams instead of stacking six layers in one ridge.
On this page (8 sections)
- The short version
- Basics: what quilt as you go method means versus quilting a whole top
- Comparison: sashing vs direct-join vs row-by-row on bulk and throat space
- Layering: how to layer and quilt a single block to size with seam allowance
- Sequence: step-by-step sashing method for flat joins on both sides
- Pressing: how to trim, align and press joins to avoid bulk at intersections
- Choice: the flattest beginner sequence I would use on a home machine
- Still wondering?
Part of our guide on sewing machine with quilting features
Key figures
- Block size
- 10-14 in (25-36 cm) square
- Trim allowance
- 1/2 in (1.3 cm) extra
- Sashing width
- 1-2 in (2.5-5 cm) finished
- Seam allowance
- 1/4 in (6 mm)
- Home throat
- 6-8 in (15-20 cm)
- Needle for cotton
- 80/12, 50 wt thread
The short version
- Quilt one block sandwich at a time, then join: you handle inches, not a whole quilt.
- Sashing gives the flattest back and hides raw edges without hand sewing.
- Trim each quilted block 1/2 inch larger than finished size before you join.
- Press sashing away from batting and clip intersections to keep corners flat.
Basics: what quilt as you go method means versus quilting a whole top
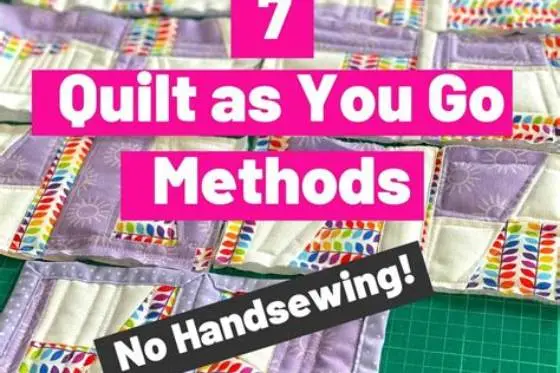
A 12 inch (30 cm) quilt as you go method block feels light because you quilt a 10 to 14 inch (25 to 36 cm) sandwich before you join it, not a full 60 by 80 inch (152 by 203 cm) top through a 6 to 8 inch (15 to 20 cm) throat. You layer backing, batting and top for one block, quilt it, then square it to finished size plus seam allowance. That swap cuts the weight you push under the arm. It matters on a home machine.
Quilting a whole top means you baste three big layers and then wrestle the roll under the arm. Your shoulders tire, the middle drags, and stitch length wobbles. Quilt as you go flips the order. You finish quilting while the piece is small, so your walking foot can feed evenly and your hands stay near the needle. You still get a finished quilt, just in tiles you join later.
The cost is seams where tiles meet. Those seams decide if the back lies smooth or ridges. A good method hides raw edges and spreads thickness. A poor one stacks fabric and batting at every intersection. You feel that at the iron. Next you need to see which joining style keeps that stack thinnest and fits your throat space.
Comparison: sashing vs direct-join vs row-by-row on bulk and throat space
Sashing adds a 1 to 2 inch (2.5 to 5 cm) fabric strip between blocks, direct-join adds no strip but stacks six layers at the seam, and row-by-row joins long quilted strips instead of small squares. Sashing hides raw edges on front and back with two narrow seams. Direct-join folds one backing over the next and topstitches. Row-by-row reduces the number of intersections you must match. People in this spot often ask about squaring up quilts as well.
On a home machine, throat space decides comfort. Sashing lets you sew a 1/4 inch (6 mm) seam on one block at a time, so you never pass a big quilt through. Direct-join is faster but thicker at the join, and the topstitching shows. Row-by-row suits simple straight-line quilting and fewer blocks, but matching points across a long seam takes care. Think about your quilting density and how flat you need the back.
For the flattest result with the least bulk, sashing wins for beginners. You press away from the batting and the intersection stays low. Direct-join wins for speed if you accept a ridge. Row-by-row wins when you want to quilt continuous lines across the quilt. Your choice changes how you trim and press next.
| Method | Finished bulk at seam | Throat space needed | Best when |
|---|---|---|---|
| Sashing (front and back strip) | Low, 2 thin seams | Low, one block at a time | You want flat back, hidden edges |
| Direct-join (fold-over backing) | High, 4-6 layers in one ridge | Low, one seam at a time | You want speed, no extra fabric |
| Row-by-row (quilted rows) | Medium, fewer intersections | Medium, handle long rows | You quilt straight lines across rows |
- sashing: flattest back, hides raw edges
- sashing: easy on small throat
- direct-join: no extra fabric, fast
- sashing: adds cutting and two seams
- direct-join: ridge shows, harder to press flat
- row-by-row: long seams harder to align

AMZTKDIY Walking Foot Presser Foot Precision Sewing Attachment with Guide for
Keeps your quilt-as-you-go blocks flat by feeding all three layers together and the built-in guide helps you hold straight 1/4 in seams for flat joins.
Layering: how to layer and quilt a single block to size with seam allowance
Cut each block 1/2 inch (1.3 cm) larger than finished size on all sides. That extra gives you a true 1/4 inch (6 mm) seam allowance after quilting, even if batting shifts a little. Stack backing right side down, batting, then top right side up. Smooth from the center out and pin or spray baste lightly. You want no tucks before you stitch. We cover best iron for quilting in its own article.
Quilt with a walking foot and 80/12 needle and 50 wt cotton thread for plain cotton. Keep quilting 1/4 inch (6 mm) inside the raw edge where the joining seam will sit, or stitch right over it if you plan to hide it with sashing. Test on a scrap sandwich first. Even feed means no ripples when you square up.
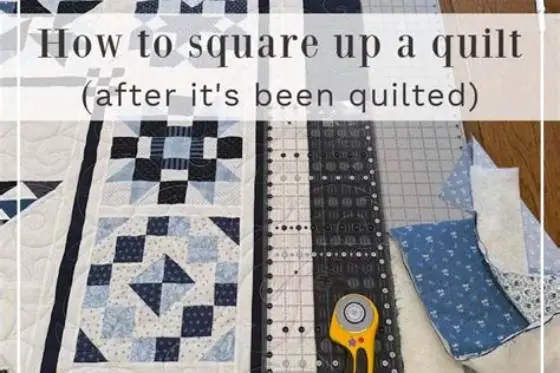
Square each quilted block after quilting, not before. Use a square ruler and trim to finished size plus 1/2 inch (1.3 cm) total. Check two sides with the same ruler line to keep corners true. A block that is 1/8 inch (3 mm) off here grows into a wavy row later. Trimming now is what makes the next joins lie flat.
- Backing: cut 1 inch (2.5 cm) larger than batting, then trim after quilting
- Batting: low-loft cotton or 80/20 keeps seams thin, high-loft adds bulk
- Top: press seams open or to one side before layering to reduce ridges
Most quilt-as-you-go bulk happens at the four-block intersection, not along the seam itself.
Sequence: step-by-step sashing method for flat joins on both sides
This sashing sequence gives you a flat front and a flat back with no hand sewing. You work with one seam at a time, so the machine never holds more than a block plus a strip. Press well at each stage and the intersections stay thin. Keep a hot iron and a clapper or wooden seam roller close.
Work in this order and check fit after each seam. If a block waves, re-square before you join the next one. Small errors add up across a row. You will thank yourself for measuring twice here.
You end with raw edges enclosed and a back that looks planned, not patched. That sets you up for trimming and pressing that actually holds. The next section shows how to keep those four-way intersections from bumping up.
- Cut front sashing 1-1/2 inch (3.8 cm) wide and back sashing 1 inch (2.5 cm) wide, both the length of the block side. Press front sashing in half lengthwise if you want a folded edge.
- Place front sashing right sides together on the front of block A, align raw edges, sew 1/4 inch (6 mm). Press sashing away from block, away from batting.
- Place block B front to front sashing, sew 1/4 inch (6 mm) through sashing and both blocks. Press away from the center. Front now shows two blocks with a flat strip between.
- Flip to the back. Fold back sashing over the raw seam, turn under 1/4 inch (6 mm), and pin so it just covers the previous stitching. Topstitch 1/8 inch (3 mm) from the fold. No bulk shows.
- Repeat to make rows, then join rows with long sashing strips cut the full row length. Nest or stagger intersections as you go.
- Trim the outer quilt edges 1/4 inch (6 mm) beyond the last quilting line before binding.
Pressing: how to trim, align and press joins to avoid bulk at intersections
Bulk lives at intersections where four seams meet and batting doubles up. Trim batting out of the 1/4 inch (6 mm) seam allowance before you join, but leave backing and top intact. Use small scissors and cut close to the stitching, not into it. That one snip drops thickness by half at the cross.
Align with pins or fork pins right through the seam line, not beside it. Match the sashing edges first, then the quilting lines. Sew with the bulkier side down so the feed dogs help, and ease rather than pull. If the foot climbs a bump, stop and hand-crank over it to keep stitch length even.
Press every seam away from the batting, then press the intersection open with the tip of the iron. A little steam helps cotton, but lift and press rather than drag. For a stubborn bump, clip the seam allowance at 45 degrees up to but not through the stitching. The corner will lie flat and the next row will sit level.
- Trim batting: cut it back 1/8 inch (3 mm) inside seam to thin the stack
- Align: pin through the stitch line and check both sides before sewing
- Press: use a clapper or book weight for 10 seconds while the seam cools
Choice: the flattest beginner sequence I would use on a home machine
I would choose front-and-back sashing with low-loft 80/20 cotton batting for your first quilt as you go. It gives the flattest back and forgives small trimming errors, and you never wrestle more than one block plus a strip through the throat. You get a tidy front, a tidy back, and intersections you can press flat with a normal iron. That is the trade I accept over saving a little cutting time.
Use 1-1/2 inch (3.8 cm) front sashing and 1 inch (2.5 cm) back sashing for a 1 inch (2.5 cm) finished look, or 2 inch (5 cm) front for a wider frame. Stick to one width for the whole quilt so rows match. Rule of thumb: trim batting out of every joining seam and press away from it, every time. Skip that and even perfect sewing looks lumpy.
Plan sizes before you cut. The Quilt Calculator helps you work out blocks, backing, batting and binding for any quilt size, so you buy the right yardage and cut sashing to length. Make one test join with scraps and wash it. You will see the true thickness and color. If it lies flat after washing, make the rest the same way.
- flattest result on small throat
- no hand sewing, edges enclosed
- forgiving for beginners
- more cutting and pressing
- adds fabric to buy
For flat, low-bulk joins on a home machine, sashing beats direct-join; use it for your first QAYG.
Still wondering?
Can I quilt as you go with big blocks or rows instead of small squares?
Yes. Larger blocks mean fewer joins and less matching, but each sandwich is heavier to handle. Rows reduce intersections and suit straight-line quilting, but long seams need careful pinning. Pick the tile size your throat handles easily.
What batting keeps quilt-as-you-go seams flattest?
Low-loft cotton or 80/20 cotton-poly blends press thinnest and add little bulk in seams. High-loft polyester is warm but stacks up at joins. Trim batting out of seam allowances if you need extra flatness.
Do I need a special foot to quilt the blocks?
A walking foot helps most. It feeds the three layers evenly so blocks stay square. A 1/4 inch foot helps keep joining seams accurate. Change to a fresh 80/12 needle for cotton and re-thread with the foot up.
How do I keep the back sashing straight when I topstitch it?
Press the fold first and pin so it just covers the previous seam line. Sew from the front in the ditch or 1/8 inch from the fold on the back, checking that the bobbin thread catches the folded edge all along.
Will sashing change my finished quilt size?
Yes, by the finished sashing width times the number of sashing strips. Add that to your block math before cutting. Use the Quilt Calculator to add sashing and recalc backing and binding.