How to baste a large quilt on a small floor without wrinkles
Baste a large quilt on a small floor by taping the backing taut, layering batting and top smooth in sections, and securing per your product labels: many quilters start with pins or temporary spray, but spacing and hold vary by loft, fabric, quilt size, and conditions so follow your batting and spray instructions and test on scraps.
On this page (7 sections)
- The short version
- Prep: how much bigger to cut backing and batting and how to anchor them taut
- Methods: when spray, pins, thread, or a roll holds best
- Steps: how to layer backing, batting and top in sections without wrinkles
- Spacing and checks: how far apart to pin or spray and how to catch tucks
- Setup: how basting changes on a longarm vs at home
- Still wondering?
Part of our guide on choosing features for quilting at home
Key figures
- Backing overhang
- 2-4 inches per side — per pattern/longarm instructions
- Pin spacing
- Varies; many makers suggest roughly 4-6 inches — follow batting label
- Spray hold duration
- Varies by product/conditions — check can label
- Thread basting speed
- Slowest, but most adjustable for delicate fabrics
- Roll diameter
- 3-4 inches pool noodle helps in small spaces
The short version
- Cut backing and batting 2 to 4 inches larger per side per your pattern, then tape or clamp backing taut without stretching.
- Many batting makers suggest roughly 4 to 6 inches for pins as a baseline, but adjust for loft and size and follow your batting label.
- Temporary spray hold varies by product and conditions: check the can label and test on scraps; use ventilation and keep away from flame.
- Work in sections and roll finished areas on pool noodles to keep tension even in a small room.
- Remove pins just before the presser foot to avoid needle damage and skipped stitches; re-smooth and re-pin only the area you move.
Prep: how much bigger to cut backing and batting and how to anchor them taut
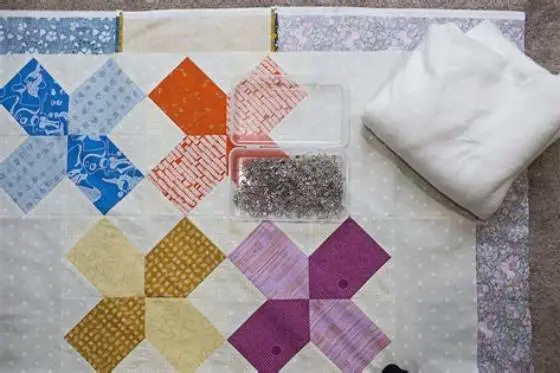
Cut backing and batting larger than the quilt top so you have grip and room to square up. Most patterns and longarm shops ask for 2 to 4 inches extra per side, but your pattern decides so follow it. That overhang keeps edges from pulling short while you quilt.
Tape the backing to a clean hard floor with painter's tape or clamp it to a table so it stays taut without stretch. Smooth it from the center out with your hands, then add tape every 8 to 12 inches along the edges. It should feel drum-tight yet not distort the weave.
Lay a clean sheet or plastic under the backing to protect it and stop sliding. Work in a warm, dry, dust-free room because heat and humidity change spray tack and dust weakens hold. Test any spray on scraps first.
Methods: when spray, pins, thread, or a roll holds best
Temporary spray gives a smooth, even hold with no pin bumps, so it suits small floors where crawling around pins is hard. Hold time varies by product, fabric, batting type, and whether layers stay dry and flat, so read the can label. Many labels note hold for days under good conditions. Test on scraps. It helps to understand irons for flat quilting seams before going further.
You need fresh air with spray. Open windows, run a fan, and wear a respirator or mask if the label calls for it. Most sprays are flammable, so keep them away from flame, heaters, and sparks and use at room temperature per label.
Curved safety pins or quilter's pins let you reposition, which helps with thick or high-loft batting where spray can slip. Many quilters and batting makers suggest roughly 4 to 6 inches as a starting point, but loft, fabric, and quilt size change the need so follow your batting label. Plan to remove pins as you quilt.
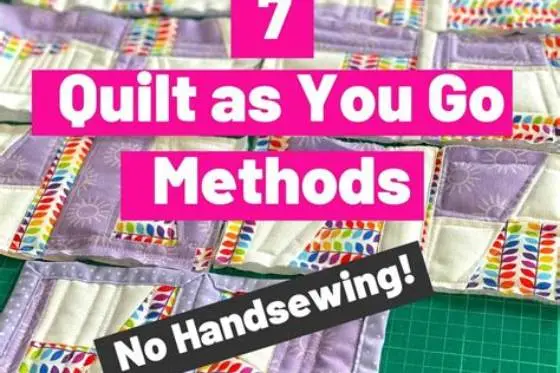
Thread basting with long hand stitches holds delicate or slippery fabrics without residue and stays put for multi-day projects. It takes longer, but you can tune tension as you go. Rolling finished sections on pool noodles or boards keeps tension even in a tight room. That's the trade. We cover quilt as you go method in its own article.
| Method | Best for | Hold Duration | Ease of Removal | Space Needed |
|---|---|---|---|---|
| Spray | Flat surfaces, quick smooth hold | Varies — check label; often days if dry/flat | Easy if light mist | Small |
| Pin | Thick/high-loft batting, repositioning | Until removed | Moderate — remove before foot | Medium |
| Thread | Delicate/slippery fabrics, long projects | Long term | Slow — clip and pull | Small |
| Roll & baste | Large quilts in small spaces | Depends on method used | Varies | Small |
- Spray: fast, flat, no pin bumps
- Spray: needs ventilation, flammable, can stiffen if over-sprayed
Steps: how to layer backing, batting and top in sections without wrinkles
Clear the most floor you can and cover it so the backing does not slide. Tape the backing down taut as described, then center the batting over it and let it relax without pulling. Smooth it from the middle out and clip or lightly tape corners if it shifts.
Lay the quilt top over the batting and align seams and edges before you secure anything. Use blocks and borders as guides and square corners with a ruler. Smooth each area with your hands before you pin or spray it.
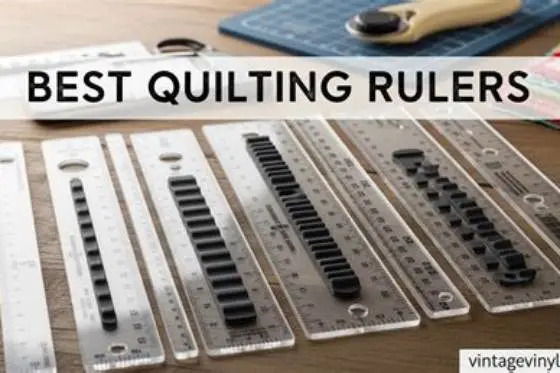
Work in arm's reach sections and roll the finished part onto a noodle so it stays flat while you move. Check for tucks by lifting an edge and looking underneath with a bright light. Fix a wrinkle now. Quilting locks it in. It helps to understand rulers for quilting before going further.
- Clear and cover floor, then tape backing taut without stretching.
- Center batting on backing and smooth from middle out; let it relax.
- Align quilt top on batting; square edges and smooth each section.
- Secure one section at a time per your chosen method and label directions.
- Roll finished section onto pool noodle or board to keep tension even.
- Move to next section, unroll, smooth, and secure; repeat to end.
- Lift edges and check for tucks; re-smooth and re-secure where needed.
Baste large quilts wrinkle-free even in small spaces by rolling layers and using spray or pins strategically for smooth, aligned quilting.
Spacing and checks: how far apart to pin or spray and how to catch tucks
For pins, start at the center and work outward in a grid, then adjust for your quilt. Many quilters and batting brands suggest roughly 4 to 6 inches as a baseline, but high-loft, large, or densely quilted projects often need closer spacing. Low-loft and small quilts may need less. Follow your batting and pattern instructions.
For spray, follow the manufacturer's distance and coverage directions and apply a light even mist per label, then press layers together. Avoid heavy coats because they can stiffen fabric or leave residue, and hold depends on fabric and batting type. Test on scraps and reapply lightly if an edge lifts.
Catch tucks before you quilt. Lift the top, feel for ripples in batting and backing, and watch how light shows through. Slide your hand from the center out and add a pin or light respray where you see a bubble. Smooth again.
- Pin spacing is not one-size-fits-all; adjust for loft, fabric, and quilt size per label.
- Spray coverage: light even mist per label; do not flood the surface.
- Check wrinkles by lifting edges and using a bright light from below.
- Fix tucks right away before quilting locks them in.
Setup: how basting changes on a longarm vs at home
A longarm frame uses leaders and clamps to hold layers taut, so you need little or no pin or spray basting. Rollers keep a large quilt flat and let you adjust tension with the frame. That cuts wrinkle risk, but it needs a big dedicated space.
At home you move the quilt through a domestic machine, so you must secure layers yourself on a floor or table. Wrinkle risk rises without a frame, especially with large quilts in small rooms. You will baste more carefully and check alignment often.
At home remove pins just before the presser foot reaches them so you do not hit a pin and damage the needle or cause skipped stitches. Keep a dish nearby for pins and pause to re-smooth if the quilt shifts. If you must reposition, take out pins in that area only, smooth, and re-pin per your batting guide.
| Aspect | Longarm | Home Machine |
|---|---|---|
| Holding layers | Frame and clamps | Pins, spray, or thread per label |
| Wrinkle risk | Low with frame tension | Higher without frame — check often |
| Space required | Needs large frame area | Can use floor or table in sections |
| Basting method | Minimal or none | Secure per batting/spray instructions |
Still wondering?
What spray basting should I use for quilts?
Use a temporary, fabric-safe spray labeled for quilting and follow its safety and coverage directions. Check ventilation, flammability, and temperature notes on the can, and test on scraps for staining or stiffness. Hold varies by product, fabric, and batting type.
Can I use safety pins instead of quilting pins?
You can, but standard safety pins are thicker and may leave holes or bump under the foot. Curved quilter's safety pins glide easier. Space per your batting label, and remove each pin just before the presser foot to avoid needle damage.
How do I avoid puckers when pin basting a large quilt?
Tape backing taut without stretching, smooth each layer from center out, and work in sections. Many makers suggest roughly 4 to 6 inches as a starting point, but adjust for loft and quilt size per your batting instructions. Roll finished sections to keep tension even.
Is thread basting needed for machine quilting?
Not always. Thread basting gives strong, adjustable hold for delicate fabrics or projects that span days. For many machine quilts, pins or light spray per label are enough if you check for tucks and remove pins before the foot.
How do I check alignment after basting?
Lift edges gently and look at backing and batting underneath. Use a ruler or quilting square to check corners and seams. If you see shift, remove fasteners in that area only, re-smooth from the center out, and re-secure per label.