Thread tension wrong? Fix these before touching the dial
Fix sewing machine thread tension in this order: rethread, check the bobbin and bobbin case, clean lint from the discs, then adjust the dial and test on scraps of your fabric and thread. The dial is the last fix, not the first.
On this page (8 sections)
- The short version
- How to adjust sewing machine thread tension: order of work
- Tension discs: why the thread must sit between them
- Bobbin case and bobbin tension: when the problem is underneath
- How balanced tension looks top and bottom
- Dial adjustments: small steps that actually work
- When it isn't tension at all
- Still wondering?
Part of our guide on presser foot kit for sewing machines
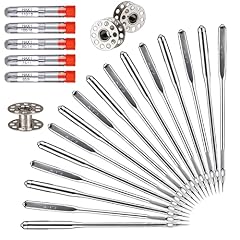
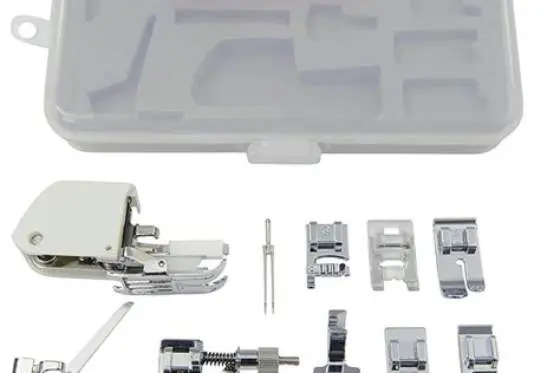
Sewing Machine Needles 50 PCS HAX1 Universal 5 Sizes Compatible
Before touching your tension dials, swap in a fresh needle matched to your fabric — this 50-pack gives you 10
Check the specs on AmazonKey figures
- First fix
- Rethread the top
- Dial increment
- Small steps, test after each
- Test fabric
- Two layers of your project fabric
- Typical dial range
- Check your manual
- Needle change
- Every project, or when dull
- Lint cleaning
- Brush regularly, no compressed air
The short version
- A thread that missed the tension discs loops underneath and looks like a tension fault.
- Read the stitch from both sides: top thread should meet the bobbin thread between two layers, not show on the wrong side.
- Metallic and heavy topstitching thread may need a looser top tension and a slower speed.
- On many computerized machines, auto tension may need overriding in the settings menu, not the dial.
- Skipped stitches and needle breaks are needle or timing problems, not tension; a new needle first, a service shop second.
How to adjust sewing machine thread tension: order of work
The tension dial gets blamed for everything, and it is usually innocent. Before you turn it, work through the cheap checks in order. Each one takes under two minutes. Skip the order and you can turn a dial that was already right, then spend an hour chasing a fault you created.
Start with the needle. Put in a fresh one, in the size your manual recommends for your fabric. A dull or bent needle causes looping, shredding and skipped stitches that read as tension trouble. This is the one purchase that pays for itself immediately.
Then confirm you are using the right bobbin for your machine. Plastic bobbins that look interchangeable often differ by a fraction of an inch in height or width. The wrong one wobbles, winds unevenly or sits proud of the case. Check your manual for the part it names, not the one that happens to fit.
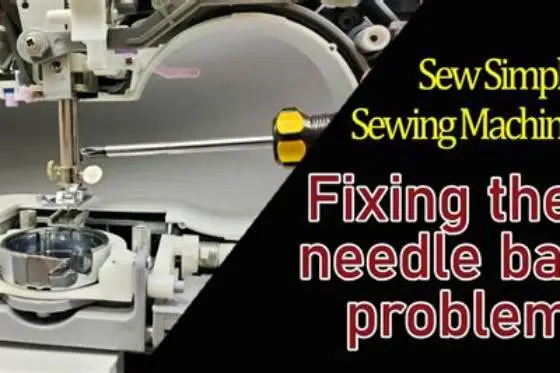
Finish with lint. Fibre packs into the bobbin area and around the tension discs. Packed lint holds the discs or the bobbin case slightly open so the thread runs looser than the dial says. Brush it out regularly. Then decide whether the dial still needs moving. It helps to understand sewing machine needle bar issues before going further.
- Put in a fresh needle of the correct size for your fabric and thread.
- Check the bobbin is the one your manual names, wound evenly and inserted the right way round.
- Brush lint from the bobbin case area with a small brush; no compressed air.
- Rethread the top with the presser foot up.
- Sew a test line on two layers of your fabric. Only now, if it's still wrong, move to the dial.
| Check | Symptom it fixes | Time |
|---|---|---|
| Fresh needle | Looping, skipped stitches, shredding thread | 1 minute |
| Correct bobbin | Uneven stitching, rattling, nests underneath | 2 minutes |
| Lint removal | Gradual looseness that crept in over hours | 2 minutes |
| Thread path | Sudden looping after rethreading or starting | 1 minute |
Sewing Machine Needles 50 PCS HAX1 Universal 5 Sizes Compatible with Singer
Before touching your tension dials, swap in a fresh needle matched to your fabric — this 50-pack gives you 10 needles in each of five sizes, 65/9 up to 110/18, so looping and skipped stitches from the wrong needle are covered for
- Height 0.67 inches
- Length 4.02 inches
- Width 2.76 inches
Tension discs: why the thread must sit between them
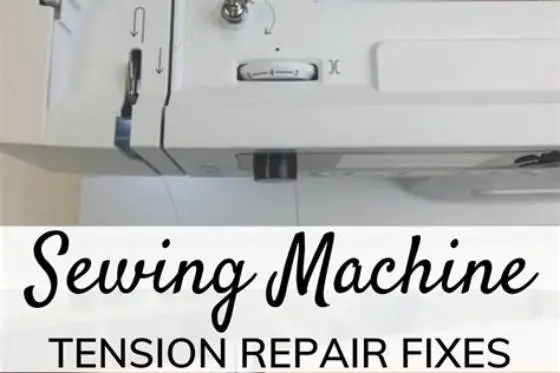
Your top thread passes between two small tension discs. Those discs only grip the thread when the presser foot is down. Thread the machine with the foot down and the thread sits on top of the discs instead of between them. The dial can be at any number; the thread feels no tension at all.
The symptom is unmistakable. You get loops on the underside, or a thread nest. The top thread pulls out of the fabric with one finger. It looks like a tension fault, so many people start twisting the dial. The nest forms under the fabric, where the loose top thread piles up instead of locking with the bobbin thread.
You can check the discs without sewing a stitch. With the foot down, pull the thread just above the needle. You should feel a slight drag. That drag is the discs gripping. If the thread pulls through freely, it is sitting on top of the discs, not between them. We cover testing on fabric scraps in its own article.
After cleaning, or when thread slips out of a guide mid-seam, the same trap catches you. If the stitching went wrong suddenly mid-project, suspect the thread path before the dial. When in doubt, start with the thread path.
Bobbin case and bobbin tension: when the problem is underneath
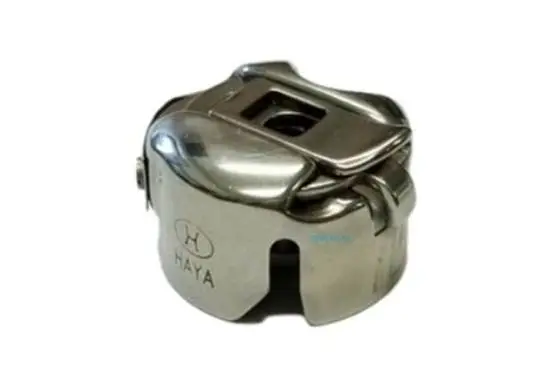
If loops appear on the top of the fabric, the bobbin thread is usually too loose. Drop-in bobbin machines hide the case under a cover plate; front or side-loading machines have a removable metal case. Either way, the bobbin thread slides through a small tension spring, where lint and stray thread collect.
Take the bobbin out and look at the path it feeds through. Look for a scrap of thread or a felted lump of lint in the spring area. Lift it out with the tip of a fine pin or your small brush. Then reinsert the bobbin so the thread feeds the direction your manual shows. Sew a test line. We go through singer machine bobbin case step by step elsewhere on the site.
The bobbin case spring itself has a tiny set screw. It does adjust bobbin tension, but treat it as a last resort. Most manufacturers set bobbin tension at the factory and expect you never to touch it. A shop adjustment is the safer path if you're not confident. Photograph the screw's position before you turn anything. Turn only a very small fraction of a turn, and only after rethreading and cleaning have failed. On machines still under warranty, a wrong turn can void coverage.
Also check the bobbin itself. A bobbin wound at high speed or with uneven tension delivers thread that feeds in surges. No setting hides that. Rewind it slowly and evenly. Use a fresh wind, not a part-used bobbin from another project, when you're diagnosing.
Before you touch the tension dial, the fix that works costs nothing and takes one minute.
How balanced tension looks top and bottom
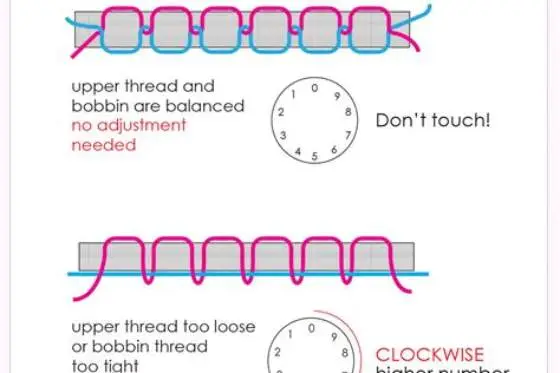
You need a target before you adjust. With balanced tension, the two threads meet inside the fabric, between the layers. Top and bottom look identical: a clean line of stitches on each side, no loops, no visible rail of one thread riding over the other.
Sew a test line on two layers of your actual fabric and thread. Flip it over. The top thread should show just slightly on the underside at the seam line, a faint dotted appearance, but never a loop. If the top thread lies flat on the underside in long floats, top tension is too loose. If the bobbin thread shows through to the top, top tension is too tight.
For example, picture a test seam with red thread on top and white thread in the bobbin, on grey cotton. Balanced tension would show a clean red line on top, a clean white line underneath, and just the faintest flecks of red on the underside. Too loose, and you would see red loops trailing across the white underside. Too tight, and white dots or lines would appear on the red top surface.
Some sewists use contrasting thread colours top and bottom for diagnosing, bright yellow over grey, so the crossing point is obvious. It works, and it's free. One honest caveat: perfect balance isn't always the goal. For quilt piecing you want a truly balanced seam so it presses flat. For topstitching on a single layer, run the top thread slightly tighter so the underside stays tidy.
| What you see | Which thread is wrong | Direction to adjust |
|---|---|---|
| Loops under, top thread flat on the back | Top thread too loose | Raise top tension |
| Loops on top, bobbin thread visible from above | Bobbin thread too loose, or top too tight | Check bobbin first, then lower top tension |
| Thread nests under the fabric | Top thread not seated in the discs | Reseat the thread in the discs |
| Even stitches both sides, slight dots of top thread underneath | Balanced | Change nothing |
Dial adjustments: small steps that actually work
Most mechanical dials mark positions with numbers. The number is a position on your own machine's dial, not a standard unit. Manuals usually recommend a middle-range starting number, often 4 or 5 on a 0 to 9 dial. Start there, then let the test line decide.
Adjust in small steps. Turn the dial a small increment, sew a fresh line on the same two layers, flip it over, read it. Repeat. Small increments teach you how your machine behaves. A large jump overshoots and now you're guessing in both directions. Write down where you started so you can go back.
Brother and Singer handle this differently. Many Brother computerized models set tension for you, or let you change it with plus and minus keys on the panel. Auto tension suits ordinary cotton and medium-weight fabric. With metallics, thick topstitching thread or heavy layer sandwiches, override it in the settings and take manual control. Mechanical Singers usually have a numbered dial, 0 to 9, on the front or top of the machine. On an older machine, trust the test line more than the number.
If your computerized machine suddenly misbehaves at a setting that worked last month, cleaning and rethreading come before any menu change.
When it isn't tension at all
Some pairings genuinely need a dial move. Metallic threads are stiff and springy. They need a slower speed, a metallics needle, and often slightly looser top tension so they don't kink. Quilting through a sandwich of top, batting and backing compresses unevenly, so use a walking foot and slightly higher top tension. Heavy topstitching thread needs a larger needle eye than your usual size. Use the needle size your manual recommends for your fabric.
Stretch knits deserve their own note. A slightly loose upper thread lets the seam stretch without popping. Don't chase textbook balance on jersey; chase a seam that survives being pulled on. A ballpoint or stretch needle matters more than the dial here.
Now the other side. If stitches skip, blame the needle, not tension. The system may be wrong, the point may suit another fabric, or the needle may sit backward or not fully up. Push it fully home with the flat side facing the way your manual shows. If a fresh, correctly fitted needle still skips, the timing may be off. Timing means the needle and the hook beneath the throat plate no longer meet at the right moment. Timing is a shop job.
Broken needles, grinding noises, stitches that skip in a regular pattern, thread that snaps at the same point: these point at mechanical wear. The fix needs a technician with parts. If rethreading, cleaning, and dial adjustment all fail, the escalation path is timing or mechanical service. Don't open the hook race yourself unless you know what you're doing.
Diagnose the thread path, bobbin and needle before the dial; adjust tension in small steps only after those checks pass.
Still wondering?
Why does my stitching go fine, then suddenly loop halfway through a seam?
Most often the top thread has slipped out of a guide or out of the tension discs. Or the bobbin is running low and feeding unevenly. Stop and thread the top again from the start before adjusting anything.
Should bobbin tension ever be adjusted?
Rarely, and only a very small fraction of a turn of the tiny set screw on the bobbin case, after cleaning and rethreading have failed. Photograph the screw's position first with your phone. If you're not confident, a service shop does it cheaply and safely.
Do computerized machines need tension adjusting at all?
For ordinary fabric, the auto setting usually handles it. Override it when using metallics, thick topstitching thread, or thick layered work, because auto tension guesses poorly with unusual thread.
What number should my tension dial be on?
Check your manual for the recommended starting point. Most machines sew well somewhere in the middle range, but the numbers aren't standardized between models. Start where your manual suggests, test on two layers of your fabric, and adjust in small steps from there.
My machine sews perfectly on scraps but badly on my project. Why?
The fabric or thread is different from the test, or the project has bulk the test didn't. Re-test on scraps of the actual project layers, and adjust for that combination specifically.
What should I do if rethreading, cleaning, and adjusting the dial all fail?
The problem is likely mechanical: timing, a worn hook, or a bent part. Take the machine to a service shop. Timing and hook-race repairs need tools and training you won't have at home.