Do sewing patterns include seam allowance? How to tell
Most commercial patterns include seam allowance, but not all. Big 4 brands like Simplicity and Butterick usually include it, while some indie and European patterns omit it. The envelope back or the first instruction page always states which approach that pattern takes.
On this page (8 sections)
- The short version
- What seam allowance is and why it exists
- Big 4, indie and European: who includes it
- Standard seam allowances by project
- How to check whether your pattern includes seam allowance
- How to add seam allowance when it's missing
- Do sewing patterns include seam allowance your machine can follow?
- Still wondering?
Part of our guide on best online sewing classes for beginners
Key figures
- Big 4 garments
- 5/8 in (1.5 cm) included
- Indie PDF patterns
- Often excluded
- European patterns
- Varies by brand and era
- Quilting seams
- 1/4 in (6 mm)
- Bags and home decor
- 1/2 to 1 in (1.3 to 2.5 cm)
- Where it's stated
- Envelope back or instructions
The short version
- Measure a straight edge with a ruler when the paperwork stays silent.
- Big 4 garment patterns include allowance as a North American standard.
- Bags and home decor lean wider, commonly 1/2 to 1 inch, because those seams carry weight.
- Indie PDF and some European patterns may omit allowance; add it yourself before you cut.
- A 1/4 inch quilting foot or a seam gauge keeps every seam the same width.
What seam allowance is and why it exists
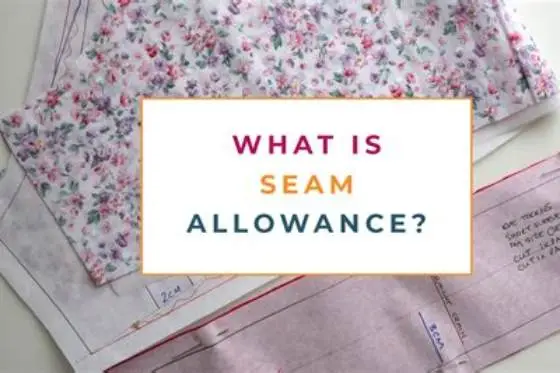
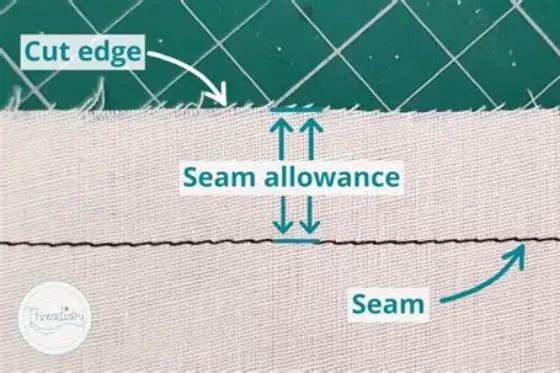
Seam allowance is the strip of fabric between the stitching line and the raw edge. The printed pattern pieces are drawn bigger than your body measurements by exactly that amount on every edge that gets sewn. Sew on the marked line and the finished garment comes out the size the envelope promises.
It exists for three practical reasons. First, it gives the seam something to hold. A seam sewn right on the edge has almost no fabric to grip and pulls apart under stress. Second, it's your fitting margin. If the garment runs tight, you can let a seam out into the allowance instead of starting over.
Third, allowances allow finishing. You press the seam open and finish the raw edges with a zigzag or an overlocker so fraying never eats into the stitching. Trim an allowance down and you lose all three benefits at once. That's why guessing wrong about whether your pattern includes it is worth two minutes of checking before the scissors come out.
Hem allowance is a separate figure from seam allowance, and the two get mixed up. A hem folds fabric to the inside and needs its own depth, often deeper than a seam, so a pattern states the hem separately. Do not borrow the seam figure for a hem, or the hem will sit short. People in this spot often ask about seam allowance explained as well.
Big 4, indie and European: who includes it
The Big 4 American brands, Simplicity, McCall's, Butterick and Vogue, include seam allowance on virtually all their patterns. 5/8 inch (1.5 cm) is the North American standard for garments. It often narrows on enclosed edges such as collars and necklines, so check the piece markings. You can sew their pieces straight from the envelope without adding anything.
Indie PDF patterns split by brand. Most include allowance, and a few print the stitching line only and expect you to add it yourself.
European patterns vary by publisher and by era. Magazine patterns of an older era often printed the stitching line only and left the allowance to the reader. A current pattern's approach is written on the pattern itself, so read the one you hold. Before you commit to anything, it is worth looking at best modern sewing books.
The trade-off is worth knowing. Patterns without allowance give you cleaner, more accurate tracing lines and less bulk when you grade between sizes. Patterns with allowance are faster: pin, cut, sew. Neither is better, but you must know which one you're holding before you cut.
| Pattern type | Usually includes allowance | Typical amount |
|---|---|---|
| Big 4 (Simplicity, McCall's, Butterick, Vogue) | Yes, nearly always | 5/8 in (1.5 cm) |
| Modern indie PDF brands | Mixed, check the notations | Often 3/8 to 5/8 in (1 to 1.5 cm) |
| European patterns | Varies by brand and era | Check the instructions |
| Quilt patterns | Rarely stated | 1/4 in (6 mm) assumed |

3 Pack Sewing Ruler Sliding Gauge Sewing Measuring Tool Black Metal
When your pattern leaves you to add the seam yourself, the sliding marker locks anywhere along the 0-6 in (0-12 cm) dual inch-and-cm scale so you can strike the same allowance line on every pattern piece.
Standard seam allowances by project
Garment patterns in North America follow the 5/8 inch (1.5 cm) convention, narrowed on curves and enclosed edges like facings. Quilting lives on 1/4 inch (6 mm). That figure is why the quarter-inch foot exists: blocks sized for a finished quilt assume every seam took exactly that much.
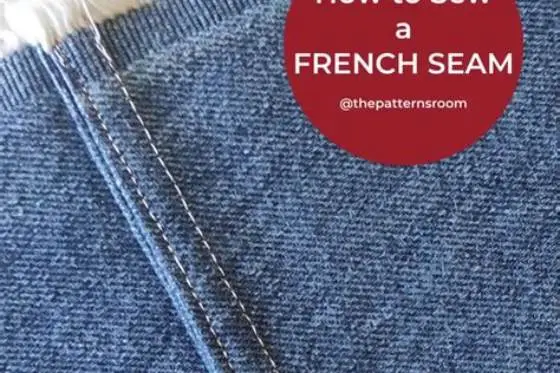
Bags, cushions and home decor lean wider, commonly 1/2 inch (1.3 cm) to 1 inch (2.5 cm). Those seams carry weight, and the wider allowance spreads the load. Knit garments sewn with an overlocker sometimes use a narrower allowance, around 3/8 inch (1 cm). A slim overlocked seam stretches better than a wide pressed-open one, so the narrow figure is a common indie convention. T-shirt and knit patterns are usually drafted for that narrow seam, so their pieces already allow for it. If you sew one on a regular machine with a zigzag instead of an overlocker, the same narrow figure still works. The other half of this decision is French seam technique.
These are conventions, not laws. Use them as a starting point when you need a number and the pattern gives you none.
Two more cases deserve a line. Facings and linings usually take the same allowance as the garment edge they finish, so you cut them to match. And zips need the allowance the pattern states, because a narrow seam beside a zip leaves nothing to catch the tape into.
| Project | Standard allowance | Why |
|---|---|---|
| Woven garments | 5/8 in (1.5 cm) | Room for fitting and seam finishing |
| Necklines, collars, curves | 1/4 in (6 mm) | Narrow allowances turn and lie flat |
| Quilt blocks | 1/4 in (6 mm) | Block sizes assume it |
| Bags and cushions | 1/2 to 1 in (1.3 to 2.5 cm) | Strength under load |
How to check whether your pattern includes seam allowance
Step 4 settles it when the paperwork is unclear. A pattern either has that consistent band of extra fabric or it doesn't, and a ruler measures it. Keep the answer written on the envelope so you don't re-solve it next time.
When the paperwork says nothing and there is no stitching line to measure, sew a test. The finished garment measurements on the envelope are the quickest shortcut. Cut one piece, sew a seam at the width you expect, and measure the finished piece against the printed figure. If it comes out short by the allowance, the pattern did not include it.
- Read the back of the envelope or the PDF cover page. Look for the phrase 'seam allowance included' or a figure such as '5/8 in (1.5 cm) unless otherwise stated'.
- Open the instructions to the first page or the notations page. Brands that leave allowance out state it here, often with a line about adding your own.
- Look at the pattern pieces themselves. If each edge sits a visible distance outside a drawn stitching line, allowance is included. A single line with no marked edge means you measure to confirm.
- Measure a straight edge with a ruler. Trace the stitching line if present, then measure from it to the cut edge. A consistent 5/8 inch (1.5 cm) confirms it. If there's only one line, measure from the edge inward to see if extra fabric was added.
- The cutting layout shows orientation and grain line, not whether allowance is included. Ignore it for this decision.
How to add seam allowance when it's missing
Adding allowance is routine, not a punishment. The fast way works on patterns printed on paper or tissue. Lay the piece on fresh paper and trace it. Then run the tracing through a double-tracing wheel, or use a ruler to draw a second line offset outward by your chosen amount. A 5/8 inch (1.5 cm) offset is the usual choice for garments.
The accurate way uses tools most sewists already own. Set a compass or a seam allowance guide to the offset. Or place a clear ruler with an inch grid along the edge, mark at the right distance repeatedly, then join the marks. On curves, mark more closely spaced points so the offset line stays smooth.
For PDF patterns, the cleanest method is still on paper. Print at 100 percent, verify the test square with a ruler, tape the pages, then trace and offset by hand. Editing the PDF itself with drawing software is possible but easy to get wrong if you don't control the print scale.
One thing that genuinely helps here is a seam gauge, the small sliding ruler that locks at a set distance. It marks consistent offsets on straight edges faster than any ruler juggling, and you'll use it again at the machine for checking hems.
If you grade between sizes, keep the allowance even as the line moves. A French curve keeps the offset smooth on armholes and necklines, and the notches tell you where the graded lines meet. Add the allowance after you grade, not before, or the sizes drift apart.
Do sewing patterns include seam allowance your machine can follow?
There's a third party in this: your machine. Once the pattern is right, the sewing has to hit the same line every time. Or a 5/8 inch allowance quietly becomes 5/8 on one seam and 1/2 on the next. Fit suffers exactly that much.
Most machines mark common widths on the needle plate, and the marks line up with the fabric edge as you sew. Worth checking yours tonight. Lower the needle, measure from it to the nearest plate marks with a ruler, and write the true widths on tape stuck near the plate. Markings wear off and don't always sit where you assume.
For repeatable work, two aids earn their place. A magnetic seam guide clamps to the plate and stops fabric at a set width, ideal for bags and long straight seams. For quilting, a 1/4 inch foot with a fixed guide fence is the single biggest upgrade, because block piecing punishes any drift at all.
I'd pick the quarter-inch foot if you quilt and the magnetic guide if you sew garments and bags. Both are inexpensive tools that cover most straight-seam situations.

3PCS Magnetic Seam Guide for Sewing Machine
It grips your metal needle plate with a strong magnet and its scaled polygonal edges let you set and reposition a fixed seam width, keeping fabric at the allowance the pattern expects.
Read the envelope or instructions before cutting; assume nothing, because the convention varies by brand, region and era.
Still wondering?
Do quilt patterns include seam allowance?
Almost never, and they don't need to. Every block size in the pattern assumes the same fixed seam. If your blocks come out small, an inconsistent seam width is the usual cause.
What happens if I sew without any seam allowance?
The finished piece comes out smaller than intended, and the seam has little fabric to grip, so it may pull apart at stress points. There's also nothing left for finishing or letting a seam out if the fit runs tight.
Is 5/8 inch seam allowance always correct for garments?
It is the North American convention for the Big 4 brands, but narrower is common on curves, and some indie brands use different figures. Verify the figure on your pattern even when 5/8 inch sounds right.
Can I add seam allowance to a PDF pattern on screen?
You can, in drawing software that lets you offset a path, but the risk is print scaling. Most home sewists get safer results printing at 100 percent, verifying the test square, then tracing and offsetting on paper.
How do I know which needle plate markings match my machine?
Drop the needle and measure from its centre to each mark with a ruler. Markings can be worn, misaligned or in centimetres when you expect inches, so measuring once beats trusting the engraving.