Does a walking foot fit a CS6000i, and which shank it takes
Yes. The CS6000i takes a low-shank walking foot that screws onto the presser bar with its own built-in forked adapter. Whether the snap-on holder stays on depends on the foot: some fit alongside it, others need it removed first.
On this page (9 sections)
Part of our guide on preventing jams and skipped stitches

ZhXu Shuo SA140 Feed Walking Foot with Guide for Quilting and
Gives your CS6000i even feeding on quilt sandwiches and slippery layers - it is built to the SA140 low-shank
Check it on Amazon
HONEYSEW Open Toe Walking Foot W/Guide for Brother Sewing
Lets you see the needle while you stitch in the ditch on your CS6000i - an open-toe walking foot with a guide
See this alternative
YMXFAWO Walking Foot Kit for Brother
A second low-shank walking foot option for your CS6000i that installs tool-free, useful if you want to leave
View on Amazon| Product | shank type: low shank | Verdict | |
|---|---|---|---|
| ZhXu Shuo SA140 Feed Walking Foot with Guide for Quilting and Sewing ZhXu Shuo | Listed as fitting low-shank Brother home machines, matching the CS6000i's low shank | Meets it | View on Amazon |
| HONEYSEW Open Toe Walking Foot W/Guide for Brother Sewing Machine HONEYSEW | Explicitly fits low-shank Brother machines, same shank class as the CS6000i | Meets it | View on Amazon |
Key figures
- Shank type
- Low shank
- Attachment
- Screw-on adapter, no snap-on
- Max stitch width
- Check your manual
- Also sold as
- Even-feed foot, quilting foot
- Tool needed
- Included screwdriver
- Time to fit
- About 2 minutes
The short version
- A walking foot screws onto the presser bar directly: it does not use the snap-on holder
- Buy a foot listed as low shank with a screw-on or built-in adapter
- Check stitch width compatibility against your machine's manual
- A walking foot fixes feeding, not tension: skipped stitches and loops have other causes
Does a walking foot fit a Brother CS6000i?
Yes, and fit is simple once you know one fact: the CS6000i is a low-shank machine. That is the same standard used by most modern home sewing machines. The huge majority of walking feet sold for domestic machines will attach to it correctly. That means the search is short: one standard, one adapter style, and the checks in the buying section below.
This changes what you search for. You are not looking for a 'Brother CS6000i foot' specifically. You want a low-shank walking foot with a screw-on adapter. Brother sells its own walking foot for low-shank home machines, and generic versions attach exactly the same way. If a listing never mentions shank at all, skip it: a seller who hides the one figure that decides fit is not worth the gamble. The three checks in the buying section below take less than a minute to run.
Fitting takes about two minutes. Once it is on, the foot should sit level on the plate and the lever arm should ride the clamp screw. The full sequence is in the attachment section below, and it needs no extra parts beyond the foot itself.
Shank type: what it means for foot choice
Shank is the metal bar your presser foot hangs from. Its height decides which feet physically fit your machine. Three common standards exist on home machines: low shank, high shank, and slant shank. The CS6000i is low shank, which is good news twice over. Low-shank feet are the most widely available and usually the cheapest. Every generic walking foot described as 'fits most home sewing machines' is written for your machine. We go through walking foot vs attachment step by step elsewhere on the site.
When you pick by the sewing rather than the brand, shank is the first thing to read in a listing. A walking foot made for a high-shank machine will not reach the presser bar correctly. No adapter rescues that: geometry is simply wrong. A foot made for a low-shank machine fits whether the box says Brother, Singer, Janome or nothing at all. The brand name tells you who made it. Shank tells you whether it works.
One practical note: your presser bar is a low-shank domestic bar, so maximum fabric clearance under a walking foot depends on the presser bar lift. This is a machine for quilting lightweight battings and piecing, not for feeding a sandwich made of several layers of dense foam or leather. A foot will fit, but your machine's lift height sets the ceiling on thickness. Check your CS6000i manual for the presser bar lift specification to know what thickness your machine can handle.
| Shank type | Typical height | Fits CS6000i? |
|---|---|---|
| Low shank | Most common on home machines | Yes |
| High shank | Taller than low | No |
| Slant shank | Angled bar | No |
ZhXu Shuo SA140 Feed Walking Foot with Guide for Quilting and Sewing Stitch
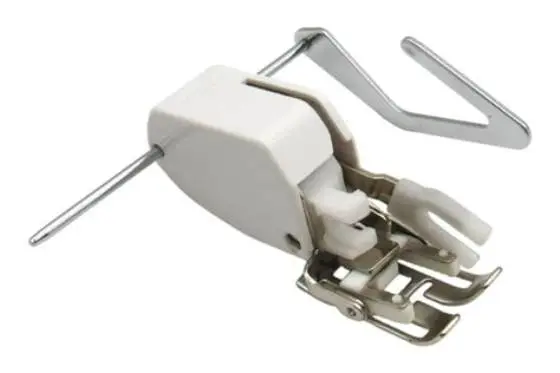
Gives your CS6000i even feeding on quilt sandwiches and slippery layers - it is built to the SA140 low-shank pattern Brother specifies for that machine, so it mounts straight onto the presser bar with no adapter.
- Height 0.1 inches
- Length 3.6 inches
- Width 3.5 inches
How the walking foot attaches
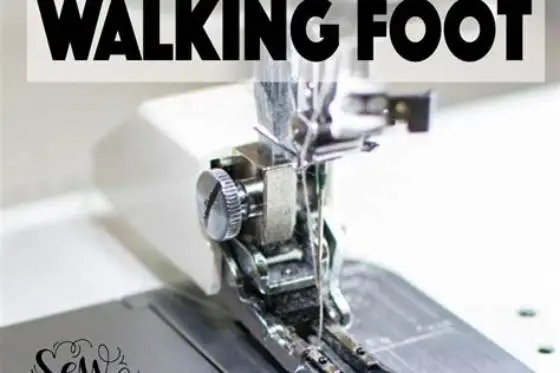
Your CS6000i came with a snap-on holder already fitted to the presser bar. That is the little levered bracket that lets you click standard feet on and off. The walking foot bypasses it: a lever arm rides on the needle clamp screw and drives the top feed dogs with every stitch. It helps to understand 4x4 embroidery sewing combo before going further.
The forked adapter is built into the foot itself on most domestic walking feet. You screw that assembly onto the bar, with the lever arm hooked over the clamp screw so it rises and falls with every stitch. No separate adapter is needed, and the needle clamp stays where it is. Leave the walking foot fitted for a whole quilting project, then swap back to snap-on feet for zigzag or buttonholes.
After fitting, sew a test line on scrap layers and watch the foot move. The top feed dogs should step forward with each stitch, in time with the feed dogs below. If the foot sits crooked or the lever arm misses the clamp screw, loosen the adapter, reseat it, and tighten again. A foot that is level on the plate and moving with the needle is fitted right.
- Raise the needle to its highest point and lift the presser foot lever.
- Loosen the walking foot's adapter screw until the fork slides over the presser bar.
- Position the foot behind the needle clamp with its lever arm over the clamp screw.
- Tighten the adapter screw firmly with the included screwdriver.
- Lower the foot and sew a test line on scrap.
HONEYSEW Open Toe Walking Foot W/Guide for Brother Sewing Machine Quilting
Lets you see the needle while you stitch in the ditch on your CS6000i - an open-toe walking foot with a guide bar, sized for low-shank Brother models like yours.
Nobody else says it plainly: the CS6000i takes a screw-on low-shank walking foot, and the snap-on holder has nothing to do with it.
What to check before you buy
Fit comes down to three things. Run every listing past the same short checklist before clicking buy. The seller's title usually states the shank. Bullet points usually state the attachment. Specifications or photos state the needle opening. If any of the three is missing, photos usually settle it. You want to see the forked screw-on adapter and a needle slot wide enough for your widest zigzag.
Stitch width is the one people skip and then regret. Check your CS6000i manual for the maximum zigzag stitch width your machine can sew. A walking foot with a narrow needle slot will strike the foot at the extremes of the swing. Most quality walking feet accommodate the standard zigzag widths on home machines. A few cheap versions built for straight-stitch-only quilting do not, so it is worth the ten seconds to check. Confirm the foot's needle opening matches or exceeds your machine's maximum zigzag width. If the listing gives no width figure, look at the photos. A wide slot with clear space either side of the needle is what you want. A narrow slot with the needle touching the edges is a warning.
| Check | What the listing must say | What failure looks like |
|---|---|---|
| Shank | 'Low shank' or 'fits most home machines' | 'High shank', 'slant', or no mention with industrial photos |
| Attachment | 'Screw-on' with adapter shown on the foot | Snap-on only, or adapter sold separately |
| Stitch width | Needle opening at least as wide as your manual's max zigzag, or photos showing clearance | 'Straight stitch only' in the description |
YMXFAWO Walking Foot Kit for Brother
A second low-shank walking foot option for your CS6000i that installs tool-free, useful if you want to leave the guide-bar foot set up for quilt rows and this one for garment sewing.
What a walking foot actually changes on this machine
A walking foot adds a second set of feed dogs on top of your fabric. They move in time with the machine's own feed dogs underneath. On a CS6000i, that changes one thing: layers move together instead of the top layer lagging behind. On a quilt sandwich, the top shifts less. Your seams stay straight and your batting stops creeping. On matching stripes, print stops sliding out of register. On slippery laminates or two plies of minky, fabric feeds evenly instead of waving.
What it cannot fix is everything that is not a feeding problem. This is where walking feet get blamed unfairly. Skipped stitches come from the needle first. An 80/12 universal needle that has done a few projects is the most common cause, and a fresh needle fixes it. Thread nests underneath are a re-threading job with the presser foot up, or the wrong bobbin in the case. Wavy seams from uneven tension will still be wavy under a walking foot. Tension happens above the fabric, not at the feed dogs.
Honest expectation: a walking foot makes piecing and quilting look tidier with no change to your technique. It is worth having on the machine before any quilting project. It will not make your machine feed thick assemblies it cannot already feed. It will not replace proper needle, thread and tension choices. Fix the feeding, keep the rest of your setup right.
Before starting your real seam, test the foot on scrap layers of the actual project fabric. Stack them the same way you will stack the project. Sew a 15 cm line, and check whether the layers stay aligned. If the top still shifts, try a lower-loft batting: a thinner sandwich feeds more evenly. For walking-foot quilting, start at a 3mm stitch length and sew at a steady medium speed. Long stitches move the sandwich without puckering, and a steady pace keeps the layers together.

YMXFAWO Walking Foot Kit with Guide for Low Shank Sewing Machines
Adds a second low-shank walking foot plus an adjustable quilting guide for evenly spaced rows on your CS6000i, with no adapter needed.
- Size size-006
Quilting foot, even-feed foot, or walking foot: same purchase
Yes: 'walking foot', 'even-feed foot', 'quilting foot' and sometimes 'dual feed foot' all describe the same type of attachment. On a low-shank machine they are one purchase, not several. Sellers use different names to catch different searches, not because the products differ. One variation worth knowing is the open-toe version, with a cut-away front so you can watch the needle enter the fabric. For stitching in the ditch or free-motion-adjacent guide work, that visibility earns its keep. For plain straight-line quilting, the closed solid toe is perfectly fine. The open-toe design gives less fabric control on thick sandwiches. Beginners piecing standard cotton battings get better results with the solid toe.
Between generic low-shank feet and Brother's own part, the SA140 walking foot, function is the same: the walking mechanism is not proprietary technology. The SA140 is the foot the CS6000i manual lists among the machine's accessories. Brother's part buys you a fitment guarantee straight from the machine's maker. Generics buy you the same result for less. Because the CS6000i is a standard low-shank machine, fit risk with a well-described generic is small. Choose the generic if the listing passes the three checks. Choose Brother's part if you would rather not think about it at all.
Many walking feet come with an optional quilting guide bar. It is a long metal rod that slides into a bracket on the foot and runs parallel to your seam. It rides along the previous seam so you sew perfectly spaced rows. The bar attaches through a small hole or clip on the foot's right side. You adjust spacing by sliding it in or out. If your foot includes one, keep it: it is worth having the moment you quilt your first bed cover.
| Option | Attachment | Best for |
|---|---|---|
| Generic low-shank screw-on | Screw-on adapter, built in | Everyday quilting on a budget |
| Brother low-shank foot | Screw-on adapter, built in | Zero-doubt fitment |
| Open-toe low-shank screw-on | Screw-on adapter, built in | Stitching in the ditch and seeing stitches |
- generic: same walking action, lower cost
- generic: widely available for low shank
- brand part: maker-guaranteed fitment
- open toe: full needle visibility for ditch work
- generic: listing quality varies, check the three points
- brand part: costs more for the same function
- open toe: front opening collects lint faster
- open toe: reduced fabric control on thick layers
A low-shank screw-on walking foot is the first accessory to add to a CS6000i before any quilting project.
Still wondering?
Do I need a separate adapter for a walking foot on the CS6000i?
No, as long as you buy a low-shank walking foot. The forked adapter is built into the foot, so nothing extra is needed. A separate adapter is only sold for high-shank and industrial feet, which will not fit your machine anyway.
Can I use a Singer walking foot on a Brother CS6000i?
Yes, if it is a low-shank model. Shank decides fit, not brand. Check the listing says low shank and shows the screw-on adapter. It will attach exactly as a Brother-branded foot does.
Why does my fabric still shift under the walking foot?
Check that the lever arm is riding on the needle clamp screw. If it is not, the top feed is not walking and the foot is just a heavy presser foot. Reseat the foot. If layers still creep, sew more slowly and let the feed dogs do the work.
Can the CS6000i quilt thick battings with a walking foot?
It handles typical low-loft cotton or polyester quilt battings in a standard three-layer sandwich. If your batting is very lofty or dense, test a scrap sandwich first. If the foot cannot close flat on the layers, the sandwich is too thick.
Should I remove the snap-on holder to fit the walking foot?
It depends on the foot. Some walking feet fit with the snap-on holder still on the bar; others need it removed first. Follow your foot's instructions, and keep the holder's screw safe for when you switch back to standard feet.
Does a walking foot help with slippery fabrics like minky or laminate?
Yes: this is one of its best uses outside quilting. Top feed grips the slick layer from above. It moves at the same rate as the bottom, which is exactly the problem the standard foot cannot solve on those fabrics.