Do you need a walking foot machine or just the attachment?
A walking foot sewing machine feeds the top layer at the same rate as the bottom using grippers on the foot that move with the feed dogs, so multiple or sticky layers do not shift. A clip-on walking foot does this on a regular machine, a true walking-foot machine does it built in with more power.
On this page (8 sections)
- The short version
- Basics: what is a walking foot sewing machine and how it feeds the top
- Problem: why layers shift, pucker or stick on a regular foot
- Comparison: walking-foot machine vs clip-on foot vs built-in dual feed
- Decision: when the attachment is enough and when you need the machine
- Setup: how to put on and set a walking foot for heavy layers
- Check: how to test feeding and fix common walking foot problems
- Still wondering?
Part of our guide on best sewing machine for upholstery
Key figures
- Stitch length
- 3.0-4.0 mm for quilts
- Needle for layers
- 90/14 to 100/16
- Thread weight
- 40-50 wt polyester
- Foot pressure
- lower 1-2 notches
- Feed type
- top + bottom together
- IDs to know
- IDT / AcuFeed = dual feed
The short version
- Use a regular foot for two stable layers, a clip-on walking foot for quilts and vinyl, a true walking-foot machine for leather and many thick layers.
- If the top layer creeps forward or the seam puckers, you need top feeding, not more presser foot pressure.
- Set a longer stitch, lower pressure, and a larger needle when you add a walking foot for heavy stacks.
- Test on scraps first and check that both layers exit together without waves.
Basics: what is a walking foot sewing machine and how it feeds the top
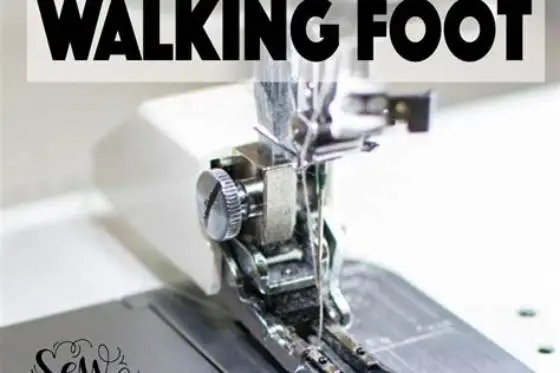
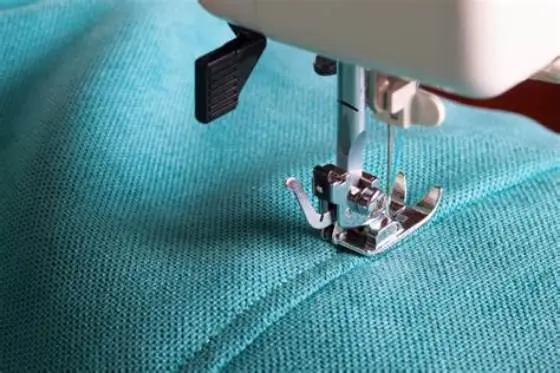
You asked what is a walking foot sewing machine and the answer starts under the foot. A regular foot just holds fabric down while the feed dogs below pull it forward, so the bottom layer moves and the top drags. A walking foot adds its own set of grips on top that step in time with the dogs below, so both layers advance together at 3.0-4.0 mm per stitch when you set that length. That paired motion depends on your stitch length, presser pressure and fabric thickness, so the same setting feeds quilts differently than single cotton.
Think of a regular presser foot as a smooth sole that presses. It creates friction on the top layer and that friction is why quilts creep, vinyl sticks and stripes never match. A walking foot replaces that sole with a moving one, usually two small feed dogs or a textured bar inside the foot that lifts, moves forward and drops again. You still control speed with the pedal and length with the dial, but now the top is pulled, not pushed.
A walking foot machine has that mechanism built into the head and driven by the main shaft, so it stays timed at any speed and under load. A clip-on walking foot is an add-on foot with its own arm that hooks over the needle clamp and uses the needle bar motion to drive its top feed. Both aim for even feeding, but the built-in machine keeps timing and pressure more consistent when the stack gets thick or heavy.
Problem: why layers shift, pucker or stick on a regular foot
Layers shift because only the bottom gets pulled. On a quilt sandwich of top, batting (the fluffy middle) and backing, the feed dogs grip the backing and the top floats under a smooth foot. After 10 inch (25 cm) of stitching the top can lag by 1/4 inch (0.6 cm) or more, and the amount depends on loft, length and how hard you hold the quilt. That lag shows as tucks at the end, wavy borders or points that do not meet. It helps to understand machines for thick leather layers before going further.
Pucker and stick come from the same friction. Vinyl and coated cotton grab a standard metal foot and hesitate, then lurch forward, which leaves short and long stitches and a puckered seam. Leather does the same but also scars where the foot dragged. Even regular cotton puckers when a thick seam, like a jeans hem over 4 layers, lifts the foot and breaks contact with the dogs, so the feed stalls for a stitch or two.
You can press harder, but that makes it worse. Extra pressure pins the top and increases drag, so the bottom still feeds and the top still stalls, just with more distortion. Shortening stitch length to 1.5-2.0 mm also hurts because the dogs take smaller bites and slip more on thick stacks. The fix is to drive the top instead of pressing it, which is why a walking foot, a Teflon foot or tissue paper helps on vinyl, but only the walking foot controls both layers together over distance.
Comparison: walking-foot machine vs clip-on foot vs built-in dual feed
These three options all feed the top, but they do it with different strength and convenience. A clip-on walking foot is the add-on most home sewists buy first. It walks the top using the needle bar and it fits many low-shank machines. It handles quilts, 2-4 layers of cotton and light vinyl well when you reduce pressure and lengthen the stitch to 3.5 mm. Its limit shows on long heavy work where the arm can flex or the foot gets noisy at speed. We cover machine for auto vinyl in its own article.
Built-in dual feed, called IDT or AcuFeed by makers, is a second feed system built into the machine behind the needle. You flip a lever or switch and a small feeder engages on top without changing feet. It is quiet, stays timed and lets you use many regular feet with dual feed on. It feeds quilts and bags beautifully, but it is still a home machine with a home motor and lift height, so very thick leather or many layers of canvas will still stall it.
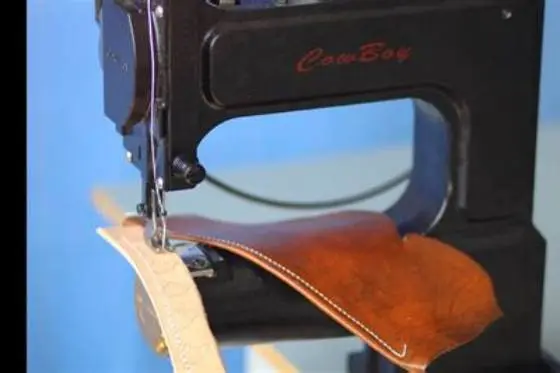
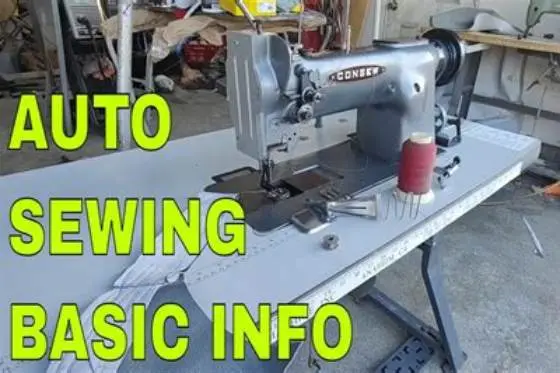
A true walking-foot machine, often called a compound-feed or triple-feed in its industrial form, drives the foot, the needle and the feed dogs together from inside the head. It has higher presser lift, often 3/8 inch (0.9 cm) or more, and a stronger motor that holds feed timing under load. That is why upholstery and leather shops use it for 4-8 layers of heavy material. The trade-off is size, speed control and that it is not ideal for fine piecing or embroidery.
- Clip-on walking foot: low cost, portable, needs correct shank type, can be bulky and noisy.
- Built-in dual feed: integrated, easy to engage, works with many feet, still limited lift and power.
- True walking-foot machine: most power and lift, feeds heavy stacks evenly, larger and not for delicate work.
| System | Best for | Layers / thickness | Limits |
|---|---|---|---|
| Clip-on walking foot | quilts, light vinyl, matching plaids | 2-4 layers cotton, 1 layer vinyl | flex at speed, needs right shank |
| Built-in dual feed (IDT / AcuFeed) | quilts, bags, coats | 3-5 layers, medium weight | home lift height, home motor |
| True walking-foot machine | leather, upholstery, canvas | 4-8 layers, heavy | size, not for fine piecing |
- clip-on: cheap way to test even feeding
- dual feed: always ready, no extra foot to store
- true machine: feeds heavy work without pushing
- clip-on: can chatter and needs shank match
- dual feed: still a home machine power limit
- true machine: heavy, single purpose
Most skipped stitches on thick seams are not tension at all, it is the top layer stalling while the bottom races ahead.
Decision: when the attachment is enough and when you need the machine
Choose the attachment when your problem is creep over distance, not power through thickness. If you quilt straight lines on a sandwich of cotton and 80/20 batting, match stripes across a dress, or sew a vinyl tote with two layers plus lining, a clip-on walking foot is enough. It will keep the top layer moving with the bottom so your 12 inch (30 cm) seam ends even. That result depends on using the right shank foot, lowering pressure a notch and testing on scraps first. If that sounds like your situation, read up on heavy leather sewing machines next.
You need built-in dual feed when you want that even feeding without swapping feet all day. If you switch often between piecing, quilting and garment sewing on the same machine, flipping a lever beats changing a bulky foot. It also keeps more throat space clear because the mechanism is slim. For many quilters this is the sweet spot and it avoids owning two machines.
You need a true walking-foot or compound-feed machine when the job stalls a home machine even with a walking foot. Signs are the motor groans on 6-10 mm stacks, the foot cannot climb over a thick cross seam, or the needle deflects and skips on leather. If you sew bags with foam, auto upholstery, or leather over 1/8 inch (0.3 cm) thick, the extra lift and driven needle feed matter. I would pick the clip-on for quilts and occasional vinyl, dual feed if I quilt weekly and want ease, and a true machine only if heavy goods are the main work. My rule of thumb is simple: if you have to help the fabric through, you need more machine, not more pressure.
- attachment: solves most home creep for little money
- dual feed: fastest daily use
- true machine: handles real heavy stacks
- attachment: not for thick leather
- dual feed: costs more than a foot
- true machine: overkill for quilts alone
Setup: how to put on and set a walking foot for heavy layers
A walking foot only walks if its arm is seated right. With the needle up and the presser foot up, loosen the foot screw and remove the regular foot. Slide the walking foot on so its fork straddles the needle clamp screw, then tighten the shank screw firmly. Lower the foot and turn the handwheel slowly to be sure the arm moves up and down with the needle and nothing hits. That check takes ten seconds and prevents a bent arm.
Settings matter more than force. Reduce presser foot pressure by 1-2 notches or to the machine's darn setting minus a little, so the top can move without being pinned. Lengthen stitch to 3.0 mm for quilts and 3.5-4.0 mm for vinyl or thick seams, because a longer bite slips less on heavy stacks. Use a fresh needle sized to the stack, usually 90/14 for quilts and 100/16 leather point for vinyl or leather, and a 40 wt or 50 wt polyester thread that does not add bulk in the seam.
Thread with the presser foot up so the thread seats in the tension discs, then rethread the needle and bobbin. Test on a scrap stack the same as your project and watch the layers exit together. If the seam still waves, lower pressure a touch more. If stitches skip, go up one needle size before raising tension. The Sewing Machine Matchmaker on this site can narrow which machines offer built-in dual feed versus needing a clip-on foot if you are shopping.
- Turn off machine, raise needle and presser foot, remove old foot.
- Fit walking foot with fork over needle clamp screw, tighten shank screw.
- Set pressure lower 1-2 notches, stitch length 3.0-4.0 mm, needle 90/14 to 100/16.
- Re-thread with foot up, insert fresh needle, wind bobbin evenly.
- Sew test stack 10 inch (25 cm), check layers exit even, adjust pressure or needle.
Check: how to test feeding and fix common walking foot problems
Good feeding looks calm. Both layers move without you pulling, stitches are even on top and bottom, and the seam lies flat after pressing. Check it by marking the top and bottom layers with a pin at the same point, sewing 10 inch (25 cm), then measuring the overhang. Less than 1/8 inch (0.3 cm) difference is good for home work. More than that means pressure is high, length is short, or the foot is not seated on the needle clamp.
Common fixes are cheap and quick. If fabric sticks, clean lint from the feed dogs and bobbin area, re-thread with the foot up and try again. If vinyl still drags, place tissue paper under the seam and tear it away after, or use a Teflon sole walking foot. If the machine thumps on a thick cross seam, stop with the needle down, lift the foot, slip a folded scrap behind the foot to level it, then sew across. That levels the foot so the dogs keep grip.
Know when to stop and get service. A walking foot that chatters loudly, a needle that hits the foot, or feed dogs that do not move when you turn the handwheel with the foot down signals timing or lift linkage trouble. Change the needle to 90/14 or 100/16 first and test, because a bent needle mimics timing issues. If the problem stays after a new needle, correct bobbin and clean feed path, book a service check rather than forcing heavy work through.
- Feed test: pin mark both layers, sew 10 inch (25 cm), measure overhang.
- Sticking fix: clean dogs, lower pressure, use tissue or Teflon sole.
- Thick seam fix: level foot with scrap behind, go slow, needle down.
- Service sign: hitting, chattering or no feed after new needle and re-thread.
For most home quilters a clip-on or built-in dual feed is enough; buy the true machine only for steady heavy work.
Still wondering?
Can I use a walking foot for all sewing?
You can, but you should not for everything. It is bulky and can obscure your view for fine piecing or curves. Use it for long straight seams, quilting and sticky fabrics, then switch back to a regular foot for detail work.
Do I need a different walking foot for quilting versus leather?
You need the right shank type for your machine and the right sole for the job. A standard walking foot with a guide suits quilting, while vinyl and leather feed better with a Teflon sole or roller foot version. Match shank first, then sole.
Will a walking foot fix skipped stitches on thick seams?
Sometimes. If skips come from the top stalling and the needle deflecting, even feeding helps. If skips come from a dull or wrong-size needle, or lint in the bobbin area, change the needle to 90/14 to 100/16 and clean first.
What stitch length should I use with a walking foot?
Longer than normal. Try 3.0 mm for quilts and 3.5 to 4.0 mm for vinyl, leather or many layers. Short stitches slip more on thick stacks and can pucker.
Is IDT or AcuFeed the same as a walking foot?
They do the same job, feeding the top, but they are built in. You engage dual feed with a lever instead of swapping a bulky foot. They are great for quilts and bags, but they have the lift and power limits of a home machine.