Which machine embroidery projects beginners can finish with standard settings
Beginners can handle simple applique, monograms, and basic shapes using standard machine embroidery settings. These projects use low stitch density and simple designs, requiring only basic tension and speed settings to succeed.
On this page (7 sections)
Part of our guide on embroidery machine for beginners
Key figures
- Standard speed
- Check your machine manual's default; many beginner machines default to about 400 spm
- Needle size
- 80/12 EU/US
- Thread weight
- 50 wt
- Stabilizer
- Medium-weight cutaway, suited to your fabric
- Hoop size
- 4-5 inches
- Stitch density
- Use software default for cotton, often about 0.4 mm
The short version
- Start with simple designs like monograms and applique to avoid complications.
- Use standard tension and moderate speed to prevent thread breaks.
- Stabilize fabric well to reduce puckering in embroidery.
- Avoid dense, multi-color designs until confident with machine settings.
- Clean and thread your machine properly to avoid skipped stitches.
Which machine embroidery projects beginners can complete
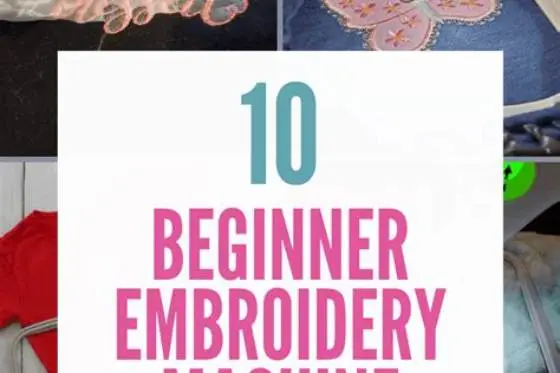
Beginners usually manage straightforward projects like monogramming initials, simple applique, and basic geometric shapes. These designs have low stitch density, reducing the risk of needle breaks or thread nests. They mostly require a single color or minimal thread changes.
Start with small designs under 10,000 stitches according to your machine manual. Check the design info screen for stitch count to confirm. These designs keep fabric flat and minimize puckering. Cotton or polyester blends work well and stabilize easily.
Avoid large, dense designs at first as they demand more precise machine settings and longer stitching times. Quick, small projects help build confidence and understanding of your machine’s behavior.
Check the fabric’s weave before choosing your design. Tighter weaves handle dense stitching better, while loosely woven fabrics like gauze may distort more. This affects your design choice and stabilizer needs. Before you commit to anything, it is worth looking at easy sewing projects.
Some beginners find it helpful to embroider on scraps of their chosen fabric first. This trial run shows how the fabric reacts and tests your settings. It also helps prevent costly mistakes on the final piece.
Basic machine settings for beginner projects
Check your embroidery machine’s manual for its default speed setting. Many beginner models run around 400 stitches per minute (spm). Start at this speed for your first projects and adjust only after test stitches on scrap fabric. Slow down when sewing narrow satin columns or small lettering by testing on scrap until you see no thread shredding or bobbin loops.
Use needle size 80/12 for cotton, linen, and polyester blends typical in beginner projects. For heavier fabrics like denim or canvas, consider a larger needle such as 90/14, but check your manual for recommendations. If that sounds like your situation, read up on how to use brother embroidery machine next.
Set thread tension to your machine’s standard or default setting. Adjust tension only if you see thread nests, loops, or puckering during test runs. A visual check for correct tension shows balanced stitches on both fabric sides without loops or thread nests. The bobbin thread should appear centered under satin stitches.
Use a medium-weight cutaway stabilizer appropriate for your fabric weight to prevent puckering and provide support. For fabrics like towels or fleece, you may need to adjust stabilizer type and loosen top tension slightly; consult your machine manual or stabilizer packaging for guidance.
Keep stitch density at the software’s default for your fabric type. For cotton, this often is about 0.4 mm spacing between stitches. Do not increase density without testing on scrap fabric, as too dense stitching can cause fabric damage or needle breaks. We cover embroidery thread that prevents breaks in its own article.
Test all settings on scrap fabric before starting your project to confirm smooth stitching and proper tension.
If your machine allows, lower the presser foot pressure slightly for delicate fabrics. This reduces fabric stretch and puckering. A setting around 3 or 4 on a scale of 10 often works well with cotton blends.
Use polyester embroidery thread for most beginner projects. It resists breakage and has a slight stretch, which helps with tension balance. Avoid cheap threads, which can fray and cause skipped stitches.
Humidity and temperature affect thread tension. In dry conditions, thread can become brittle and break more easily. Adjust tension and speed after testing if you notice frequent thread breaks or loops.
| Setting | Recommended Value | Notes |
|---|---|---|
| Speed | Check machine default, often ~400 spm | Adjust slower for fine details |
| Needle size | 80/12 EU/US | Standard for cotton blends |
| Thread weight | 50 wt | Polyester or cotton |
| Tension | Machine default | Adjust if thread nests form |
| Stabilizer | Medium-weight cutaway | Choose suitable for fabric |

New brothread Cut Away Embroidery Stabilizer 8"x8"
Keeps your beginner projects flat on knits and fleece with steady 2.5oz medium-weight backing that stays put after washing.
Common beginner mistakes and fixes
Skipped stitches often occur from dull needles, improper threading, or incorrect tension. Replace needles after about 6-8 hours of stitching, or sooner if thread breaks occur. Re-thread the machine with the presser foot raised and check bobbin placement to fix common issues.
Bird nesting, where thread tangles under fabric, usually signals bobbin winding or tension problems. Clean lint from the bobbin case and use quality thread. Adjust upper tension gradually if nesting continues.
Puckering happens when stabilizer is too light or fabric is stretched during hooping. Use the right stabilizer weight and hoop fabric without pulling. A hoop size that fits the design snugly reduces puckering.
- Replace dull needles regularly
- Re-thread machine with presser foot up
- Clean and re-wind bobbin
- Adjust tension incrementally
- Hoop fabric without stretching
Beginner machine embroidery projects thrive with simple designs and standard settings you can master quickly for beautiful results.
Project ideas suited to simple machines
Monograms on cotton napkins or towels are excellent first embroidery projects. They use one color and simple satin stitches that standard machines handle well. Choose fonts with smooth curves to keep stitches neat.
Applique with basic shapes like hearts, stars, or flowers is beginner-friendly. Secure fabric pieces with simple zigzag stitches. These projects help practice hooping and stabilization.
Small home decor items like coasters, bookmarks, or fabric labels use minimal stitches and colors. They let you learn machine operation without complexity.
Keep monogram letters at least 1 inch tall for neat satin columns. Letters smaller than about 0.5 inch crowd stitches and may skip underlay, causing blurred edges. Test the smallest letter on scrap fabric to check stitch clarity.
A 4-inch coaster with about 6,000 stitches at 400 spm takes roughly 15 minutes plus thread changes. If your machine shows much longer times, the design may have too high density or overfilling, causing stiffness.
Try simple line art designs like single-line animals or icons. These require minimal color changes and maintain a low stitch count. For example, a 2-inch cat outline with 3,500 stitches can complete in under 10 minutes at 400 spm.
Beginner crafters often enjoy personalizing tote bags with small, simple embroidery patches. These patches can be sewn or glued on later. This avoids hooping large, thick bags and makes the project more manageable.
Practice layering applique shapes with contrasting colors to create depth. Start with two layers, such as a red heart over a white background. Use a 3 mm zigzag stitch to secure edges. This technique teaches control without complicated settings.
| Project Type | Complexity | Recommended Fabric | Skills Practiced |
|---|---|---|---|
| Monogramming | Low | Cotton or linen | Satin stitch control |
| Applique shapes | Low to medium | Cotton blends | Hooping and stabilization |
| Bookmarks & labels | Low | Medium-weight fabric | Thread tension and speed |
How to start your first machine embroidery project successfully
Choose a simple design with minimal colors and under 10,000 stitches. Use a design file compatible with your machine or software, such as PES or DST files, available from trusted embroidery design sites.
Prepare stable medium-weight cotton or blends. Hoop fabric with an appropriate stabilizer, ensuring no wrinkles and firm tension. Proper hooping prevents puckering during stitching.
Set machine speed to the default in your manual, often around 400 spm, and keep tension at standard settings. Test stitch on scrap fabric to confirm settings before starting.
Replace needles and use quality thread to avoid breakage. After stitching, trim excess stabilizer carefully and press on the fabric’s reverse side to flatten stitches.
- Select a simple design under 10,000 stitches from a trusted source.
- Prepare fabric with medium-weight cutaway stabilizer.
- Hoop fabric tightly without stretching.
- Set machine speed to your manual's default, often about 400 spm, and standard tension.
- Test stitch on scrap fabric.
- Embroider your project carefully, watching for thread breaks.
- Trim stabilizer and press fabric after finishing.
Still wondering?
Can beginners use decorative stitches for embroidery?
Decorative stitches often need tighter tension and slower speed. Beginners should master basic satin and zigzag stitches first.
What fabric works best for first machine embroidery projects?
Medium-weight cotton or cotton-polyester blends offer good stability and hooping ease, minimizing puckering.
How often should I change my embroidery needle?
Change needles every 6-8 hours of stitching or sooner if thread breaks or fabric damage appear.
Is a stabilizer necessary for all embroidery projects?
Yes, stabilizers support fabric and prevent puckering. Medium-weight cutaway stabilizers suit most beginner fabrics.
How do I know if my machine tension is correct?
Balanced stitches on both fabric sides without loops or puckering indicate correct tension. Adjust tension incrementally if needed.