Fabric scissors pulling fabric: what brings the edge back at home
Sharpen fabric scissors by honing only the beveled edge on a fine stone or diamond file at the existing angle, usually 15-20 degrees, with light one-way strokes. Clean and tighten the pivot first, skip foil and sandpaper for real sharpening, and test on a single layer of cotton.
On this page (8 sections)
- The short version
- Pulling or crushing: how to tell if fabric scissors need sharpening vs cleaning or tightening
- Foil and sandpaper: do they actually sharpen fabric scissors or just clean them
- how to sharpen fabric scissors with a stone or file: the correct angle and stroke
- Small scissors: how to sharpen detail and embroidery shears by hand
- The sharpness test: how to check the edge without ruining fabric
- When to stop: when professional grinding beats at-home sharpening
- Still wondering?
Part of our guide on best sewing table
Key figures
- Cleaning first
- Lint and oil dull more than steel
- Pivot tension
- Tips should just meet closed
- Sharpening angle
- 15-20 degrees, match bevel
- Stone grit
- 800-1200 grit fine
- Test fabric
- Single layer cotton muslin
- Stop point
- Cuts clean, no folding
The short version
- Clean, dry, and tighten the pivot before you decide the edge is dull.
- Hone only the outer bevel at its existing angle; never grind the flat inside face.
- Foil and sandpaper polish and deburr but do not create a new edge on steel.
- Test on one layer of fine cotton or silk; a sharp shear cuts without lifting the fabric.
- If blades are nicked, bent, or heavily rounded, send them for professional grinding.
Pulling or crushing: how to tell if fabric scissors need sharpening vs cleaning or tightening
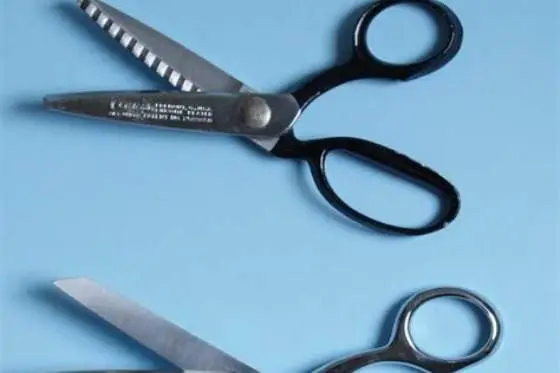
Scissors that fold the fabric at the tips and push it forward usually have a loose pivot or lint packed at the screw, not a dull edge along the whole blade. Hold them closed to a light and look for a hairline gap near the tips. A gap means the blades do not meet, so they crush instead of shear.
Lint, adhesive, and dried oil build fast in a sewing room. Open the shears wide and wipe both blades with isopropyl alcohol on a lint-free cloth. Check the inside faces, the flat sides that slide against each other, for sticky residue. You will often feel the drag disappear after cleaning, and the cut improves without any grinding.
Tension matters as much as sharpness. Tighten the pivot screw a quarter turn and try a cut on scrap. The blades should close smoothly with light thumb pressure, and the tips should kiss at the very end. If the screw just spins or the blades wobble side to side, the pivot is worn. That wobble creates a burr-like feel.
A true dull edge shows as a rounded, shiny line along the outer bevel when you tilt it under a lamp, and it skips mid-cut even after cleaning and tightening. Run a fingertip lightly away from the edge, not along it. A small wire burr on the inside face can also catch. If cleaning and tension do not fix the pull, the bevel needs honing. The next section explains why quick tricks do not replace it. The other half of this decision is choosing between fabric and embroidery trimmers.
- Cleaning check: alcohol wipe, dry, one drop of sewing machine oil at pivot, wipe excess
- Tension check: tighten 1/4 turn, test close, tips must meet with no gap
- Edge check: look for rounded bevel and uniform light reflection, not a crisp line
| Symptom | Likely cause | Fix first |
|---|---|---|
| Crushes at tips, gap visible | Loose pivot or bent blade | Tighten pivot, check for wobble |
| Drags, leaves adhesive | Residue on inside faces | Clean with alcohol, oil pivot |
| Skips mid-blade after cleaning | Rounded bevel or burr | Hone bevel, remove burr lightly |
Foil and sandpaper: do they actually sharpen fabric scissors or just clean them
Cutting aluminum foil or sandpaper feels sharper for a few cuts because it scrubs off adhesive and knocks down a tiny burr. The foil does not grind a new bevel into hardened shear steel. Grit on sandpaper is too coarse and hits the flat inside face where you should never grind.
Shears cut by two flat inside faces sliding past each other with a precise bevel on the outside of each blade. Dragging that flat across sandpaper rounds the edge and widens the gap. You get a rougher, toothier edge that chews fine cotton and silk. The improvement you feel is mostly cleaning, not sharpening.
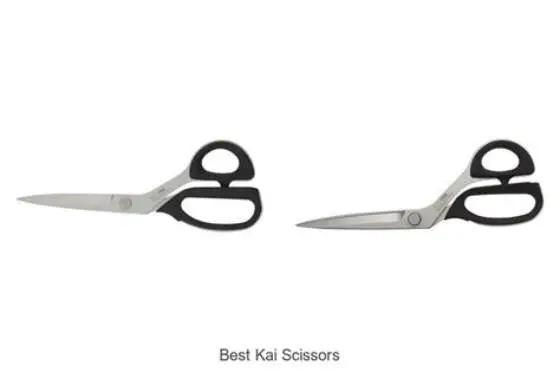
A stone or diamond file removes a thin, controlled strip from the outer bevel only and leaves the inside face flat. That restores the crisp intersection where the two blades meet. Foil cannot do that because it folds and cuts unevenly. Sandpaper cuts the wrong surface and leaves deep scratches that need more work to polish out. Before you commit to anything, it is worth looking at best fabric scissors.
Use foil or fine 2000-grit paper only as a cleaner when you have no alcohol handy, and expect the effect to fade after a few inches of fabric. If the shears still pull after cleaning and a light deburr, they need a real hone. The next section shows the angle and stroke that actually brings the edge back.
| Method | What it does | Risk to edge |
|---|---|---|
| Aluminum foil cutting | Cleans adhesive, lightly deburrs | No new edge, effect fades fast |
| Sandpaper cutting | Scrubs residue, scratches steel | Rounds edge, harms flat face |
| Fine stone or diamond file on bevel | Grinds bevel, restores apex | Low risk if angle is matched |
- foil and sandpaper: quick clean with no tools
- foil and sandpaper: can remove light adhesive fast
- do not sharpen hardened shear steel
- sandpaper scratches the flat face you must keep flat
- results fade after a few cuts

S SATC Diamond Sharpening Stone 2 Side Grit 400/1000 Diamond Plate Honing
Hones just the outer bevel of your fabric scissors with the 1000-grit fine side on an 8-inch plate so the flat inside face stays true.
how to sharpen fabric scissors with a stone or file: the correct angle and stroke
Your shears have a narrow outer bevel, usually 15-20 degrees per blade depending on brand and size, and a dead-flat inside face. You hone only that outer bevel and you match the existing angle exactly. Grinding the flat ruins the shear. If you are unsure of the angle, color the bevel with a marker and watch where the stone removes ink.
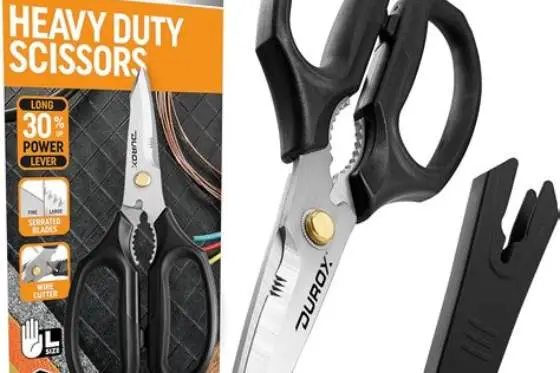
Set up with good light and a stable surface. Open the shear wide and rest the bevel flat on a 1000-grit diamond plate or fine ceramic stone. You will feel the bevel sit down with a soft click when the angle is right. Keep the inside face off the stone completely. Hold the handle firmly and keep your fingers clear of the edge. The other half of this decision is best heavy duty scissors.
Use light pressure, about the weight of the shears themselves, and push the blade forward across the stone as if you were trying to slice a thin layer off it. Keep the stroke in one direction, heel to tip, and lift on the return. Repeat 3 to 6 times, then check the marker. You want an even, satin scratch pattern across the whole bevel, not just at the heel or tip.
Feel for a faint wire burr on the flat side after honing. Lay the flat face almost flat on the stone, raise the spine about 1-2 degrees, and make one very light pass to knock the burr off. Wipe, oil the pivot, and test. Stop as soon as the fabric cuts cleanly without lifting. The next section adapts this for small scissors where the bevel is tiny.
- Clean and dry blades, tighten pivot so tips just meet, mark bevel with marker
- Match bevel flat on stone, feel it seat, keep inside face off stone
- Push heel to tip in one direction with light pressure, 3-6 strokes, check marker
- Remove burr with one flat, ultra-light pass on inside face, wipe and oil
- Test on single-layer cotton, repeat only if it still pulls
A single light burr on the inside face can make sharp shears feel dull until you remove it.
Small scissors: how to sharpen detail and embroidery shears by hand
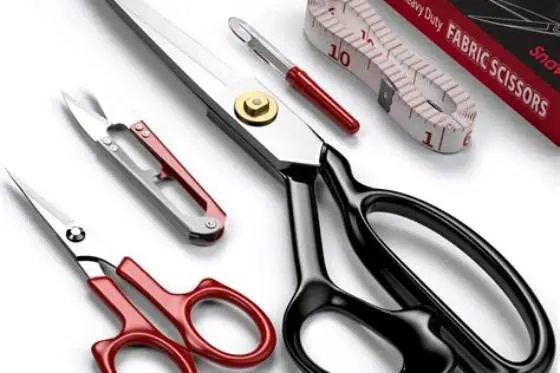
Small detail and embroidery scissors use the same geometry but the bevel is shorter, often 1-2 mm wide, and the blades flex more. Clamping pressure matters. Hold the finger hole close to the pivot and let the blade rest naturally on the stone. Forcing the tip down bends the blade and rounds the point.
Use a small, flat diamond file or a narrow 800-1200 grit stone that fits the length. A large bench stone can rock and round the tip. Seat the bevel the same way, marker helps here because the bevel is hard to see. Make shorter strokes, about 1 to 1.5 inches (2.5 to 4 cm), heel to tip, with even lighter pressure than on dressmaking shears.
Points dull first on detail scissors. Keep the tip on the stone through the whole stroke and do not lift early. Count strokes and do the same number on both blades to keep them matched. Two to four light strokes per side is often enough. Check sharpness under magnification if you have it; you look for a clean, unchipped apex.
Deburr even more gently on small shears. One whisper pass with the flat face barely touching the stone is enough. Wipe thoroughly, as a tiny burr feels huge on fine thread and silk. Test on a single layer of lawn or silk, not on paper. Paper dulls the fresh apex quickly and tells you little about fabric.
- Tool choice: small diamond file or narrow fine stone, flat and true
- Stroke length: 1 to 1.5 inches (2.5 to 4 cm), heel to tip, one direction
- Pressure: weight of scissors only, lighter at the tip
- Deburr: one ultra-light flat pass, then wipe and oil pivot
The sharpness test: how to check the edge without ruining fabric
A good test uses fabric you already sew, not paper. Paper contains clay and grit that micro-chips a fresh edge. Keep a 6-inch (15 cm) square of washed cotton muslin or lawn as your test swatch. Wash removes finish that can mask a dull spot. Test after cleaning, after tensioning, and after each honing round.
Hold the test fabric gently, without stretching it taut. Let it hang or support it lightly on the table and cut a slow, straight line about 3 inches (7.5 cm) long with the middle of the blades. Sharp shears slice with almost no lift and leave a clean, non-frayed edge. Dull or burred shears lift the fabric, push a fold ahead of the cut, or need two bites to finish.
Listen and feel as well as look. A sharp shear makes a soft, continuous hiss and needs light, even thumb pressure. A dull spot clicks or skips, and you feel a bump mid-close. If the cut is clean on muslin, try one thin silk or knit scrap if that is what you sew most. Stop honing as soon as it passes; extra strokes just wear steel.
Wipe blades after testing and add a single drop of oil at the pivot. Store shears closed, tips protected, away from pins and rotary cutters. That one habit keeps the edge longer than any sharpening schedule. When honing no longer brings the hiss back, the blades need professional attention.
- Test fabric: single-layer washed cotton muslin, 6 inches (15 cm) square
- Cut: slow 3-inch (7.5 cm) line, mid-blade, no stretching
- Pass signs: no lift, no fold pushed ahead, clean edge, soft hiss
- Fail signs: lift, skip, need to close twice, ragged edge
When to stop: when professional grinding beats at-home sharpening
Home honing maintains a good edge but it cannot fix a nick, a bent blade, or a bevel that has been rounded for years. If you see a visible notch when you sight down the edge, or the blades rock when closed on a flat table, stop. Grinding out a deep nick by hand removes too much steel and changes the set, the slight curve that makes the blades meet only at the cutting point.
Professional grinding re-establishes both bevels on a wheel and then re-sets the blades so they meet correctly. It also handles serrated or specialty edges you should not touch at home. Expect a turnaround of several days and a cost that depends on length and condition. For high-quality dressmaking shears, grinding usually costs less than replacement and extends life for years.
You can also damage shears by over-honing. If you have honed three light rounds and the muslin test still fails, or the edge looks wavy under light, further strokes make it worse. Clean, oil, and put them aside for service. Keep a second pair for everyday cutting so you are not tempted to force a dull tool through canvas or paper.
Choose a sharpener who works on fabric shears, not just knives or lawn tools. Ask if they keep the inside face flat and if they test on fabric. A knife edge is too acute for shears and will fold quickly. Good service returns shears that cut to the tip without chewing. That is the signal to resume light home maintenance, not heavy grinding.
- Get grinding if: visible nicks, bent blade, wavy edge, or gap that will not close with pivot adjustment
- Do not grind at home: serrated blades, pinking shears, or heavily rounded bevels
- Maintenance after service: light hone every few months with 3-6 strokes, not heavy sessions
Home honing works for maintenance; deep nicks and bent blades need professional grinding.
Still wondering?
Can I use a knife sharpener or pull-through for fabric scissors?
No. Most pull-through sharpeners set a knife angle around 20-25 degrees per side and grind both sides. Shears need one flat inside face and one outer bevel. A pull-through rounds that flat and leaves a gap.
How often should I sharpen fabric scissors at home?
Only when cleaning and tightening do not restore the cut. For many home sewists that is every 3 to 6 months of regular use, with just 3 to 6 light strokes. Frequent heavy grinding shortens blade life.
What grit should I use for fabric shears?
A fine 800-1200 grit diamond plate or ceramic stone is right for maintenance. Coarser grit removes too much steel and leaves deep scratches you must polish out.
My scissors cut paper well but not silk. Are they sharp?
Paper is abrasive and forgiving. Silk shows the real edge. If silk lifts, folds, or frays, the bevel is rounded or burred. Hone the outer bevel lightly and retest on a single layer of silk.
Should I oil scissors after sharpening?
Yes. Wipe all grit off, add one small drop at the pivot, work it in, and wipe excess. Oil reduces wear on the inside faces and keeps tension smooth.