Why can't I sew a straight line and how to fix it for beginners
Sew a straight line by positioning fabric flat under the presser foot, using machine guides or marking tools, and feeding the fabric evenly. Control speed and hand placement to prevent shifting and crooked stitching.
On this page (8 sections)
- The short version
- How to position fabric to sew straight
- How to guide fabric evenly through a sewing machine
- How to mark and use guides for straight stitching
- Common mistakes that cause crooked lines
- Tips for straight lines in quilting and dress sewing
- How to sew a straight line: step-by-step guide
- Still wondering?
Part of our guide on winding by hand or machine
Key figures
- Needle size
- 80/12 EU/US
- Thread weight
- 50 wt
- Presser foot pressure
- Medium setting
- Machine guides
- Millimeter marked
- Sewing speed
- 10-20 stitches/sec
- Fabric alignment
- Flat and taut
The short version
- Keep fabric flat and aligned with machine guides for straight stitching.
- Use marking tools to draw your sewing line for accuracy.
- Guide fabric gently with both hands at the sides to feed evenly.
- Slow sewing speed helps maintain control over fabric movement.
- Common crooked lines come from fabric shifting or uneven feeding.
How to position fabric to sew straight
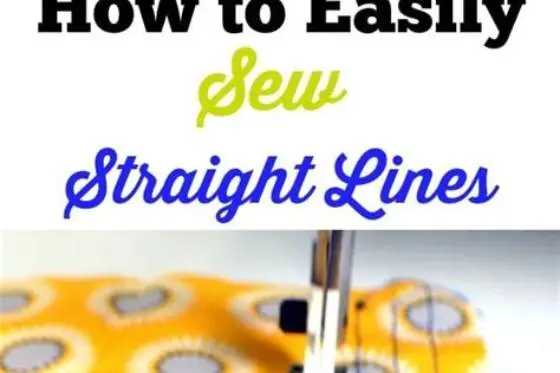
Place your fabric flat under the presser foot, aligning the edge with a clear machine guide. The fabric should lie completely smooth without wrinkles or folds within the sewing area. Wrinkled fabric bends the needle path, causing uneven stitches and crooked lines.
Keep the fabric taut but not stretched. Too much stretching pulls the fabric from side to side, while slack allows it to shift unexpectedly. A light, even tension across the fabric works best for a steady sewing line.
Match your sewing line with a marked guide on your machine throat plate or presser foot edge. These marks are usually in fractions of an inch or millimeters, helping you maintain a consistent distance from the fabric edge.
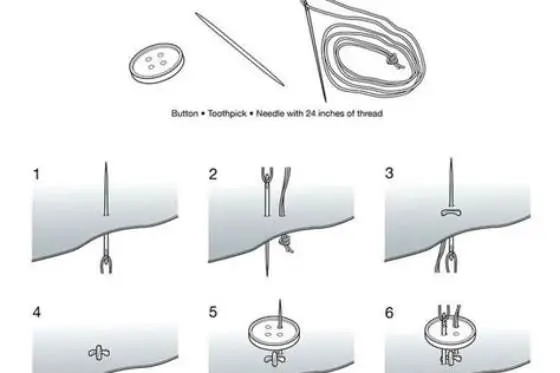
If you sew multiple layers, position the top layer carefully to avoid shifting beneath. Smooth each layer separately before lowering the presser foot. This prevents uneven feed and crooked stitches. There is more on sewing a button by hand in a separate guide.
Check your sewing machine’s throat plate for damage or wear. A scratched or uneven plate can catch fabric edges, pulling them off line. Replace or repair it to keep fabric moving straight.
Some fabrics like knits or slippery synthetics behave differently. Test sew a scrap piece first to see how the fabric feeds. Adjust your presser foot pressure and feed dog settings accordingly. This trial run guides you before working on your main project.
How to guide fabric evenly through a sewing machine
Hold fabric with both hands on each side of the needle, about 3 to 4 inches (7-10 cm) apart. This balance helps feed the fabric evenly without pulling or pushing it off course. Resist the urge to pull the fabric toward you; let the feed dogs pull it gently.
Feed dogs are the metal teeth under the presser foot that move fabric forward. If you push or pull fabric unevenly, the feed dogs lose their grip, and stitches wander off the line. Your role is to guide, not force, the fabric direction.
Sew at a moderate speed, typically 10 to 20 stitches per second, to gain control. Faster speeds can lead to jerky fabric movement and crooked lines. Slower stitching also enables more accurate hand placement and fabric guidance.
Keep your hands relaxed but steady. Nervous or jerky movements cause the fabric to shift unexpectedly. Practice guiding scraps at a steady rhythm to build confidence and control.
If your machine has a speed control slider, use it to limit maximum speed. Beginners benefit from slower, consistent stitching rather than bursts of fast sewing that cause crooked lines.
Turn off the machine’s automatic needle up/down feature if it disrupts your stop-and-go sewing rhythm. Manually controlling the needle position helps you stop precisely with the needle down for fabric adjustments.
How to mark and use guides for straight stitching
Mark your sewing line clearly on the fabric using washable fabric markers, tailor’s chalk, or erasable pens. Draw the line parallel to your fabric edge where you want to sew. This visible guide boosts confidence and accuracy.
For quilting or dress sewing, measure from a fixed point like the fabric edge or seam allowance and draw the line with a ruler or quilting square for precision. Marking becomes essential when working with slippery or patterned fabrics where edges are harder to judge.
Alternatively, use removable adhesive seam guides attached to your machine’s throat plate. These guides provide a physical barrier for the fabric edge to follow, preventing drifting without constant measuring.
Mark lines perpendicular to the fabric edge when sewing corners or curves. This helps keep your stitching consistent even through directional changes.
Consider using a fabric stabilizer spray or interfacing on slippery fabrics before marking. It adds grip and reduces shifting, making your marked lines easier to follow accurately.
Lightly test your marker on a hidden fabric area to confirm it washes out or fades completely. Permanent marks ruin fabric but temporary ones guide your sewing safely.
Many beginners struggle to sew straight lines because they pull fabric and ignore machine guides; this guide fixes that with simple, practical steps.
Common mistakes that cause crooked lines
Pulling fabric during stitching is the most frequent cause of crooked seams. It disrupts the feed dogs' steady movement and shifts fabric under the needle. Always ease fabric forward with your hands, not by pulling.
Incorrect presser foot pressure can also cause fabric to bunch or slip. Too much pressure flattens the fabric excessively and restricts movement; too little and fabric slides unevenly. Adjust your machine’s presser foot tension based on fabric thickness.
Using a dull or bent needle leads to skipped stitches that look like crooked lines. Replace your needle regularly, especially when starting a new project or changing fabric types.
Sewing without proper machine maintenance causes uneven feeding. Clean lint and dust from feed dogs and bobbin area routinely to keep stitch quality high.
Tips for straight lines in quilting and dress sewing
Quilters rely on quarter-inch seams, so a precise guide like a quarter-inch foot or seam gauge is vital. Use these tools to keep your sewing exactly on the seam line.
For dress sewing, press seams flat between steps to avoid fabric shifting. Pin seams perpendicular to the sewing line and remove pins before stitching to prevent needle damage.
Use a slow, steady pace and check alignment often when sewing curves or changing fabric direction. Stop with the needle down for adjustments. This practice keeps seams accurate without creating distortion.
- Quilting seams: use quarter-inch foot
- Dressmaking: pin perpendicular to seam line
- Press seams flat after sewing each seam
- Sew slowly and stop needle down to adjust
How to sew a straight line: step-by-step guide
Cut thread tails to about 3 inches (7 cm) after finishing the seam. Long tails can tangle or catch, pulling the seam out of alignment as you work on the next steps.
Use a seam ripper carefully if you notice a crooked section immediately after sewing. Undo only the crooked stitches and resew slowly along the marked line. This keeps your project neat without wasting fabric.
Practice sewing straight lines on scrap fabric regularly. Repetition trains your hands and eyes to coordinate better, improving your accuracy with each attempt.
- Prepare fabric by trimming edges neatly and pressing flat.
- Align fabric edge with a clear seam guide or mark a stitching line.
- Lower the presser foot to hold fabric firmly.
- Hold fabric sides 3-4 inches apart, guiding gently without pulling.
- Start sewing at slow speed, keeping fabric aligned with guide or marked line.
- If needed, stop with needle down to adjust fabric and check alignment.
- Complete the seam and remove fabric from machine carefully to avoid distortion.
Still wondering?
Why does my sewing line go crooked even though I try to keep fabric straight?
Crooked lines often result from pulling fabric too hard or uneven presser foot pressure. Let the feed dogs pull fabric gently and keep your hands guiding softly at the sides.
Can I sew a straight line without marking the fabric?
Yes, but only if your machine has clear seam guides and you keep fabric edges aligned perfectly. Marking adds extra accuracy, especially on slippery or patterned fabrics.
What needle size should I use for straight stitching on medium-weight cotton?
A needle sized 80/12 EU/US works well for medium-weight cotton, ensuring clean stitches without skipped or crooked lines.
How often should I change my sewing machine needle?
Change needles after every 6-8 hours of sewing or when stitching problems like skipped stitches appear, to maintain straight, even seams.
What can cause fabric to shift under the presser foot?
Fabric shifts when presser foot pressure is too loose, feed dogs are clogged with lint, or if the fabric is not properly aligned and taut.
Are there any special feet to help sew straight lines?
Yes, using a quarter-inch foot or a foot with a clear guide edge helps maintain consistent seam allowances and straight lines.