Quilting Clips Instead of Pins: When They Work Better
Quilting clips replace pins for binding, thick layers and fabrics that show pin holes, such as vinyl and leather. Pins still win for curves, fine matching and narrow seams. Most quilters end up using both, with clips doing most of the binding work.
On this page (8 sections)
Part of the guide: Best Fabric Scissors for Sewing: Three Pairs That Cut Clean
Key figures
- Best for
- Quilt binding and thick layers
- Clip size
- Roughly 35 mm long
- Pack size
- 50 clips per pack
- Never sew over
- Remove before the foot
- Pins still win
- Curves and fine matching
- No holes in
- Vinyl, leather and knits
The short version
- Use clips for binding, thick layers and fabrics that show pin holes.
- Use pins for curves, fine matching and narrow seams.
- Clip binding every few inches and remove each clip before the presser foot.
- Work out the clip count from the quilt's edge length and your spacing.
Quilting clips for sewing instead of pins: the short answer
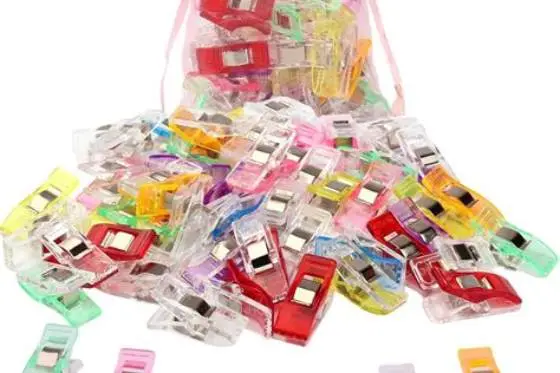
Quilting clips can replace pins for much of a quilter's work, and they beat pins outright in three places. They hold thick layers without bending, they leave no holes in vinyl or leather, and they clip on faster than a pin goes in. For binding a quilt, they are the better tool. Many quilters start with a pack of clips. Packs commonly hold from 10 to 100 clips, and how many you need depends on quilt size and clip spacing.
Pins still win in other places. A pin pivots around a curve, holds one thread of alignment, and fits inside a narrow seam where a clip cannot reach. Fine garment work and appliqué still belong to pins. The honest answer is not clips or pins. It is both, in the same sewing room, each used where it wins.
This page explains how a clip works, where it beats a pin, where it loses, and how to clip a binding step by step. It ends with how to choose a pack and keep the clips working. If you quilt, the short version is simple: use each tool where it wins.
How a quilting clip holds fabric
A quilting clip is a small plastic clamp with a flat base and a hinged jaw. You squeeze the top, the jaw opens, you slide it over the fabric edge, and you let go. The spring holds the layers together from the outside, without piercing anything. The flat base sits on the table and keeps the layers from shifting while you sew. There is more on sewing tools essential for beginners in a separate guide.
The standard clip is the Clover Wonder Clip. Some standard Wonder Clips are roughly 35 mm long; check the maker's listing for exact dimensions. It opens wide enough to grip a quilt sandwich: top, batting and backing, plus a folded binding. Smaller mini clips suit tight corners and small pieces, and larger jumbo clips suit thick bag seams and bulky folds. The size is printed on the pack, and the clip's colour is bright so you can spot it on the floor.
A clip grips a span of fabric, not a single point. That is its strength and its limit. It holds a straight edge firmly across a few inches, which is why it suits binding. It cannot hold the middle of a piece, and it cannot follow a curve the way a pin can. Think of it as a hand that pinches the edge, not a needle that threads through the middle. For the middle of a quilt, where a clip cannot reach, quilters use basting spray or curved safety pins instead.

Clover Wonder Clips Pkg of 50
Secures your quilt sandwich without pins by supplying 50 non-piercing clips to hold layers in place.
Where quilting clips beat pins
Thick layers are the clip's best case. A pin must pierce every layer, and a thick quilt sandwich bends pins and distorts the layers as it goes. A clip bites from the outside and holds the sandwich flat, with no hole and no bend. Bag makers and quilters both reach for clips when the layers get thick, and binding is the clearest example.
Fabrics that show holes are the second case. A pin hole in vinyl, oilcloth, laminated cotton or leather stays open forever, and a row of them across a seam looks like a fault. A clip holds those fabrics without piercing them, so the surface stays clean. Knits are a quieter case. A pin can snap a knit yarn and start a run, while a clip squeezes the layers without breaking a thread.
Speed and safety are the third case. Clipping is a squeeze, a place and a release, and it is faster than pinning a long edge one pin at a time. There is no sharp end to find with a bare foot on the sewing room floor, and no pin to lose inside a quilt. For children's sewing sessions and beginner classes, clips take the most annoying failure out of the room.
A pin leaves a hole. A clip leaves nothing, and it holds a quilt sandwich a pin could never pierce.
Where pins still win
Curves are the pin's best case. A pin pivots and follows a neckline, a sleeve cap or an appliqué curve, holding the fabric exactly where the curve bends. A clip holds a straight span, so a cluster of clips around a curve flattens the shape you are trying to keep. For any seam that turns, reach for pins first.
Fine matching is the second case. A pin can hold a single thread of alignment, which is what matching a plaid, a stripe or a notch needs. A clip grips a chunk of fabric, so it cannot hold that fine a point. Zips are the same. A pin holds the zip teeth exactly on the seam line before topstitching, and a clip cannot get close enough to the teeth.
Narrow spaces are the third case. A clip needs outside clearance, so it cannot hold a collar stand, a narrow tube hem or a seam you turn right side out afterwards. A pin slides in and out of those places without fuss. The rule is simple: if the clip cannot sit flat on the edge with room to spare, use a pin.
Clipping a quilt binding, step by step
Binding is where most quilters first use clips, and it shows the method at its best. The binding is a folded strip of fabric that wraps the raw edge of the quilt. It must stay folded while you stitch it down. Pins fight the fold and leave holes in the binding. Clips hold the fold flat and come off in a second.
The site's Quilt Calculator works out how much binding a quilt needs, so you can cut the right length before you start clipping. Spacing commonly runs about 2 to 4 inches (5 to 10 cm). Work out how many clips you need by dividing the quilt's edge length by your chosen spacing. Keep spare clips in a small dish beside the machine, so you never stop mid-seam to hunt for one.
Avoid sewing over a clip. Hitting plastic risks damaging the clip and possibly the needle, so remove each clip before it reaches the needle to be safe. The habit to build is simple: one hand feeds the fabric, the other hand takes the clip off just before the foot. A walking foot helps feed the thick sandwich evenly, and clips sit on the edge, clear of the foot. A clip that reaches the needle is a clip that should have come off a stitch earlier.
- Fold the binding over the quilt edge and finger-press the fold flat.
- Clip the binding about every 2 to 4 inches (5 to 10 cm), keeping the clips off the stitching line.
- Sew along the binding, removing each clip just before it reaches the presser foot.
- At a corner, mitre the fold, clip the mitre in place, and stitch through it.
- When the binding meets its start, overlap the ends, clip the join, and stitch it closed.
Choosing and caring for your clips
Start with standard clips, in a pack that covers your quilt's edge length at your chosen spacing. Add a pack of mini clips if you sew doll clothes, small bags or miniature patchwork. A standard clip is too big for those pieces. A jumbo clip suits thick bag seams and bulky folds that a standard clip cannot close around.
Cheap look-alike clips are common, and the difference shows in the spring. A weak spring slips off thick layers, and a rough jaw leaves pressure marks on delicate cloth. The Clover clip is the standard other clips are judged against, and it is the one most quilt shops stock. If a clip feels loose in your hand, it will feel looser on a quilt sandwich.
Clips need little care, but a few habits keep them working. Store them in a box or a jar, not loose in a drawer where the jaws stay pressed open. Wipe off lint and thread dust now and then, since a dirty jaw grips less well. Test a clip on a scrap first when the fabric is delicate, since a strong clip can leave a temporary pressure mark on some cloths.

Clover Mini Wonder Clips (Assorted/50 pcs.)
Keeps tight corners and small pieces together without pins using 50 small wonder clips included in the pack.
Still wondering?
How many quilting clips do I need?
Work it out from the quilt's edge length divided by your spacing, with clips about 2 to 4 inches (5 to 10 cm) apart. Start with standard clips and add mini clips later if you sew small pieces.
Can I sew over quilting clips?
No. The needle hits the plastic, the clip cracks, and the needle can snap. Remove each clip just before it reaches the presser foot. Build the habit of taking the clip off with one hand while the other feeds the fabric.
Do quilting clips leave marks on fabric?
They can leave a temporary pressure mark on delicate cloth, especially if the clip is strong and the fabric is soft. Test on a scrap first. The mark usually fades, but a pin hole in vinyl or leather never does.
Are clips better than pins for machine quilting?
For holding the quilt sandwich at the edges and for binding, yes. For the middle of the quilt, pins or basting spray work better, since a clip only holds an edge. Many quilters use clips on the edges and pins or spray in the middle.
What size quilting clips should I buy?
Standard clips suit most quilting and binding. Mini clips suit small pieces and tight corners. Jumbo clips suit thick bag seams and bulky folds.