Which embroidery transfer method works on your fabric color and type
Choose a transfer method that fits your fabric color and type. Water-soluble pens and tracing paper generally suit light fabrics. Tailor’s chalk or heat transfer methods work better on dark fabrics. Follow product instructions and test on fabric scraps before using.
On this page (10 sections)
- The short version
- Tools and materials needed
- How to transfer embroidery pattern to light fabric
- How to transfer embroidery pattern to dark fabric
- Removing transfer marks safely
- Choosing marking pens and transfer methods
- Handling thick, textured, or stretchy fabrics
- Aligning and positioning your pattern
- Working with printer-based transfer methods
- Still wondering?
Part of our guide on finding the right size hoop
Key figures
- Water-soluble pen removal
- requires rinsing after stitching according to label instructions
- Chalk temporary mark
- removes by brushing or washing; timing varies by product
- Heat transfer temperature
- follow product label and test on fabric scrap
- Fabric types tested
- cotton, linen, polyester
- Tracing paper typical weight
- 40-60 gsm
The short version
- Light fabrics work best with water-soluble pens or tracing paper.
- Dark fabrics need heat transfer pens or tailor’s chalk for visibility.
- Iron-on transfer paper suits many natural fibers but may harm synthetics.
- Test your chosen method on fabric scraps before starting your project.
- Keep your pattern aligned to avoid distortion during stitching.
Tools and materials needed
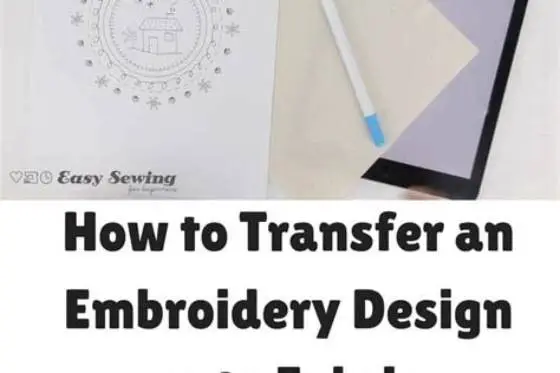
Choose tools suited for your fabric color and type. Use water-soluble fabric pens or fine tracing paper for light fabrics. For dark fabrics, tailor’s chalk or heat transfer pens work better due to visibility.
A lightbox or bright window helps keep pattern and fabric steady when tracing. Iron-on transfer paper requires a dry iron and careful temperature control according to the product label.
Always test your chosen transfer method on fabric scraps per product instructions to ensure marks are visible and removable.
- Water-soluble pen: marks rinse out after stitching per product label
- Tailor’s chalk: temporary marks that brush off or fade depending on fabric and chalk type
- Heat transfer pen: transfers pattern with heat; follow product label for temperature and timing
- Tracing paper: thin, translucent paper used for direct tracing onto fabric
- Iron-on transfer paper: works best on cotton and linen; may scorch or not stick to synthetics
How to transfer embroidery pattern to light fabric
Light fabrics like cotton and linen work well with water-soluble pens or carbon transfer paper. These create clear lines that rinse out after stitching. We cover how to hoop fabric for machine embroidery in its own article.
Place your pattern on a hard surface and put the fabric over it. Use a lightbox or tape both layers to a window to keep them stable. Trace your design with a fine-tip water-soluble pen or pencil.
If using carbon or tracing paper, place it between the pattern and fabric with the carbon side facing fabric. Trace firmly along design lines with a stylus or ballpoint pen. Avoid shifting fabric or pattern to prevent blurring.
- Secure the pattern flat on a surface and place fabric over it.
- Tape or pin layers to prevent movement.
- Trace design carefully with water-soluble pen or pencil.
- If using carbon paper, place carbon side down between pattern and fabric.
- Trace over design firmly with a stylus or pen.

OZXTYO Washable Fabric Markers for Sewing,5 Pack,Blue,Erasable
Lets you trace your embroidery pattern onto light fabric with sharp blue fine-point lines that rinse away cleanly after stitching.
How to transfer embroidery pattern to dark fabric
Dark fabrics require marking tools that show up clearly and remove easily after stitching. Tailor’s chalk, heat transfer pens, or white water-soluble pens are common options. There is more on hoop sizes for different garments in a separate guide.
Tailor’s chalk provides temporary visible lines that brush off or fade depending on chalk type and fabric. Heat transfer pens need tracing your pattern on special transfer paper, then ironing it onto fabric following the product label for temperature and time.
Heat transfer inks reverse your design during transfer, so mirror your pattern before tracing. Use the lowest heat effective for your fabric to avoid damage. Test on a hidden corner first. White water-soluble pens can work on very dark fabrics but rinse carefully after stitching.
- Trace your design onto heat transfer paper with a heat transfer pen, mirroring the image.
- Place the ink-side down on the fabric.
- Iron using temperature and timing recommended by the product label, applying light, steady pressure.
- Lift paper gently to reveal pattern.
- Alternatively, draw directly on fabric with tailor’s chalk for temporary marks.
Select embroidery transfer methods matched to fabric color and type for sharp, visible patterns and flawless stitching every project.
Removing transfer marks safely
Remove marks according to the transfer method used. Water-soluble pen marks need rinsing in cool or lukewarm water after stitching. Dab gently to avoid smearing.
Tailor’s chalk brushes off easily but may leave faint residue. Light brushing or washing after stitching can help remove leftovers.
Heat transfer marks wash out with laundering per product label. Avoid applying heat like ironing before removal to prevent setting ink permanently. If marks fail to remove, try a gentle soak or consult product instructions.
Choosing marking pens and transfer methods
Marking pens come as air-erasable, water-soluble, and heat-erasable types. Air-erasable pens fade on their own over hours or days, useful for short projects but risky if you need marks to last.
Water-soluble pens stay visible until rinsed away and suit longer projects or detailed designs. Heat-erasable pens need ironing to remove marks but may not suit heat-sensitive fabrics.
Choose a pen or transfer method based on fabric color, fiber content, weight, project length, and removal preference. Always test on a fabric scrap per product label to confirm visibility and removability.
Handling thick, textured, or stretchy fabrics
Transferring patterns onto thick, textured, or stretchy fabrics can be tricky. The pattern may be hard to see or fabric may shift during tracing.
Use a stabilizer to add firmness. Tear-away or cut-away stabilizers suit heavier fabrics. Water-soluble stabilizers work well for delicate or sheer fabrics. Sticky stabilizers help hold fabric and pattern in place during tracing.
For stretchy fabrics, keep the fabric relaxed and flat to avoid distortion during transfer and stitching. Basting layers lightly also helps. Test your method on scrap fabric to find the best approach.
Aligning and positioning your pattern
Align your pattern carefully on fabric grain to avoid distortion. Center the design using fabric folds or guidelines.
On stretchy knits, keep fabric relaxed and avoid stretching while tracing and stitching to prevent distortion.
Use pins, tape, or basting stitches to secure fabric and pattern in place during transfer. This keeps your design accurate and stable.
Working with printer-based transfer methods
Inkjet or sublimation transfer papers let you print your pattern for precise scaling and positioning.
Scale your design in printing software before printing on transfer paper. Measure your fabric and adjust pattern size to fit your project.
Follow transfer paper instructions for ironing or heat press temperature and timing. Test on fabric scraps to avoid damage.
These methods generally suit natural fibers and some synthetics but check paper and fabric compatibility carefully.
Still wondering?
Can I use a regular pencil to transfer embroidery patterns?
Regular pencils can leave stains and are hard to remove. Use water-soluble fabric pens or tailor’s chalk designed to wash or brush off after stitching.
How do I prevent pattern marks from bleeding through to the right side of the fabric?
Test your pen on scrap fabric to check for bleeding. Use light pressure during tracing and avoid soaking fabric. Stabilizing fabric surface helps keep ink on top.
What if my fabric is synthetic and heat transfer damages it?
Avoid heat transfer on heat-sensitive synthetics. Use water-soluble pens or tailor’s chalk instead. Always test your method on fabric scraps before the main project.
How long do transfer marks last on fabric?
Longevity depends on product. Air-erasable pens fade over hours or days, water-soluble pens last until rinsed, and heat transfer marks remain until washed or stitched off. Check labels and test to be sure.
Can I reuse transfer paper for multiple fabrics?
Transfer paper usually works once because ink or coating depletes after ironing. Trace your pattern onto fresh transfer paper for each fabric.
Is a lightbox necessary for pattern transfer?
A lightbox is helpful but not essential. A bright window works if fabric and paper are thin. For thicker fabrics, a lightbox improves visibility and accuracy.