How to hoop fabric for machine embroidery without puckering or shifting
Hoop your fabric by placing it flat and taut over stabilizer, then secure it with the inner and outer hoops tightened evenly until the fabric feels firm, but not stretched. Adjust tension based on fabric type and hoop style to prevent puckering or shifting.
On this page (9 sections)
- The short version
- How to place fabric in the embroidery hoop
- How tension varies by hoop type and fabric
- Choosing stabilizer for fabric and design
- How to check fabric is taut and stable
- Tips for multi-hooping or large hoops
- Common hooping mistakes and how to fix them
- How to hoop fabric for machine embroidery
- Still wondering?
Part of our guide on best embroidery machine
Key figures
- Hoop tension
- firm, not stretched
- Fabric check
- drum-like tautness
- Common error
- loose hooping
- Stabilizer use
- always recommended
- Multi-hooping
- align edges precisely
The short version
- Use a suitable stabilizer under the fabric to add stability.
- Tighten the hoop enough for firmness without overstretching fabric.
- Check fabric tautness by gently tapping; it should sound like a drum.
- Adjust hoop tension depending on fabric weight and stretch.
- Avoid common mistakes like loose hoops or uneven fabric placement.
How to place fabric in the embroidery hoop
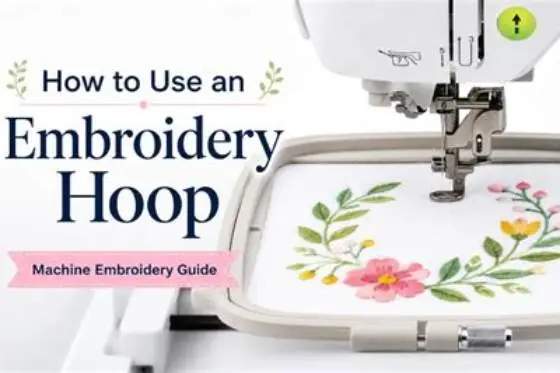
Start with a clean, flat piece of fabric and a matching stabilizer for your project. Lay the stabilizer on a flat surface first, then place your fabric on top, smoothing out wrinkles.
Separate the hoop’s inner and outer rings. Place the inner ring on your work surface, then position the stabilizer and fabric atop it so they lie flat and smooth.
Fit the outer hoop over the fabric and stabilizer, pressing down evenly to hold them in place.
Adjust the fabric gently so it lies flat and centered in the hoop area, paying close attention to any directional patterns you want to keep straight. We cover starter 4x4 embroidery machine in its own article.
Tighten the hoop screw gradually to secure the fabric firmly without stretching it beyond its natural shape.
- Separate inner and outer hoops.
- Place inner hoop on flat surface.
- Lay stabilizer, then fabric on inner hoop.
- Position outer hoop evenly on top.
- Center fabric and adjust for flatness.
- Gradually tighten outer hoop screw until fabric is firm but not stretched.
How tension varies by hoop type and fabric
Tension requirements vary depending on your hoop type and fabric. Screw-tension hoops (plastic or metal) allow gradual tightening, while magnetic hoops rely on different tension methods and may need less force.
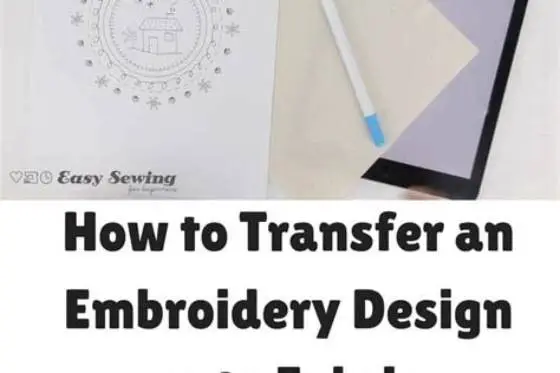
Pull fabric only enough to feel firm and flat over the stabilizer without distorting the weave or stretch. For the detail, see our notes on transfer embroidery patterns.
Keep fabric aligned with its grain to avoid bias stretch. Check fabric grainlines before hooping and pull taut along the grain, not diagonally.
For stretchy fabrics, allow slight give that springs back when you press gently. For stable woven fabrics, a firmer pull keeps the fabric flat.
If the fabric is too thick or thin for your hoop, consider floating the fabric over a stabilizer layer without clamping it tightly, or use adhesive stabilizers to prevent shifting and hoop burn.
Hoop burn can appear quickly on pile fabrics or delicate fibers if left hooped too long or clamped too tight. Remove hooped fabric promptly and use lighter tension or floating techniques to protect your fabric.

2Pcs Wood Embroidery Hoops
Keeps your fabric taut and pucker-free with a zinc-alloy screw that tightens quickly and 4-inch and 6-inch hoops to match your design size.
Choosing stabilizer for fabric and design
Select the stabilizer type based on fabric and stitch density. Tear-away stabilizers work well for stable fabrics and medium-density designs.
Cut-away stabilizers suit stretchy or delicate fabrics that need long-term support.
Wash-away stabilizers are ideal for delicate or sheer fabrics where stabilizer residues are unwanted.
Topping stabilizers protect pile fabrics or knits, preventing stitches from sinking or distorting the surface.
Use heavier stabilizers for dense stitch designs, and lighter ones for simple or open designs to avoid stiffness and puckering.
A simple step-by-step hooping method prevents puckering and shifting, giving your machine embroidery a professional, clean finish every time.
How to check fabric is taut and stable
A taut fabric sits flat in the hoop without bulges, wrinkles, or sagging. Gently tap the fabric surface with your finger. It should sound crisp, like a drum skin, indicating proper tension.
Run your finger lightly across the surface; if the fabric shifts or wrinkles, it’s not tight enough. Adjust and retighten the hoop if needed.
Check the back side of the hoop for any puckering or bulging. This often signals uneven hooping or fabric bunching.
If you notice small puckers after stitching begins, pause to reseat the fabric or add a stabilizer layer.
Fabric should look flat and smooth without dips or pull lines. Loose fabric may shift on dense designs. Look for even tension across the surface and feel the fabric around the inner hoop ring for smoothness without pronounced ridges.
- Tap test– crisp sound means good tension.
- Visual check– no wrinkles or bulges.
- Finger swipe– fabric should not shift.
- Back inspection– look for puckers behind fabric.
Tips for multi-hooping or large hoops
Large or multi-hooping projects require careful alignment to avoid design misplacement or puckering at hoop edges.
Mark fabric or stabilizer edges for alignment reference. Use a water-soluble pen or tailor’s chalk for accuracy.
Ensure each hooping maintains consistent fabric tension, especially important when rehooping the same piece multiple times.
If your machine requires repositioning, secure fabric and stabilizer properly so they don’t shift between hoopings.
Use large hoops suited to fabric weight; too large a hoop on lightweight fabric increases puckering risk.
Leave a small overlap between hoopings for alignment. Mark a consistent reference point on the stabilizer or fabric following your machine’s alignment guide. When repositioning, match this reference to the needle or hoop marks. If alignment is off, gently adjust fabric position before stitching the next section.
Common hooping mistakes and how to fix them
Loose hooping is the most frequent cause of puckering and thread breaks. If the fabric shifts during stitching, stop and tighten the hoop.
Uneven fabric placement causes puckers along the edges or irregular stitching. Rehoop with the fabric centered and smoothed.
Skipping stabilizer or using the wrong stabilizer leads to fabric distortion under the needle. Always use a suitable stabilizer matched to fabric and design density.
Overstretching fabric in the hoop causes permanent distortion. If the fabric feels stretched, loosen the hoop and rehoop gently.
If puckering or shifting persists after corrections, try adding a water-soluble topping stabilizer for delicate or loosely woven fabrics.
Watch for hoop burn, shiny ring marks caused by too much clamp force or leaving fabric hooped too long. Remove fabric from the hoop promptly to avoid damage. Use lighter tension or floating stabilizer methods for sensitive fabrics.
How to hoop fabric for machine embroidery
To hoop fabric correctly for machine embroidery, start with a matching stabilizer under the fabric to add support. Choose a hoop size suitable for your design and fabric weight.
Place the inner hoop on a flat surface. Lay the stabilizer on the inner hoop, then position your fabric over it, smoothing wrinkles and aligning grainlines.
Fit the outer hoop over the fabric and stabilizer, pressing down evenly. Hold the fabric taut along the grain but avoid stretching.
Tighten the hoop screw gradually while checking fabric tension. Tap the fabric to check for a firm, drum-like feel without puckering or distortion.
Double-check alignment and tautness before stitching. Adjust if the fabric shifts or wrinkles appear.
For large designs requiring multiple hoopings, follow your machine’s alignment method to reposition fabric consistently without losing tension.
Still wondering?
Can I hoop fabric without a stabilizer?
While some sturdy fabrics can be hooped without stabilizer, most machine embroidery needs stabilizers to prevent puckering and shifting. Without stabilizer, fabric often distorts under needle action.
How often should I check hoop tension during embroidery?
Check tension before stitching and if you notice puckering or thread breaks during embroidery. Rehooping mid-project is sometimes necessary for large designs.
What stabilizer type works best for stretchy fabrics?
Use a cut-away or water-soluble stabilizer for stretchy fabrics to provide support without restricting stretch, preventing puckering and distortion.
How do I prevent fabric shifting in multi-hooping?
Mark fabric and stabilizer edges clearly for realignment. Use gentle but firm hoop tension each time. Avoid fabric movement by securing hoop and handling carefully.
Is there a difference in hooping technique for thick vs thin fabrics?
Yes. Thick fabrics need less tension to avoid crushing fibers; thin fabrics require firmer tension to keep them flat under embroidery.