First time at an embroidery machine: what to thread, hoop and stitch
Start machine embroidery by preparing a 4x4 inch hoop, a 75/11 embroidery needle and medium tear-away stabilizer, threading with the presser foot up, hooping fabric drum-tight without stretch, then stitching a small built-in design at slow speed while you watch.
On this page (8 sections)
- The short version
- Gear check: what you actually need to start machine embroidery
- Thread path: how to set up and thread without nests
- Match-up: which stabilizer and needle for your first fabric and why
- Hooping: how to get fabric and stabilizer drum-tight and square
- First design: how to load and run a built-in stitchout and watch it
- Aftercare: how to store hoops so they stay round and do not warp
- Still wondering?
Part of our guide on finding the right size hoop
Key figures
- Starter hoop
- 4x4 inch (10x10 cm)
- First needle
- 75/11 embroidery
- Top thread
- 40 wt rayon/polyester
- Bobbin thread
- 60-90 wt bobbin
- First stabilizer
- Medium tear-away
- Hoop tension
- Drum-tight, no stretch
The short version
- Thread with presser foot up so discs grip the thread, then check bobbin direction before you stitch.
- Match stabilizer weight to fabric weight, not design size, and use a fresh embroidery needle.
- Hoop fabric and stabilizer together with even, drum-tight tension and no stretch.
- Run a built-in design first at reduced speed and stay close to pause for nests.
- Store hoops unclamped and flat so the outer ring stays round.
Gear check: what you actually need to start machine embroidery
A 4x4 inch hoop that came with your machine holds your first project steady without fighting extra fabric. That size keeps placement simple and lets you learn tension before you scale up. Pair it with a 75/11 embroidery needle with a larger eye, 40 wt rayon or polyester embroidery thread on top, and 60 wt bobbin thread below. Check your manual for the exact bobbin type, often Class 15 or L-style clear plastic, because the wrong bobbin height causes nests from the first stitch.
You also need stabilizer before you cut fabric. For medium-weight cotton, a medium tear-away around 1.5 oz per square yard gives support without bulk. Add small sharp snips for jump threads and a water-soluble pen for marking center lines. Skip adhesive sprays and specialty backings at first. You want to see how fabric, stabilizer and hoop interact, not add variables you cannot diagnose.
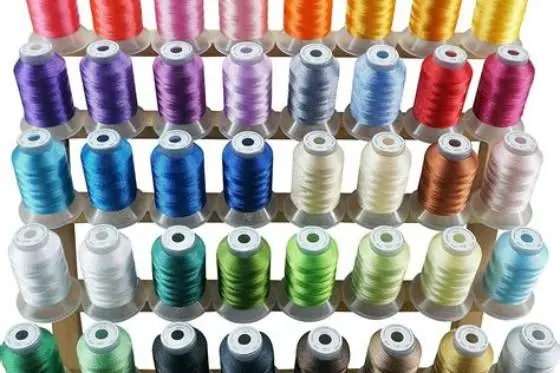
Thread choice matters more than brand name. Embroidery thread has a smooth twist that feeds through the tighter embroidery tension path, while all-purpose sewing thread can shred. Wind a fresh bobbin to about 80% full so it unwinds evenly, and keep a second bobbin ready. What fails here is a dull universal needle or a mismatched bobbin, both show as loops on top or broken top thread. That points to the next step, threading the path in the right order.
- Machine: combo or embroidery-only with included 4x4 inch hoop and embroidery foot
- Needle: 75/11 embroidery, fresh for each project
- Thread: 40 wt embroidery top thread, 60-90 wt bobbin thread, matching bobbin type
- Stabilizer: medium tear-away for woven cotton first run
- Tools: small snips, water-soluble marker, spare bobbin
Thread path: how to set up and thread without nests
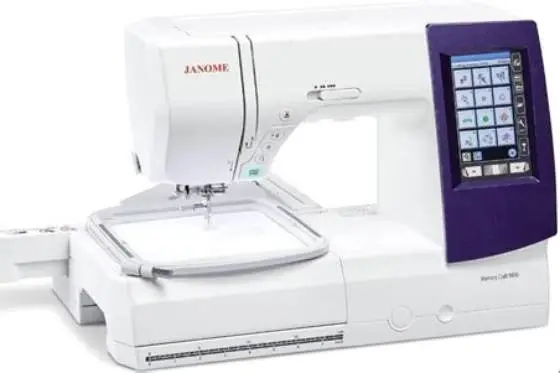
A nest of loops under the fabric usually means you threaded with the presser foot down, so the tension discs never closed on the thread. That leaves zero top tension and the machine pulls thread freely underneath. You will see big loops on the back and hear a soft thumping. The fix costs nothing, just re-thread with the foot up. For the detail, see our notes on Janome embroidery machine.
Wind your bobbin first, then thread the top. Bobbin thread should unwind smoothly and the bobbin should sit flat without wobble. Insert it so the thread follows the arrow in your manual, often counter-clockwise for drop-in bobbins. Pull the tail into the tension spring until you feel a light click. You should feel slight drag when you tug the tail, not free spinning.
Top threading needs the foot up and the needle at its highest position. Follow the numbered guides, seat the thread fully between the discs, through the take-up lever, and down to the needle eye from front to back. Use the needle threader if you have one, and leave a 4 inch (10 cm) tail behind the foot. What fails next is often stabilizer choice, so get that match right before you hoop.
- Raise presser foot and needle to highest position, turn machine on and select embroidery mode.
- Wind bobbin to 80% full at medium speed, trim tail flush, insert bobbin following manual arrow and pull thread into tension spring.
- With foot still up, thread top path in numbered order, seat thread between discs, through take-up lever, then through needle eye front to back.
- Hold top and bobbin tails lightly behind foot for first 5 stitches, then release and watch underside for loops.

New brothread Tear Away Embroidery Stabilizer 15" x 25 Yd Roll
Gives your first cotton project the right temporary support with 1.8 oz medium-weight tear-away on a 15-inch x 25-yard roll you can cut to any hoop.
Match-up: which stabilizer and needle for your first fabric and why
Start on plain medium-weight cotton, like quilting cotton around 4 to 5 oz per square yard, and you will learn faster. It lies flat, does not stretch, and shows stitch quality clearly. Pair it with medium tear-away stabilizer of similar weight and a 75/11 embroidery needle with a light ball or sharp point. That combo supports 8,000 to 12,000 stitches in a small built-in design without puckering, and tears away cleanly after. If that sounds like your situation, read up on matching settings to your budget next.
Stabilizer is the foundation, not an extra. Wovens need tear-away or cut-away to stop the fabric from being pushed into the needle plate. Knits and stretch fabrics need cut-away or no-show mesh so stitches do not pop when the fabric relaxes. Weight matters more than brand. Too light and the fabric puckers, too heavy and the needle drags and the design feels stiff. Check the stabilizer package for weight in ounces per square yard.
Needle size follows fabric weight and thread weight. Use 75/11 for quilting cotton with 40 wt thread, move to 80/12 for heavier twill or denim, and 90/14 only for canvas or multiple layers. Change the needle after about 6 to 8 hours of embroidery time, or at the first sign of shredding or skipped stitches. A fresh embroidery needle costs cents compared to picking out a failed design.
| Fabric | Stabilizer | Needle | Why it works |
|---|---|---|---|
| Medium cotton woven | Medium tear-away | 75/11 embroidery | Supports stitches, tears clean, no stretch |
| Light cotton or linen | Light tear-away + light starch | 75/11 embroidery | Prevents push-through without adding stiffness |
| Knit / stretch | Medium cut-away | 75/11 ballpoint embroidery | Stays stable after wash, no popped stitches |
| Twill / denim | Medium cut-away | 80/12 embroidery | Handles denser fabric and deeper penetration |
Most first embroidery fails are not the design but a hoop, needle or thread path set up a step too early.
Hooping: how to get fabric and stabilizer drum-tight and square
Good hooping feels like a drum skin, firm with a light tap but not stretched out of shape. You should see no ripples when you hold the hoop at eye level, and the weave should stay straight. If you pull fabric tight like a trampoline you will get wavy borders after you unhoop. Aim for even tension across the hoop, checked by a gentle press in the center that springs back slowly. We cover fixing breaks with the correct fiber in its own article.
Hoop fabric and stabilizer together for your first project. Cut stabilizer about 1 inch (2.5 cm) larger than the hoop on all sides so the rings grip it fully. Loosen the outer ring screw, place the inner ring under the fabric, then press the outer ring down evenly. Tighten just enough that you cannot slide the layers, but you can still tap the surface and hear a soft thud. That balance prevents hoop burn, those shiny ring marks that stay on cotton.
Alignment decides whether your design sits straight. Use the hoop's center marks and a light cross drawn with a water-soluble pen on the fabric. Match the fabric cross to the hoop cross before you tighten. What fails here is hooping off-grain or re-tightening after the hoop is closed, which distorts the fabric. Keep the screw snug once, then leave it. Next you will load a design and watch the first stitches.
- Mark center cross on fabric with water-soluble pen, cut stabilizer 1 inch larger than hoop all around.
- Loosen outer ring, place inner ring under fabric and stabilizer, press outer ring down evenly.
- Align fabric cross to hoop center marks, keep grain straight, tighten screw until layers do not slip.
- Tap center, it should feel drum-tight and spring back, with no stretch lines or bubbles.
First design: how to load and run a built-in stitchout and watch it
Your first stitchout should be a small built-in design under 1.5 inch square with under 5,000 stitches and few color changes. Small means fewer thread breaks and faster feedback. Built-ins are digitized for your machine's feed and tension, so they stitch cleaner than a random download. Select the design on screen, check that the hoop size matches what you hooped, and preview the placement.
Before you press start, do a trace or layout check. The machine will outline the design area without stitching, so you can see if the needle will hit the hoop. Hold the hoop lightly as it moves, but do not push it. Set speed to about 600 stitches per minute or the lowest embroidery speed, which gives you time to spot loops or bird-nesting. Press start and watch the first 200 stitches closely, that is when most errors show.
Stay near the machine and listen. A steady hum means even feeding, a loud clicking or thumping means the needle is dull or hitting thick stabilizer. If you see loops on top, re-thread the top with the foot up. If you see loops below, check bobbin tension and that the bobbin tail is in its spring. Pause, trim jump threads, and resume. A clean first design peels off the stabilizer without puckers and has no white bobbin showing on top.
- Select small built-in design, confirm hoop size on screen matches real hoop, center design.
- Run trace or layout check to confirm needle clears hoop edges.
- Set speed low, press start, watch first 200 stitches for loops or shredding.
- Pause between color stops, trim jumps with snips, resume until design finishes.
Aftercare: how to store hoops so they stay round and do not warp
A hoop that warps by even 1/16 inch (1.5 mm) will not hold even tension next time, and you will chase puckers that are not your fault. Heat and pressure warp hoops fastest, especially the outer ring with its screw. Store them flat, unclamped, and away from windows or heaters. That keeps the plastic or wood from creeping out of round over weeks.
Unclamp after every project. Loosen the screw two full turns and separate the inner and outer rings, then lay them flat on a shelf or hang the outer ring by its screw housing, not by the thin sidewall. Do not stack heavy boxes on hoops, and do not leave fabric clamped overnight to save time. The fabric memory and hoop memory both work against you, and you will see hoop burn or stretched centers on the next hooping.
Check roundness before you hoop. Place the outer ring on a flat table and look for rocking, then fit the inner ring and check for even gaps. If you see a gap wider on one side, the hoop has ovaled. Warm, flat storage and gentle handling prevent it, and a quick check takes ten seconds. With a true hoop, your next design starts with even tension, which is half the battle for clean embroidery.
- Loosen screw and separate rings after each use
- Store flat or hang by screw housing, away from heat and sun
- Never stack weight on hoops or store with fabric clamped
- Check for rocking or uneven gaps before next hooping
Still wondering?
Can I use regular sewing thread for machine embroidery?
You can in a pinch, but embroidery thread in 40 wt feeds smoother and keeps color true. All-purpose thread can shred at embroidery speeds and leaves more lint in the tension path. Use bobbin thread in 60-90 wt for a balanced stitch.
Do I need to wash fabric before embroidering?
Yes for cotton that may shrink. Wash and press on the grain, then hoop without stretch. Prewashing removes shrinkage that would pucker stitches later. If the fabric is prewashed or a stable poly-cotton, you can skip it for a practice piece.
Why does bobbin thread show on top?
Top tension is too tight or the bobbin is not seated in its spring. Re-thread the top with the presser foot up, reseat the bobbin so you feel drag on the tail, and test on a scrap. If it persists, replace the needle.
Can I reuse stabilizer scraps?
Not for hooping. Scraps work for small test stitches taped behind the hoop, but hooping needs one continuous piece larger than the hoop. Pieced stabilizer creates uneven support and puckers.
How tight should the hoop screw be?
Tight enough that fabric and stabilizer do not slip when you tug a corner, but not so tight you see stretch lines. Loosen to separate rings for storage, then re-snug at hooping time.